
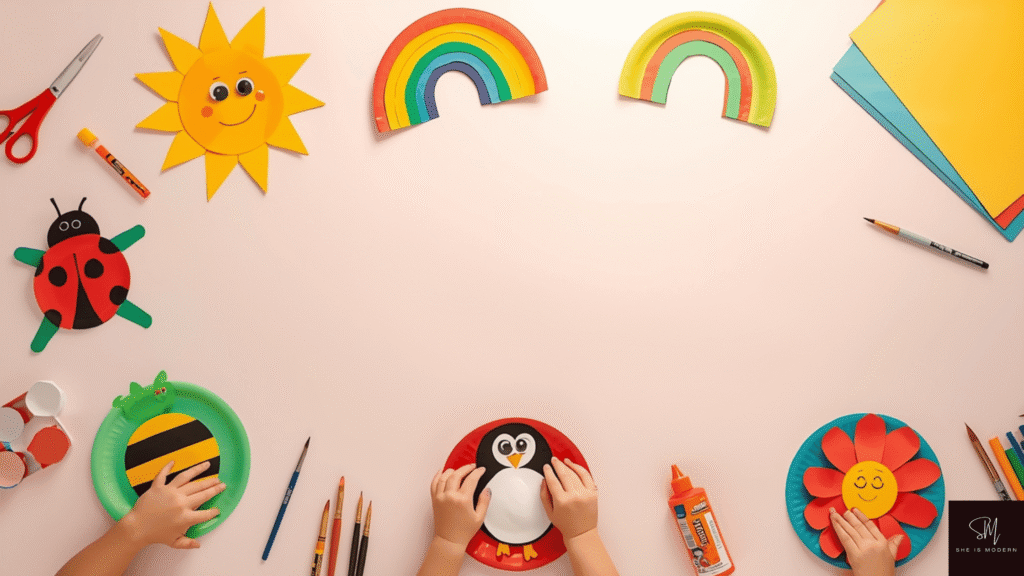
Looking for easy, fun, and budget friendly activities for kids? These paper plate crafts are the perfect solution. With just a few simple supplies, you can turn ordinary paper plates into cute animals, colorful decorations, and playful learning tools. These ideas are designed to keep kids engaged while also helping them build creativity, focus, and fine motor skills in a fun way.
The best part is that these crafts are simple enough for all ages. Whether you’re a parent, teacher, or caregiver, you don’t need special tools or experience to get started. Each project is easy to follow and allows kids to explore colors, shapes, and imagination at their own pace. Plus, most materials are things you already have at home.
From bright rainbows to adorable penguins, this list is full of creative ideas kids will love. If you’re looking for more seasonal inspiration, don’t miss these fun spring crafts for kids. These crafts are perfect for rainy days, classroom activities, or weekend fun. Get ready to turn simple paper plates into something magical and make crafting time more exciting than ever.
1. Paper Plate Sun

A paper plate sun is bright and cheerful. Kids can paint the plate yellow or orange. Let it dry fully before moving to the next step. Then cut out triangle shapes from colored paper to make sun rays. Glue them around the plate edges. This craft helps kids learn colors and shapes in a fun way.
You can add a smiling face to make it more playful. Use markers, googly eyes, or stickers. Kids love giving personality to their creations. It also encourages imagination and storytelling while crafting. They might even name their sun or create a whole sky scene.
Hang the sun on a wall or window. It looks beautiful in a classroom or bedroom. You can also make multiple suns and create a sunny collage. This craft is simple but very rewarding and perfect for beginners.
2. Paper Plate Ladybug
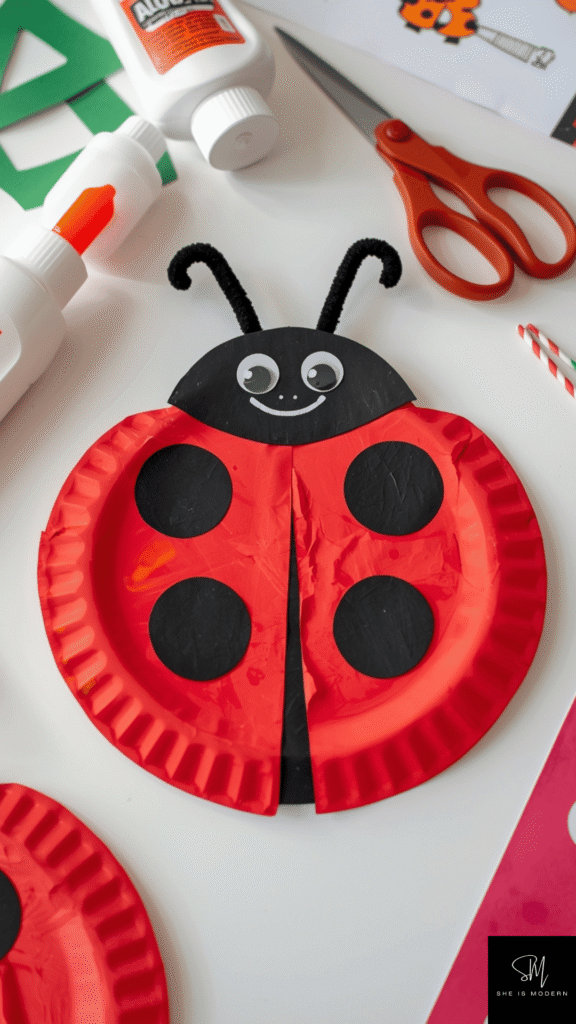
This adorable ladybug craft is a favorite. Paint the plate red and let it dry. Then add black spots using paint or cut paper circles. Fold the plate slightly to create wings. This gives a 3D effect that kids enjoy.
For the head, use black paper or paint one section. Add googly eyes and pipe cleaners for antennae. Kids can experiment with different spot patterns. This helps improve creativity and fine motor skills. It’s also a great way to introduce insects.
Display the ladybugs on walls or attach magnets to place on the fridge. Kids feel proud seeing their work. You can also turn this into a learning activity about bugs and nature.
3. Paper Plate Fish

This fish craft is colorful and fun. Start by painting the plate in any color. Once dry, cut out a triangle from the plate to form the mouth. Use that piece as the tail and glue it to the back.
Decorate the fish with scales using markers, stickers, or glitter. Add a big eye for a cartoon look. Kids can mix colors and patterns. It helps them explore design and creativity in a simple way.
You can hang the fish using string to create an ocean theme. Make multiple fish and create a mini underwater world. This craft is great for themed lessons or summer fun.
4. Paper Plate Mask
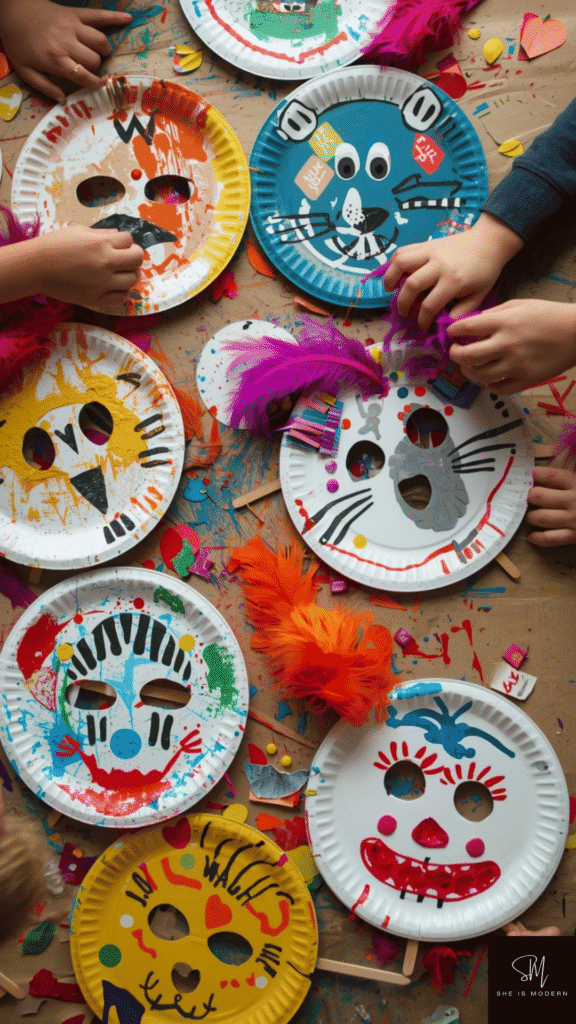
Paper plate masks are perfect for pretend play. Cut out holes for eyes and decorate the plate. Kids can create animals, superheroes, or funny faces. Paint, crayons, and feathers all work great.
Attach a stick or string to wear the mask. Kids love acting with their creations. It builds confidence and storytelling skills. They can even perform little shows for families.
This craft is great for group activities. Each child can make a different mask. It encourages individuality and creativity while having fun together.
5. Paper Plate Rainbow

This rainbow craft is bright, happy, and very easy to make. Start by cutting a paper plate in half to create a curved rainbow shape. Kids can paint each section in classic rainbow colors like red, orange, yellow, green, blue, and purple. You can also use colored paper strips if you want a no paint option. Let kids take their time blending or layering colors. This helps them understand color order while also improving their painting control and creativity.
To make the rainbow more fun, glue soft cotton balls at both ends to create fluffy clouds. Kids really enjoy touching and placing the cotton, which adds a sensory experience to the craft. You can also add glitter or stickers for extra shine. Some kids may want to draw raindrops or a sun nearby, turning the rainbow into a full weather scene. This adds more storytelling and creative thinking to the activity.
Once finished, you can hang the rainbow on a wall, window, or classroom board. It instantly brightens up any space and gives a cheerful vibe. You can also connect multiple rainbows together to make a large decoration piece. This craft is perfect for younger kids because it’s simple, colorful, and very rewarding to complete.
6. Paper Plate Turtle
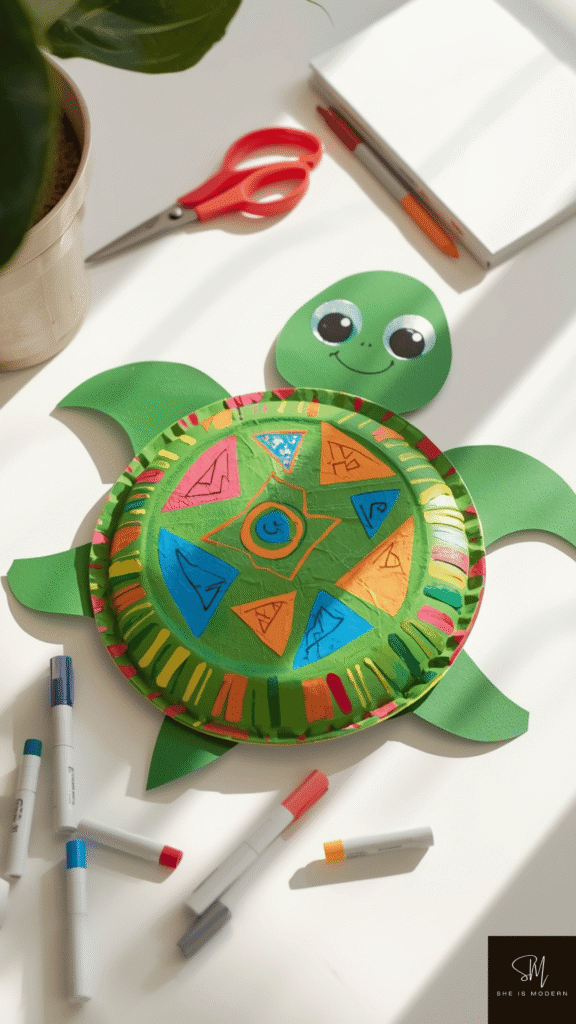
This turtle craft is cute, calming, and great for creative expression. Begin by painting the paper plate in green or any color your child likes. After it dries, kids can decorate the shell with patterns like lines, dots, or shapes using markers, crayons, or small paper pieces. This part allows kids to explore designs and create their own unique turtle shell. It’s also helpful for improving hand control and attention to detail.
Next, cut out the turtle’s head, legs, and tail from colored paper. Glue them around the plate to form the full body. Add googly eyes or draw eyes with a marker to bring the turtle to life. Kids can even give their turtle a name and personality. This makes the craft more engaging and turns it into a storytelling activity as well.
You can use this turtle for display or learning purposes. It works well in lessons about animals, oceans, or nature. Kids can also create a group of turtles and build a small “turtle family.” This makes the activity more interactive and fun, especially in group settings like classrooms or playdates.
7. Paper Plate Clock
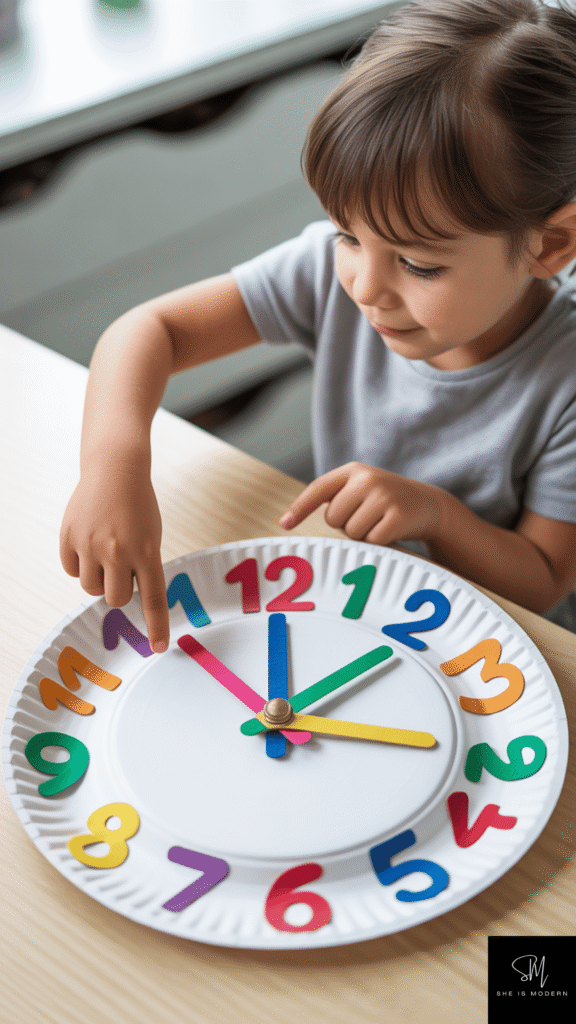
This paper plate clock is both fun and educational. Start by writing numbers from 1 to 12 around the plate like a real clock. Kids can use markers, stickers, or even foam numbers to make it more colorful. This helps them recognize numbers and understand placement. You can guide younger kids while older ones can try doing it independently for more learning practice.
Next, create clock hands using paper strips. Attach them in the center using a paper fastener so they can move easily. This is the best part because kids can rotate the hands and explore how time works. You can ask simple questions like “show me 3 o’clock” to turn it into a fun learning game. It builds early math and time telling skills in a very interactive way.
Once completed, kids can hang the clock in their room or use it daily for practice. It becomes both a decoration and a learning tool. This craft is perfect for school activities because it mixes creativity with real life skills. It also keeps kids engaged longer because they can play with it after making it.
8. Paper Plate Flower
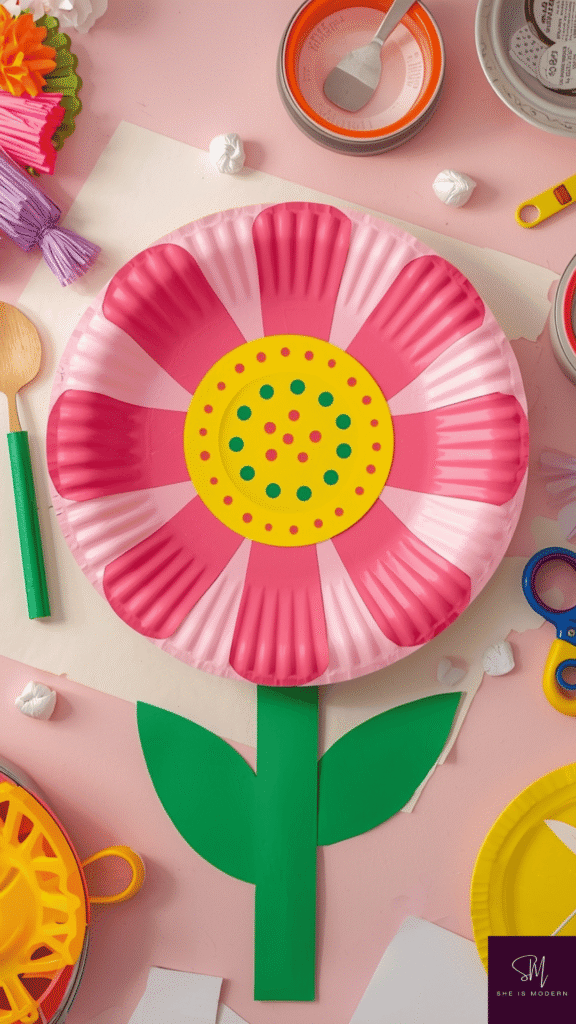
This flower craft is colorful, creative, and perfect for spring themes, and if your kids enjoy seasonal DIY activities, they’ll also love these easy spring craft ideas for kids. Start by painting the paper plate in bright shades like pink, yellow, or purple. Once dry, cut around the edges to create petal shapes. Kids can choose rounded, pointy, or wavy petals depending on their style. This helps them explore shapes and improve cutting skills in a fun way.
For the center of the flower, glue a circle made from colored paper or simply paint a contrasting color. Kids can decorate it with dots, lines, or even small beads. This gives texture and detail to the flower. You can also add a green paper stem and leaves to complete the look. It turns a simple plate into a full flower design.
These flowers can be used in many ways. Kids can make a bouquet, decorate a wall, or even gift them to family members. It’s a great craft for celebrations like Mother’s Day or spring events. The final result looks beautiful and gives kids a sense of pride in their handmade art.
9. Paper Plate Bee
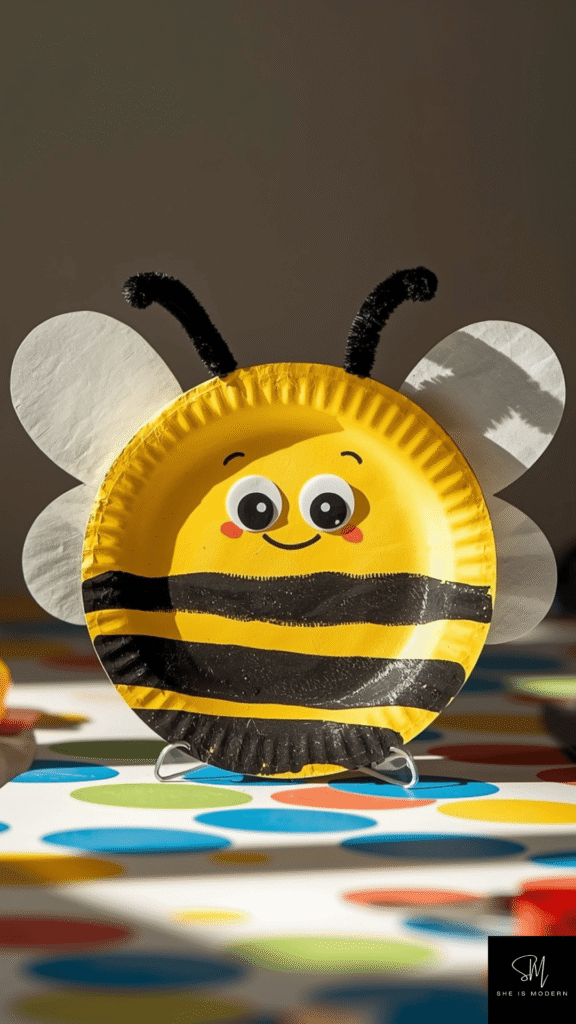
This bee craft is playful and perfect for learning about insects. Start by painting the paper plate yellow and let it dry completely. Then add black stripes using paint or paper strips. Kids can decide how thick or thin the stripes should be. This allows them to explore patterns while also improving their focus and creativity.
Next, create wings using white paper or transparent plastic. Glue them to the back or top of the plate. Add googly eyes and make antennae using pipe cleaners or paper strips. Kids can bend and shape the antennae, which adds a fun hands on element. You can also draw a smiling face to make the bee look friendly and cute.
Hang the bees using string so they look like they are flying. This adds movement and makes the craft more exciting. You can create multiple bees and turn the space into a mini garden scene. It’s a great activity for both fun and learning, especially when teaching kids about nature and pollination.
10. Paper Plate Snowman
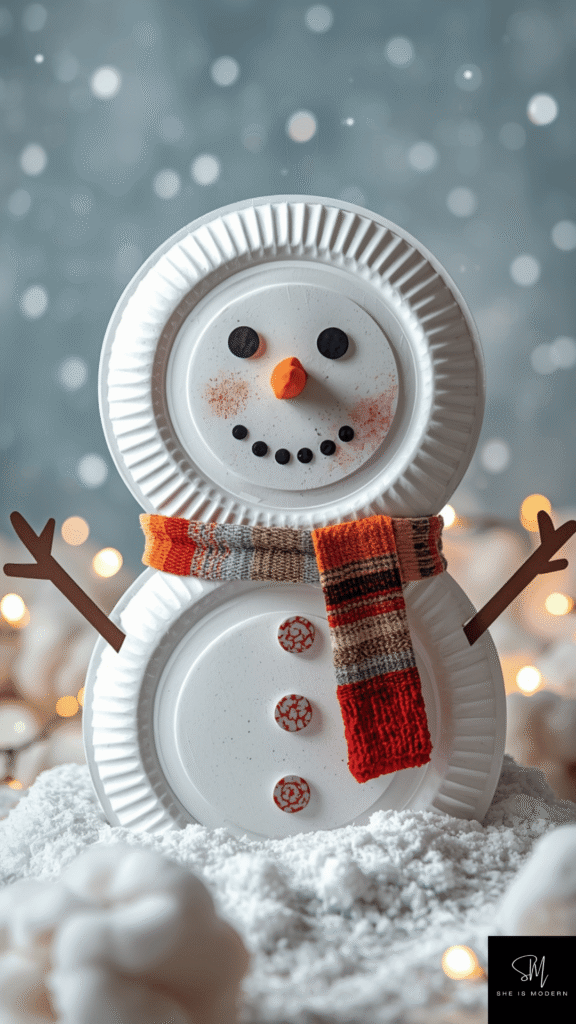
This snowman craft is cozy and perfect for winter activities. Use white paper plates or paint them white if needed. Stack two plates to form the snowman’s body and glue them together. Kids can help with positioning and pressing the plates, which builds coordination and teamwork.
Decorate the snowman with simple features like eyes, a carrot nose, and buttons using paper or markers. Add a scarf made from fabric, ribbon, or colored paper. Kids can choose different colors and patterns, making each snowman unique. You can also add a hat or earmuffs for extra detail and creativity.
Display the snowman on walls, doors, or classroom boards during winter or holiday seasons. It creates a warm and festive feeling. Kids can also make multiple snowmen and create a winter scene together. This craft is simple, fun, and perfect for group activities or family crafting time.
11. Paper Plate Dinosaur
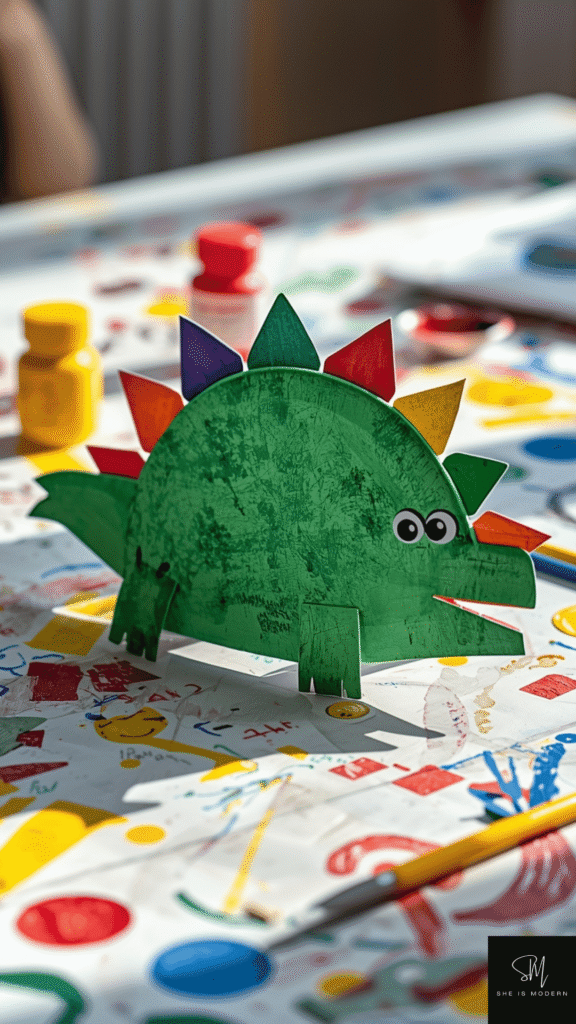
This dinosaur craft is exciting and full of imagination. Start by painting the paper plate in green, brown, or any fun color your child likes. Let it dry completely before adding details. Kids can create different textures on the plate using sponges or brush strokes. This gives the dinosaur a more realistic or playful look. It’s a great way for kids to explore colors and patterns while having fun.
Next, cut out dinosaur spikes using colored paper and glue them along the back of the plate. Add legs, a tail, and a head if you want a full body design, or keep it simple with just a face. Draw or stick on eyes and a big mouth. Kids can make friendly dinosaurs or scary ones. This helps build creativity and storytelling as they imagine their dinosaur world.
Once done, kids can use their dinosaur for playtime or display it in their room. They can even create multiple dinosaurs and build a mini Jurassic scene. This craft works great for themed activities and keeps kids engaged for a longer time because of its creative possibilities.
12. Paper Plate Apple
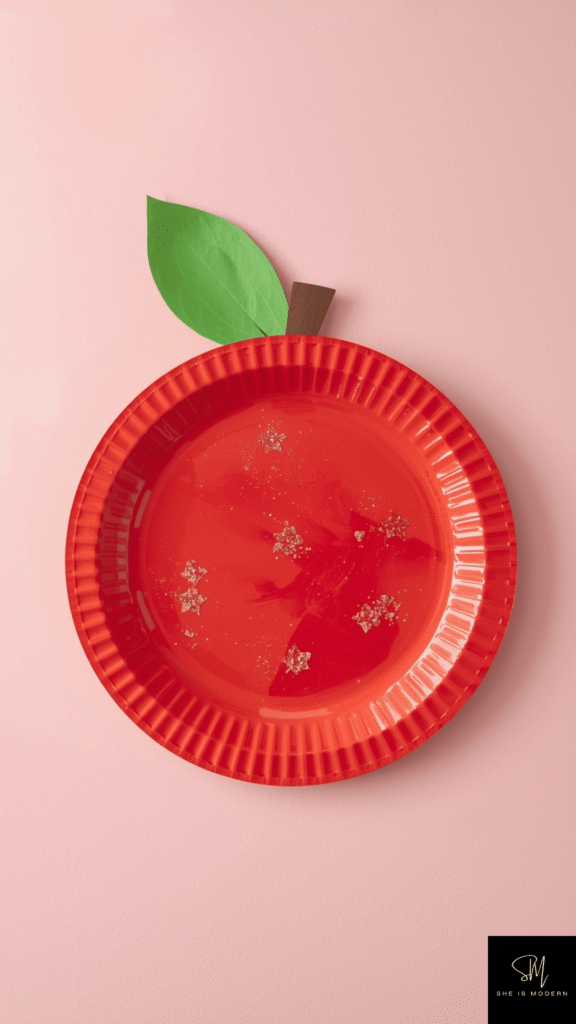
This apple craft is simple, cute, and perfect for younger kids. Begin by painting the paper plate red or green. Let kids choose their favorite apple color. You can also mix shades to create a more realistic look. This helps kids explore color blending in an easy way. If you want a no paint option, cover the plate with colored paper instead.
Add a small brown stem and a green leaf using paper cutouts. Glue them neatly at the top of the plate. Kids can decorate their apples with glitter, stickers, or small drawings. Some may even want to add a smiling face. This adds personality and makes the craft more fun and engaging for them.
This apple craft is perfect for fall themes or school activities. Teachers can use it for classroom boards or learning displays. Kids can also make a bunch of apples to create a tree scene. It’s quick, easy, and gives a very clean and bright final result that kids enjoy showing off.
13. Paper Plate Penguin
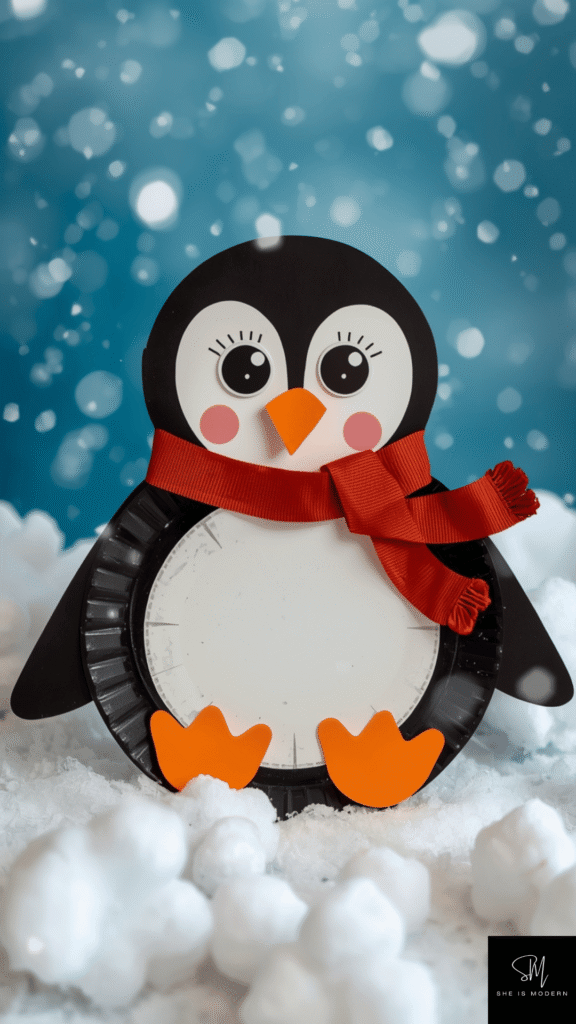
This penguin craft is adorable and great for winter fun. Start by painting most of the paper plate black, leaving a white oval in the center for the belly. This contrast makes the penguin look more real and cute. Let the paint dry before adding more details. Kids can carefully follow the shape or freestyle it for a fun look.
Cut out a small orange triangle for the beak and two orange feet. Glue them in place and add googly eyes or draw eyes with a marker. Kids can also add extra details like a scarf or hat to make their penguin unique. This gives them freedom to personalize their craft and use their imagination.
Once finished, display the penguin on a wall or use it in a winter themed setup. Kids can create a group of penguins and build a snowy scene. This craft is simple but very engaging, making it perfect for both home and classroom activities during colder seasons.