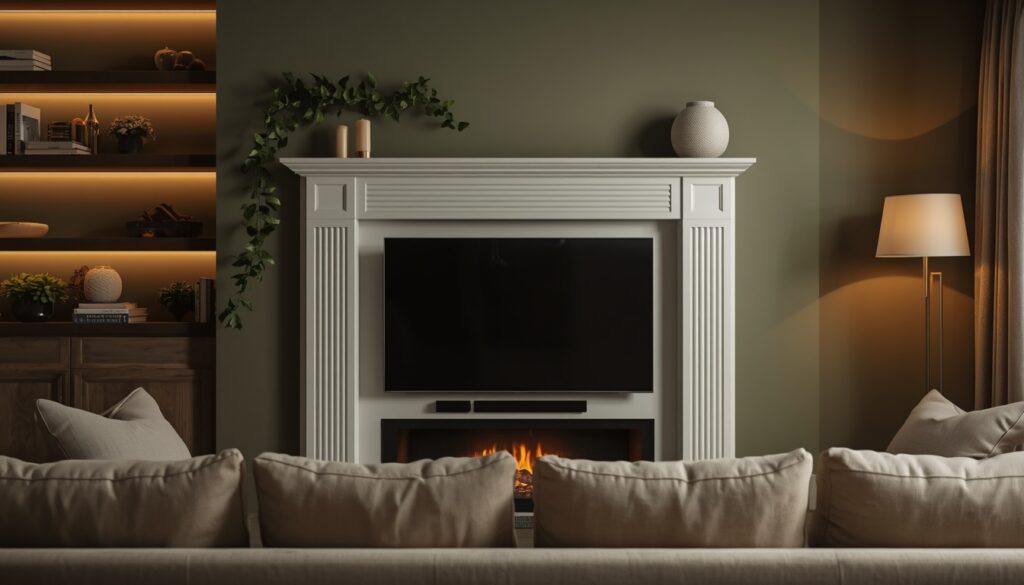
A television is one of the most visually dominant objects in any living room, and for most people, it just sits there , a big black rectangle demanding attention whether the room wants it to or not. The frustrating thing is that most living rooms are designed around the TV without ever truly designing the TV into the room. That gap between the screen and the surrounding decor is where the whole room loses its cohesion. A custom TV frame changes that completely. It transforms the television from an eyesore into an intentional design element , something that looks like it belongs exactly where it is.
The ideas in this article cover every skill level, every budget, and every design aesthetic. Some of these frames take an afternoon and cost under thirty dollars. Others require a bit more patience and a few more tools, but deliver results that genuinely look custom built and expensive. What they all share is the same core principle: when you frame a TV with intention, the entire wall , and the entire room , starts to make more sense. No specialist skills required for most of these. Just the right idea, the right materials, and the motivation to make your living room look the way it deserves to. Let’s get into all fourteen.
1. Rustic Wood Plank TV Frame for a Farmhouse Living Room
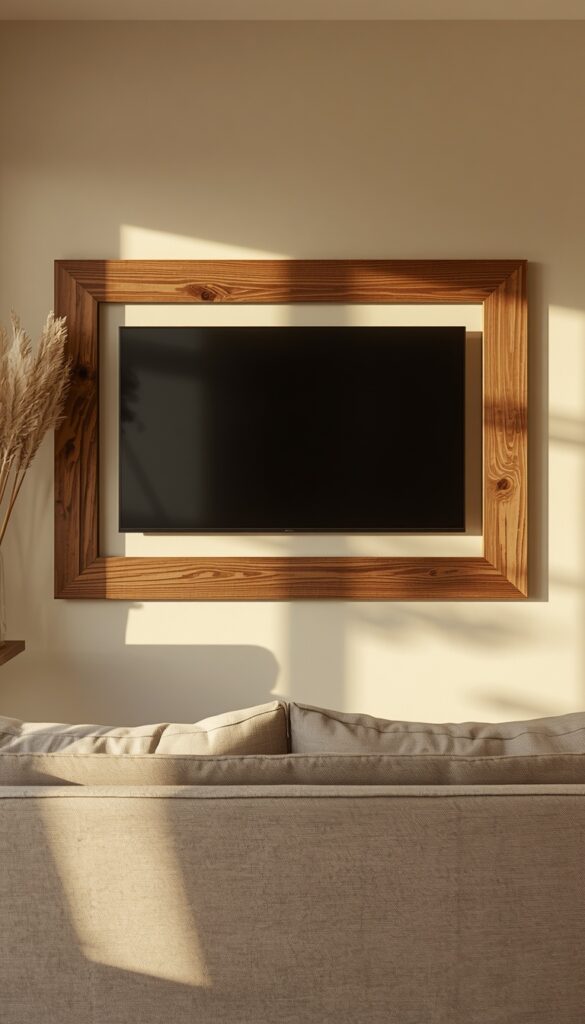
A TV frame built from reclaimed or new wood planks is one of the most satisfying DIY projects in home decor , and one of the most visually impactful. The frame sits flush against the wall around the TV, constructed from individual boards cut to create a rectangular border. The wood softens the hard tech quality of the screen immediately, introducing warmth, grain texture, and a sense of craftsmanship that no store bought solution replicates. In a farmhouse or rustic style living room, this frame becomes a natural extension of the room’s material language rather than a retrofitted add on.
Use 1×4 or 1×6 pine boards for the frame construction , they’re inexpensive, widely available, and easy to cut with a miter saw or even a hand saw with a miter box. Cut the four frame pieces to create either butt joints at the corners or 45 degree miter joints for a more finished look. Miter joints require more precision but give the frame a cleaner, more professional appearance. Secure the frame pieces to each other with wood glue and finish nails before mounting the whole assembly to the wall using construction adhesive and wall anchors. Make sure the frame sits at least a quarter inch away from the TV bezel on all sides to avoid contact with the screen.
Finishing the wood is where the frame develops its character. A dark walnut stain gives the frame a rich, warm quality that suits a more polished farmhouse or transitional room. A grey weathered stain or a whitewash finish suits a coastal or casual farmhouse aesthetic. For truly rustic results, skip stain entirely and apply a clear matte wax over the natural wood , the grain speaks for itself. Sand the boards to 180 grit before finishing for a smooth surface, or deliberately leave the grain slightly rough for a more raw, reclaimed appearance. Both approaches look authentic when the rest of the room supports the direction.
2. Ornate Gold Picture Frame Around the TV for Gallery Wall Drama
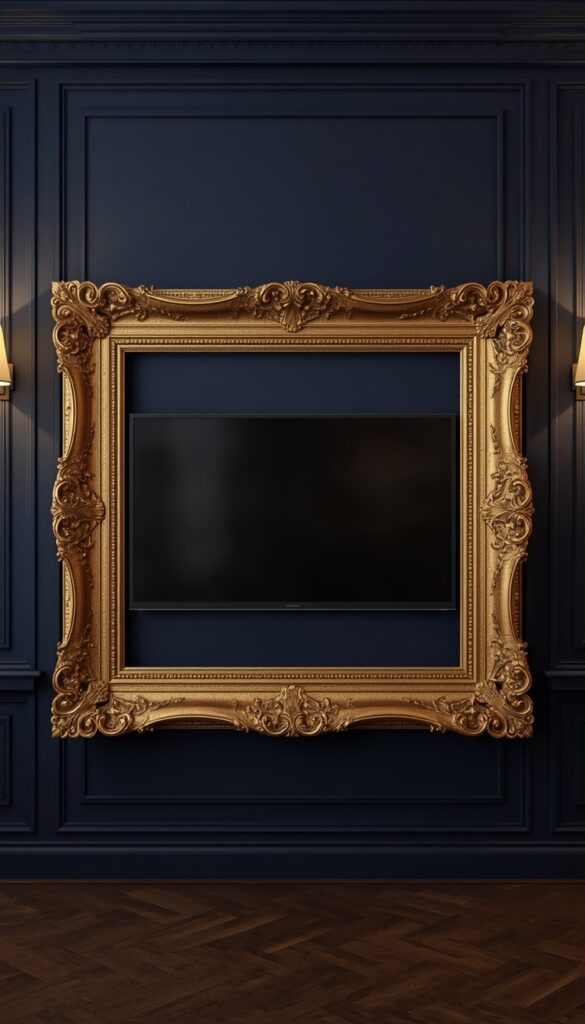
Using a large, ornate gilt picture frame to surround a flat screen TV is one of the cleverest and most dramatic custom TV frame ideas available , and it costs far less than it looks. The concept is simple: find or build an oversized ornate frame in gold, aged brass, or antique gilt that’s sized to fit around your TV, mount the frame to the wall, and position the TV behind it so the screen sits within the frame’s opening. The result looks like a painting or a portrait when the TV is off and an art installation when it’s on. It’s theatrical, and it absolutely works.
Sourcing the right frame is the most important step. Antique and thrift stores regularly carry large ornate frames from old mirrors or paintings that can be repurposed at very low cost. Estate sales are particularly fruitful for oversized gilt frames , the kind that are too large to hang conventional art but perfect for surrounding a 55 inch or 65 inch TV. If you can’t find a frame large enough, build one using decorative molding from a hardware store. Ornate polyurethane molding , which mimics carved wood at a fraction of the cost and weight , can be cut to size and assembled into a custom frame using miter joints and strong adhesive.
Mount the frame first, then mount the TV within it. Use a low profile wall mount so the TV sits as close to the wall surface as possible , you want the screen to appear to sit within the frame rather than protruding awkwardly in front of it. The gap between the TV bezel and the inner edge of the frame should be relatively consistent on all sides , an inch or two is ideal, creating a visual mat effect like a framed piece of art. Paint the wall behind and around the frame in a deep, dark color , navy, forest green, or charcoal , and the whole installation takes on a genuinely gallery like quality.
3. Shiplap Panel TV Frame Built Into a Feature Wall
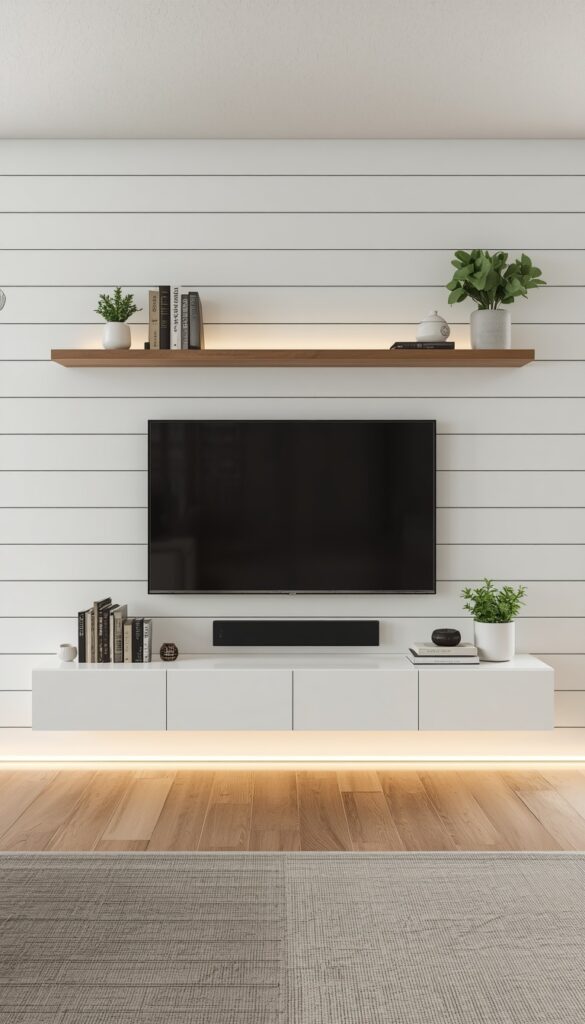
Building a shiplap panel feature wall around your TV , with the television recessed or mounted flush against the planked surface , is one of the most architectural DIY TV frame approaches possible. The shiplap extends across the full wall or a significant portion of it, and the TV becomes one element within that larger architectural statement rather than a separate object hanging on a plain wall. This approach requires more material and more planning than a simple frame, but the result is genuinely transformative , the kind of wall that makes the whole room feel custom built rather than assembled.
Standard shiplap installation uses 1×6 or 1×8 tongue and groove pine boards or flat cut boards with a small reveal gap between each plank. The boards run horizontally across the wall, secured to the wall studs with finish nails. Before installing any planks, locate all wall studs, plan your TV mount location, and run any necessary cable management solutions , recessed cable management kits let you route power and HDMI cables through the wall for a completely clean finish. Install the TV mount to the studs before adding the final surrounding planks so the mount sits flush with the plank surface.
Painting the entire shiplap wall , including the installed TV mount and frame area , in a single unified color is what makes this approach look truly intentional. White is the most common choice for a farmhouse or classic look. Deep charcoal, warm black, or a dark sage green create a more dramatic, contemporary result. The TV screen, mounted flush against the dark planked wall, recedes significantly when off and reads as a graphic element of the wall composition rather than a foreign object. Finish the installation with simple floating shelves or LED strip lighting along the bottom shiplap edge for additional styling and practical detail.
4. Black Moulding Frame for a Sleek, Modern TV Wall
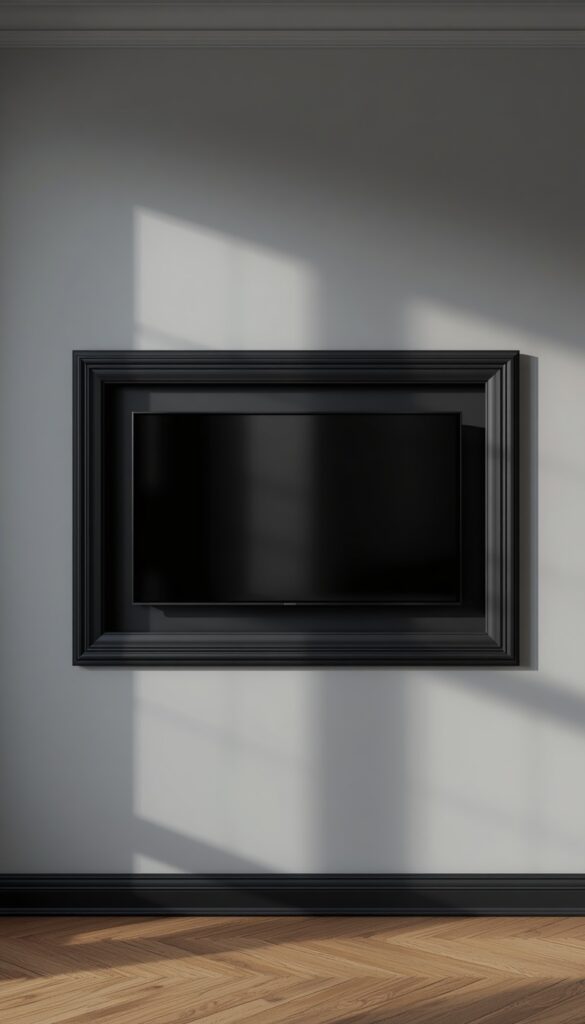
A frame built from simple flat black moulding , clean lines, no ornament, no texture , is the right answer for a modern, contemporary, or minimalist living room. This is a frame that disappears into the aesthetic of the room rather than making a decorative statement of its own. The black moulding picks up the black of the TV screen and integrates it into the wall composition, so the whole TV wall reads as a considered graphic element rather than a screen awkwardly hung on a pale wall. Simple, deliberate, and genuinely effective in the right room.
Use flat bar moulding or simple square edged trim boards in a consistent width , one and a half to two inches wide and works well for most TV sizes. Miter the corners at 45 degrees for a clean, seamless frame joint. Attach the four pieces of moulding to the wall using construction adhesive and a few finishing nails countersunk and filled, then paint the whole assembly , moulding, filled nail holes, and the wall area inside the frame , in the same flat or matte black. When the TV sits centered within this painted and framed zone, the screen and the frame read as one unified, intentional installation.
Extend the black painted zone from behind the TV outward past the frame by a few inches to create a painted panel effect , essentially a rectangle of dark color on the wall that the moulding frames. This painted panel absorbs the TV visually, making the frame plus TV plus painted background read as a single architectural feature. You can take this further by painting the entire wall black and using the moulding frame as a subtle additional detail within that darker surface. Either way, the key is committing to the contrast between the black frame zone and the surrounding wall color, whatever that may be.
5. Built In Bookcase TV Frame for a Library Living Room Look
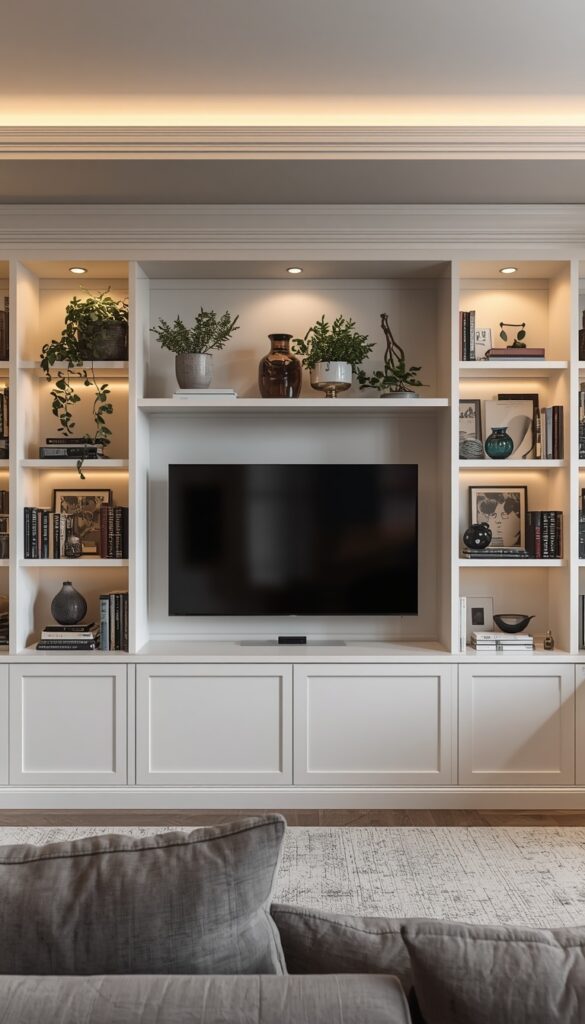
Flanking a wall mounted TV with built-in bookshelves on either side , so the television sits centered within a full wall shelving installation , is the most functional and most design forward approach on this list. The TV frame in this context isn’t a separate object but an integral part of the architectural shelving unit, giving the whole wall a library-like quality that’s deeply appealing. Books, objects, plants, and decorative pieces fill the shelves on either side, and the TV becomes the considered focal point at the center of a much larger composition. It’s the kind of wall that makes a living room feel genuinely designed.
The most achievable DIY version of this approach uses pre-built shelf units positioned on either side of the TV and connected at the top with a bridging shelf that spans across the top of the TV. Standard shelf units from a flat pack furniture retailer work perfectly as the structural base , choose units in a consistent finish and depth, and connect them to each other and to the wall securely for stability. The bridging top shelf ties the two units together into a single cohesive installation. Paint or wrap the entire assembly in the same finish , typically a matte white, warm cream, or deep color , so the whole wall reads as one custom piece rather than multiple separate units.
Cable management is essential in a built in TV frame installation because cables become much more visible within a structured, clean architectural setting. Run power and HDMI cables through the wall or through a recessed cable kit for a truly clean result. If wall routing isn’t possible, use cable channels painted to match the wall or shelving color , they become nearly invisible when color matched. Style the surrounding shelves with a mix of books, ceramics, plants, and personal objects , but edit carefully. The shelves should feel curated and considered, not crammed. Leave deliberate negative space between groupings so the eye can travel across the whole wall without feeling crowded.
6. Fabric Wrapped Panel TV Frame for a Soft, Upholstered Look
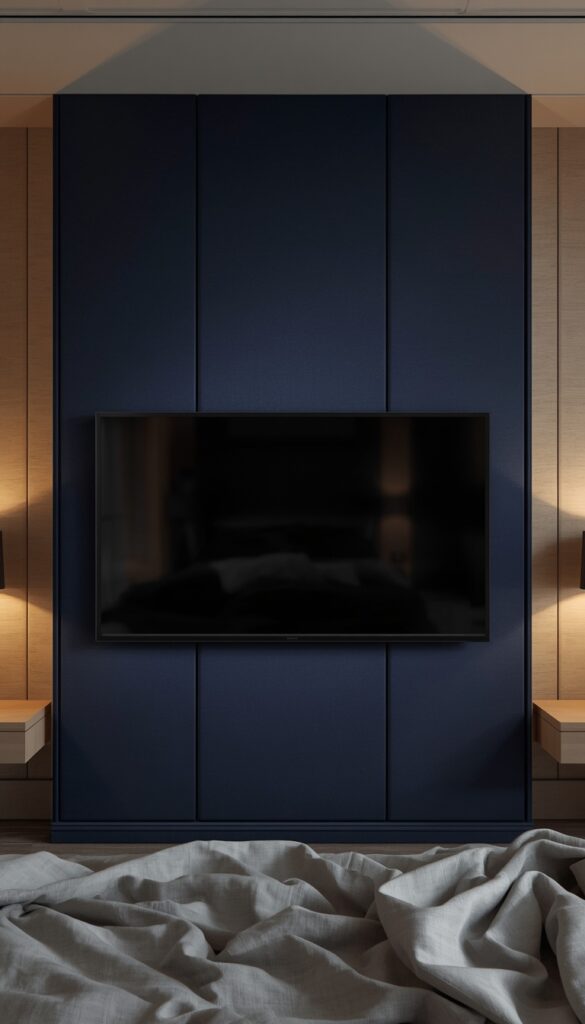
A fabric wrapped panel mounted around or behind the TV is a genuinely unexpected TV frame idea that brings softness, texture, and acoustic benefit to the living room simultaneously. The principle is similar to an upholstered headboard: a sheet of MDF or plywood cut to a size larger than the TV, wrapped tightly in a chosen fabric, and mounted to the wall behind the screen. The TV then mounts to the wall in front of the fabric panel so the screen appears to float against the upholstered background. The fabric introduces warmth, pattern, or texture that no painted or wooden frame can replicate.
Fabric selection is the most important decision in this project. A dense, flat weave fabric in a solid color , deep navy, warm terracotta, sage green, or charcoal linen , looks clean and sophisticated and suits a wide range of living room styles. A subtle pattern , a small geometric, a quiet texture, or a tonal woven design , adds visual interest without competing with the TV screen. Avoid fabrics with large pattern repeats that will be awkwardly cropped by the panel edges, or sheer fabrics that don’t provide enough visual coverage. Medium weight upholstery fabric or heavy linen works best , it wraps corners cleanly and holds its shape over time.
Cut the MDF or plywood panel two to four inches larger than the TV on all sides , this margin creates the visual mat effect that makes the TV read as a framed element rather than just a screen in front of fabric. Wrap the fabric tightly over the panel edges and secure with a staple gun on the back face, pulling firmly to eliminate any wrinkles or sags. Mount the panel to the wall using heavy duty picture rail or a French cleat system , this allows you to remove the panel for fabric replacement without disturbing the wall. The TV mounts to the wall independently via its own mount, positioned so the screen sits centered in front of the fabric panel.
7. Peel and Stick Tile Frame Around the TV for a Bold Backsplash Effect
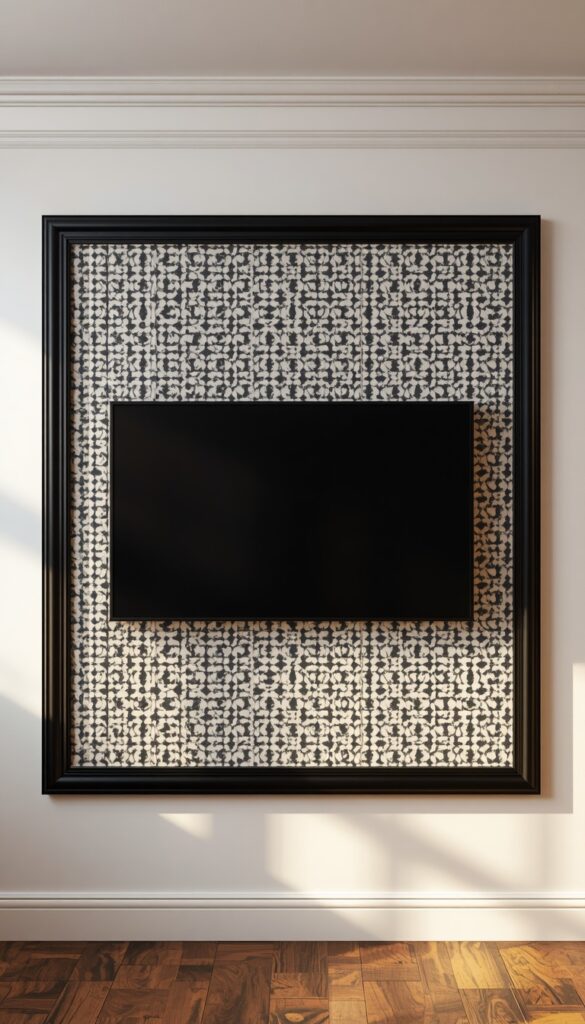
Peel and stick tiles used as a TV frame , applied directly to the wall around the television to create a tiled surround effect , is one of the more unexpected ideas in this list, and one that delivers genuinely striking results. The concept borrows from kitchen and bathroom design, where tiled surrounds create defined architectural zones, and applies it to the living room TV wall. A geometric peel and stick tile in a bold pattern , hexagons, arabesque shapes, or a classic subway layout , creates a clearly defined frame zone around the TV that looks like a custom tiled surround at a fraction of the cost.
Peel and stick tiles designed for wall application adhere well to smooth, painted drywall and can be removed cleanly from most surfaces with some patience and a heat gun. Choose tiles sized appropriately for the TV , mosaic scale tiles in a repeat pattern create a busy, ornate effect; larger tiles in a bolder geometric give a cleaner, more graphic result. The tiled zone should extend consistently around all four sides of the TV , typically two to four tile widths , creating a clear rectangular surround. Measure carefully before peeling any tiles and mark the perimeter of the surround zone with painter’s tape so you have a clear guide for placement.
Grout lines in peel and stick tile systems are typically pre-built into the tile design rather than applied separately, which makes installation clean and straightforward. The edges of the tiled surround , the outer perimeter , need careful finishing. Options include a row of border tiles if your chosen tile comes in a complementary border format, a thin strip of painted wood moulding in a coordinating color, or a clean edge sealed with a thin bead of matching caulk. All three approaches create a finished perimeter that gives the installation a deliberate, designed quality rather than the look of something simply stuck to the wall.
8. Faux Mantel TV Frame for a Fireplace Illusion
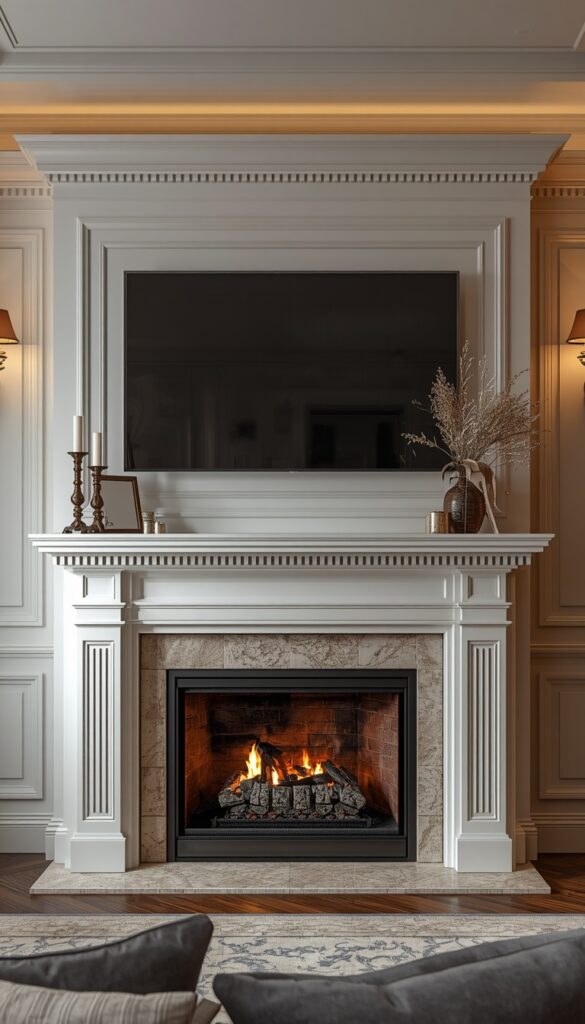
Building a faux fireplace mantel around a wall mounted TV is one of the most creative , and most searched , DIY TV frame ideas on the internet, and with good reason. The concept creates a fireplace illusion: a decorative mantel surround built from MDF or wood, installed around the TV to replicate the architectural presence of a real fireplace. The TV becomes the “fire” , and you can even use a fireplace screensaver on loop to complete the illusion entirely. In a room without a real fireplace, this faux mantel installation adds the focal point and architectural character that the space has always been missing.
Build the mantel frame from MDF sheets and decorative moulding. The basic structure consists of two side pilasters, a horizontal mantel shelf, and a decorative frieze between the shelf and the TV opening. Pilasters can be built from flat MDF sheets with applied moulding strips to create a paneled effect. The mantel shelf should extend at least six inches beyond the TV opening on each side and project four to six inches from the wall , enough to style it with candles, frames, and objects without them feeling precarious. Use a biscuit joiner or pocket screws to assemble the mantel components before priming and painting.
Paint the entire mantel assembly in a single color for the most convincing architectural result. Crisp white is the classic choice , it reads as built in millwork immediately. A warm cream or greige suits a more relaxed, casual room. A dramatic dark color , deep charcoal, navy, or forest green , gives the faux mantel a more contemporary, statement piece quality. Add a decorative inner surround between the pilasters , applied moulding strips in a panel configuration, or a contrasting paint color within the opening , to increase the fireplace illusion. Style the mantel shelf with intentional groupings of objects and the whole installation becomes genuinely convincing.
9. Floating Shelf TV Frame with Integrated LED Lighting
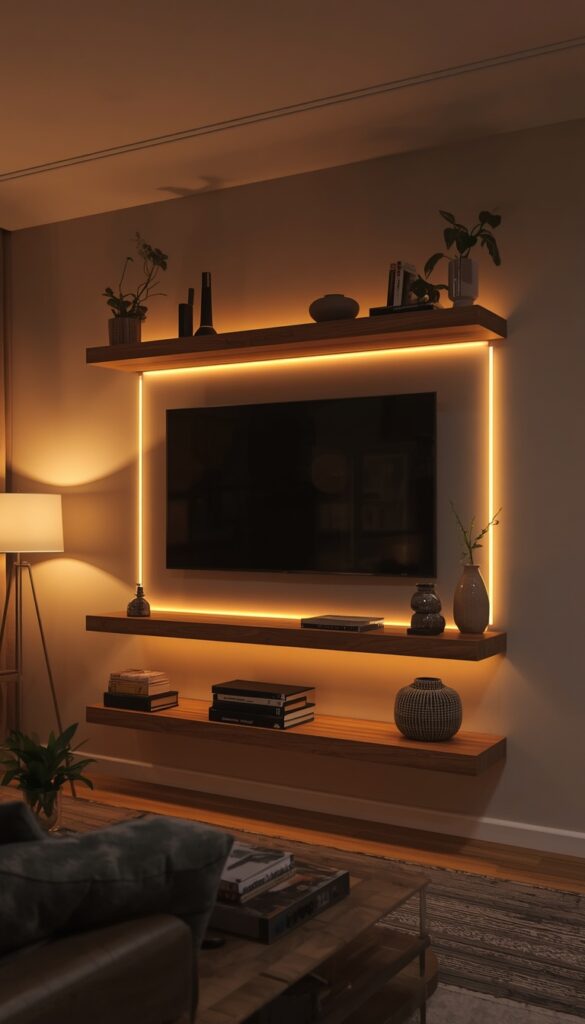
A floating shelf installation used as a TV frame , with shelves mounted above, below, and occasionally to the sides of the TV, combined with integrated LED strip lighting , creates one of the most contemporary and most atmospheric DIY TV frame results possible. The shelves provide styling surfaces that anchor the TV within a larger composition, while the LED strips add ambient back lighting that reduces eye strain during viewing and creates a dramatically atmospheric glow in the room at night. It’s a practical and beautiful combination that suits modern, Scandinavian, and contemporary living room styles particularly well.
The shelf layout is the key design decision. The most common and most effective configuration is one wide shelf above the TV , at a consistent distance, typically six to ten inches , and one or two shelves below for media equipment or styling. This above and below arrangement creates a visual sandwich that frames the TV horizontally and prevents it from floating on the wall without context. If your TV wall is wide enough, add a single shorter shelf to one or both sides of the TV at the same height as the TV center to create a more complete surrounding frame. Keep shelf depths consistent throughout , typically 8 to 10 inches , for a cohesive look.
Install LED strip lighting along the back edge of each shelf , the edge closest to the wall , so the light glows toward the wall and creates indirect illumination rather than shining directly into the room. Warm white LED strips in the 2700K to 3000K range suit most living rooms and complement wood or painted shelf tones beautifully. A simple plug in LED strip with a dimmer switch is easy to install without any electrical work. More permanent installations can use hardwired LED systems controlled by a wall switch. Either way, the combination of floating shelves and warm LED back lighting creates a TV wall atmosphere that’s both functional and genuinely beautiful at any hour.
10. Grasscloth Wallpaper Panel TV Frame for Organic Texture
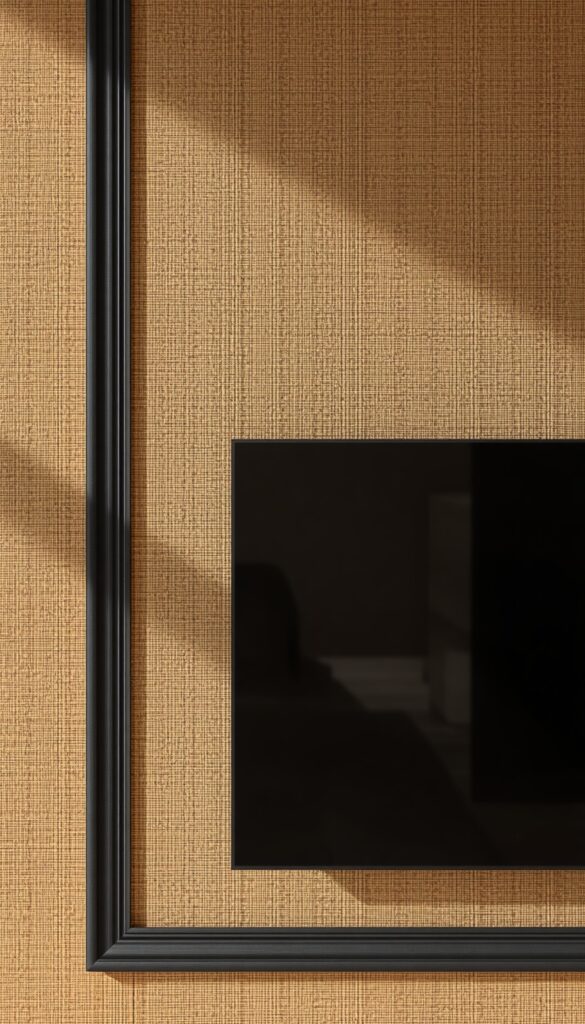
Applying a panel of grasscloth or natural texture wallpaper to the wall directly behind and around the TV , creating a clearly defined rectangular zone that frames the screen , is a sophisticated and relatively simple DIY TV frame approach that delivers enormous texture and warmth. Grasscloth is one of the most beautiful natural wallcoverings available: woven from natural fibers including seagrass, jute, and sisal, it introduces an organic, tactile quality to a wall that paint simply cannot replicate. The warm honey, sand, and natural tones of most grasscloth colorways soften the stark tech presence of a TV beautifully.
Define the panel zone by marking a rectangle on the wall that extends a consistent distance , four to eight inches , beyond the TV on all sides. This panel can extend to the ceiling, to the floor, or stop at defined points; a rectangle hanging in the middle of the wall reads as a large-scale artwork backing that the TV sits within. Apply the wallpaper only within this defined zone, with clean, straight edges at the perimeter. Grasscloth joins require careful pattern alignment at each seam , the woven nature of the material means misaligned seams are very visible, so take time to match each strip carefully before pressing it to the wall.
Finish the perimeter of the grasscloth panel with a thin painted wood moulding in a coordinating or contrasting color , this creates a defined, framed border that gives the panel a polished, architectural quality. Matte black moulding against natural grasscloth is a particularly striking combination , the sharp graphic edge of the dark moulding contrasts beautifully with the organic texture of the woven material. Alternatively, leave the edges clean without moulding if your walls have very clean lines and the grasscloth is trimmed with absolute precision. Both approaches work, but the moulding border is more forgiving and more impactful in most rooms.
11. Reclaimed Pallet Wood TV Frame for an Industrial Edge
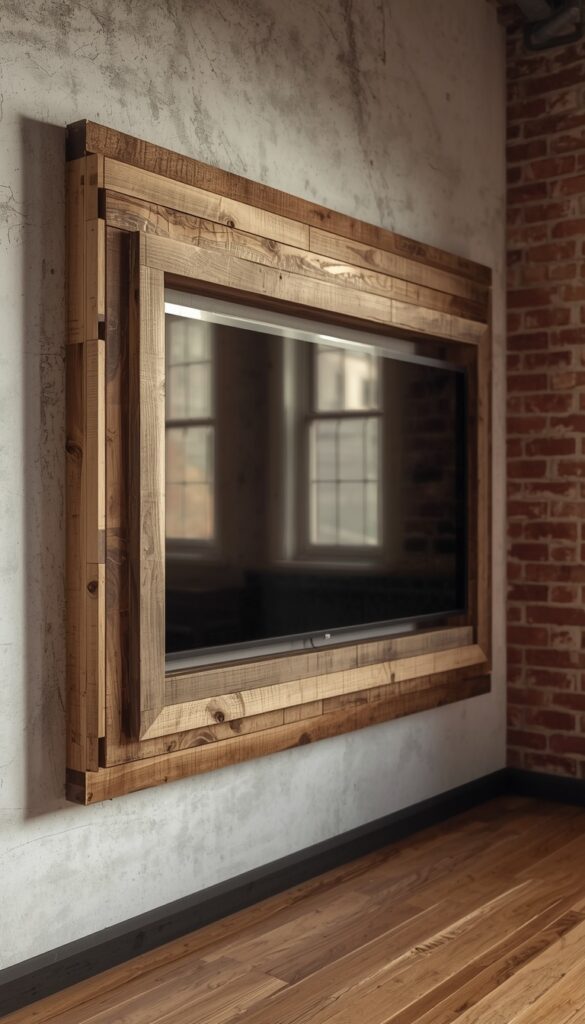
Building a TV frame from reclaimed pallet wood takes the rustic wood plank approach in a more raw, industrial direction , one that suits warehouse style lofts, urban apartments, and rooms with exposed brick or concrete elements. Pallet wood has a character that new timber can’t replicate: varying plank widths, natural weathering, occasional saw marks and nail holes, and a patchy surface color that tells the story of the material’s previous life. Built into a frame around a TV, these qualities create a genuinely characterful surround that looks both deliberately designed and authentically material.
Source pallet wood carefully , not all pallets are safe to use indoors. Look for pallets stamped with HT (heat treated) rather than MB (methyl bromide treated). Heat treated pallets have been kiln dried and are safe for interior use. Avoid pallets with chemical stains, oil residue, or visible mold. Sand each plank lightly to remove splinters without eliminating the natural surface character , 80 grit followed by 120 grit leaves a surface that’s safe to handle while preserving the aged, weathered quality that makes pallet wood distinctive. Pull any protruding nails and fill holes with wood filler or leave them as natural character details.
Assemble the frame on a flat surface before mounting , this allows you to arrange planks in the most visually interesting configuration and check the fit before anything goes on the wall. Vary the plank widths across the frame for a more organic, reclaimed appearance. Secure planks to each other and to a MDF backer sheet with wood glue and screws for a rigid assembly. Finished with a clear matte wax or a natural oil that protects the wood without adding artificial shine , pallet wood looks wrong with a gloss finish, which fights its raw, weathered character. Mount the completed frame to the wall using heavy duty construction adhesive and wall anchors rated for the weight.
12. Painted Arch TV Frame for a Soft Architectural Statement
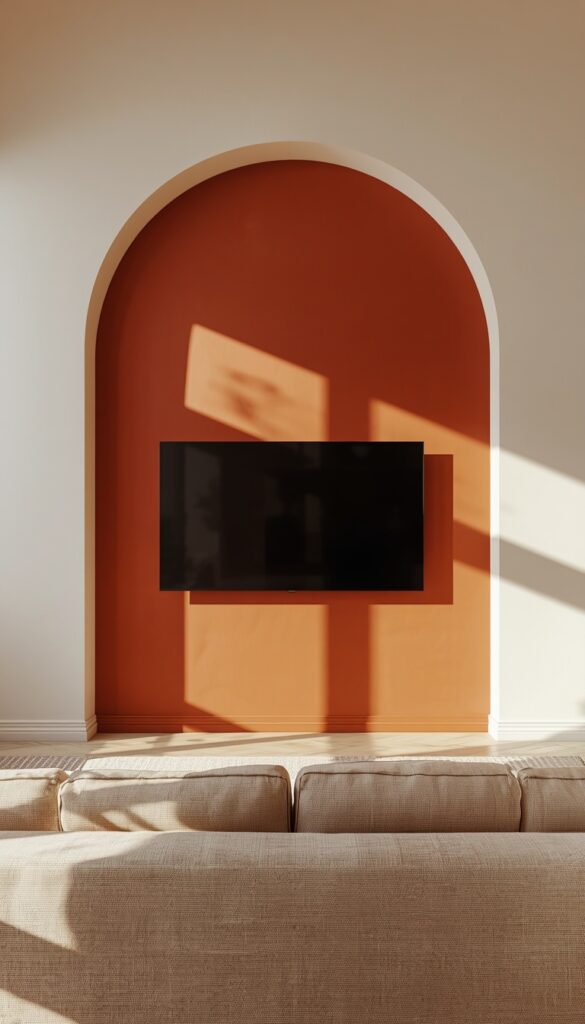
Painting a large arch shape directly onto the wall behind and around the TV , creating a trompe l’oeil architectural surround , is one of the most creative and completely free DIY TV frame ideas. No materials to buy, no construction required. Just paint and a steady hand. The arch creates the impression of a niche or alcove, visually setting the TV back into the wall even though the surface is completely flat. In a room with plain, uninteresting walls, a painted arch frame gives the TV wall an architectural quality that takes almost no skill and absolutely no structural work.
Creating a clean arch requires a simple compass made from a length of string, a thumbtack, and a pencil. Decide on the width of your arch opening , typically the width of the TV plus four to six inches on each side , and calculate the radius by dividing that width in half. Push the thumbtack into the wall at the center of the arch’s baseline, tie the pencil to the string at the measured radius, and swing the pencil in a smooth arc to mark the arch curve. The uprights of the arch extend straight down from where the arc meets its widest point, creating the classic rounded arch shape. Tape the arch perimeter carefully before painting.
Choose the arch color deliberately relative to the wall color. A deeper tone of the existing wall color , if your walls are warm cream, paint the arch zone in a medium warm sand , creates a subtle, sophisticated effect that reads as shadow and depth. A strongly contrasting color , a bold terracotta arch on a white wall, or a deep navy arch on a pale grey wall , creates a more dramatic, graphic statement. For a truly architectural finish, paint a thin border stripe in a slightly darker shade around the inner perimeter of the arch outline, replicating the shadow line of a real recessed alcove. This detail, which takes ten minutes, adds significant realism to the effect.
13. Mirror Mosaic TV Frame for a Glamorous Living Room
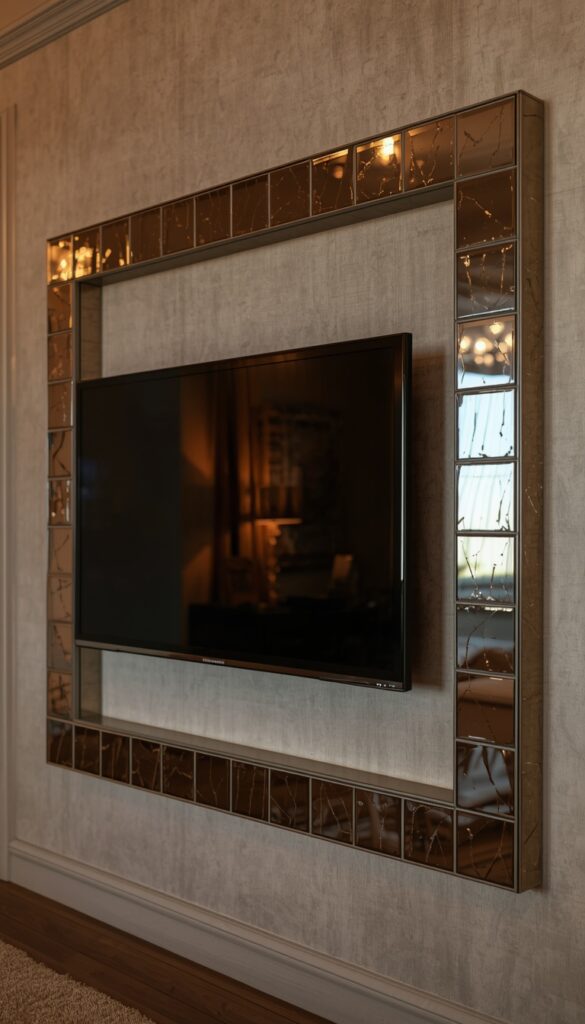
A TV frame constructed from small mirror tiles applied to the wall around the television creates a genuinely glamorous effect , one that bounces light beautifully across the room and makes the TV wall feel far more dynamic than any painted or wooden surround. Mirror mosaic tiles are widely available in a range of sizes, from small one inch squares to larger three inch or four inch pieces, in clear mirror, antique mirror, and smoked mirror finishes. Applied in a consistent pattern or a more random arrangement around the TV perimeter, they create a shimmering frame that reads as luxurious and genuinely designed.
Antique mirror tiles , those with a slightly aged, foxed finish that gives them a grey, mottled quality , create a more sophisticated, less flashy result than a clear mirror. The antique quality reads as deliberate and design forward rather than simply reflective. Smoked mirror tiles in dark grey or bronze create a dramatic, moody effect that suits rooms with a darker, more maximalist aesthetic. Mix clear and antique mirror tiles in the same installation for a more complex, layered look. In any finish, keep the application zone consistent , a rectangle of defined width around all four sides of the TV , for the cleanest, most intentional result.
Apply mirror tiles using a mirror safe adhesive , regular tile adhesive or construction adhesive can cause silver backing to deteriorate and create dark spots over time, so use a product specifically labeled as safe for mirror applications. Apply tiles from the center of each side outward so cuts fall at the corners rather than the visual center of any side. Gap tiles by two to three millimeters for a grout line, then apply unsanded grout in a color that complements the tile choice , white or cream for clear mirror, charcoal or dark grey for antique or smoked mirror. Seal the grout after curing and buff the tile surface clean for a finished, polished result.
14. Integrated Curtain Drape TV Frame for a Dramatic Reveal
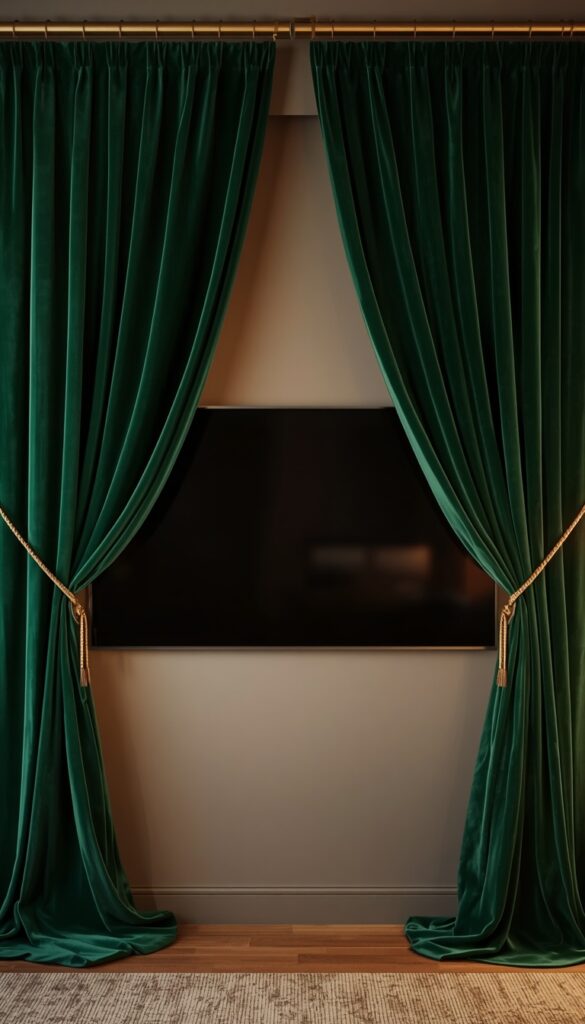
Framing a wall mounted TV within a pair of floor to ceiling curtain panels , so the drapes frame the screen on either side and can be drawn to conceal the TV entirely , is one of the most theatrical and most practical custom TV frame ideas available. When the curtains are open, the TV sits centered between two generous sweeps of fabric, looking staged and intentional. When closed, the TV disappears entirely behind the fabric, leaving a beautiful textile installation in its place. For anyone who finds a blank TV screen visually disruptive in a well designed room, this solution is genuinely elegant.
The curtain rod should span the full width of the TV wall rather than just the TV itself , typically eight to twelve feet depending on wall width. Mount the rod as close to the ceiling as possible for maximum drama and visual height. Choose curtain fabric that suits the room’s color palette and material language: a heavy velvet in a deep jewel tone for a maximalist or grandmillennial room, a lightweight sheer linen for a relaxed organic space, or a bold patterned fabric for a more playful or eclectic room. The fabric framing the TV is a significant textile presence in the room, so choose it with the same care you’d give to any major soft furnishing decision.
Use floor to ceiling curtain panels rather than shorter cafe length ones , the full vertical drop creates the theatrical, architectural quality that makes this idea work. Panels that pool slightly on the floor add an extra layer of luxury and drama. When the curtains are open and the TV is in use, use a curtain tieback or holdback at the side of each panel to keep the fabric swept back cleanly and prevent it from blocking the screen edges. When the TV is off, release the tiebacks and draw the curtains fully closed , the whole wall becomes a beautiful textile feature and the television vanishes completely. It’s the kind of design solution that feels clever every single time it works.
Conclusion
A television doesn’t have to be the awkward element in the room , the piece that everything else has to work around. Every idea in this article proves that with the right framing approach, the TV becomes part of the room’s design story rather than a distraction from it. Whether you build a rustic wood plank surround, install a dramatic faux mantel, or simply paint an arch behind the screen, the principle is always the same: give the TV a context, and the whole room benefits. DIY custom TV frames are achievable, affordable, and genuinely impactful. Pick the idea that suits your space, commit to it with confidence, and make it happen.
Frequently Asked Questions
Q: How do I build a DIY TV frame without damaging my wall? A: Most TV frames attach to the wall using construction adhesive and wall anchors rather than large scale structural work. Adhesive mounted frames cause minimal wall damage and can typically be removed by carefully working a thin blade behind the frame and patching any adhesive residue. For zero damage options, look at fabric panel frames hung on a French cleat system, which mount and remove cleanly.
Q: What materials work best for a DIY TV frame? A: MDF and pine boards are the most practical choices for most DIY TV frames , they’re affordable, easy to cut, paint beautifully, and hold moulding and adhesive well. For decorative frames, polyurethane moulding is lighter than wood and equally paintable. For texture focused frames, grasscloth wallpaper, peel and stick tiles, and fabric panels each bring something wood and paint cannot achieve.
Q: How do I hide TV cables inside a DIY frame? A: The cleanest solution is running cables through the wall using an in-wall cable management kit, which includes two wall plates and a tube that routes cables inside the drywall cavity. No electrician needed for low voltage cables like HDMI. For surface mounted frames, use a paintable cable channel , a plastic raceway available at hardware stores , painted to match the frame or wall color for near invisibility.
Q: Can I make a TV frame that works with a TV wall mount? A: Absolutely , most DIY TV frames are designed specifically to work with wall mounted televisions. Mount the TV to the wall first using a standard low profile mount, then build or install the frame around it. Make sure the frame doesn’t restrict access to the mount’s tilt or swivel mechanisms if you use those features, and leave adequate clearance around the TV bezel on all sides.
Q: How much does a DIY TV frame typically cost to build? A: Costs vary significantly by approach. A simple painted arch frame costs almost nothing beyond a small amount of paint. A basic wood moulding frame runs between fifteen and forty dollars in materials. A built-in bookcase or faux fireplace mantel installation can run between one hundred and three hundred dollars depending on materials and scale , still far less than a custom built in from a carpenter.
Q: What size should a DIY TV frame be relative to the TV? A: A frame that extends two to four inches beyond the TV bezel on all sides reads as a clean, close fitting surround. A frame extending four to eight inches creates a more pronounced mat effect, like a framed artwork. For faux mantel or built in bookcase installations, the frame is much larger than the TV , it’s an architectural feature that the TV sits within rather than a frame fitted to the TV’s dimensions.
Q: Will a TV frame affect the TV’s heat ventilation? A: This is an important practical consideration. Most flat screen TVs vent heat from the back and sides, and a tight fitting frame that completely encloses those sides can trap heat and cause overheating over time. Always maintain at least a one inch gap between the TV body and the inner edges of the frame on all sides, and ensure the area directly behind the TV has adequate airflow. For enclosed installations like built in bookshelves, leave the area directly behind the TV open to the room.
Q: What paint finish works best for a painted TV frame or panel? A: Matte or flat finish paint works best for most TV frame applications because it absorbs light rather than reflecting it, creating a softer wall surface that doesn’t compete visually with the TV screen. Eggshell is a good second choice , slightly more durable than flat and still low in sheen. Avoid satin or semi gloss finishes on wall areas around TVs, as they reflect room light in ways that can create glare during viewing.