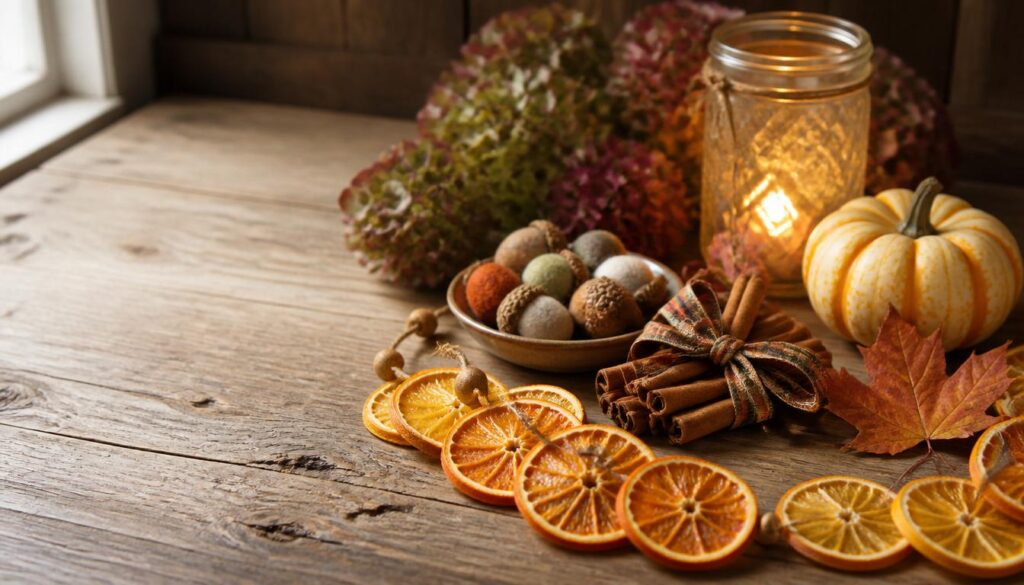
Fall is the one season that genuinely invites you to make things by hand. There’s something about cooler air and earlier sunsets that makes a craft project feel less like a chore and more like time well spent. I’ve made my way through every one of these projects myself, some more than once after figuring out what actually works versus what just looks good in theory. None of them require special skills you don’t already have.
What I love most about fall crafting is how forgiving it is. Natural materials, warm colors, a little imperfection, it all works in this season’s favor instead of against it. These 14 ideas come from projects I’ve genuinely built and given as gifts, displayed in my own home, and tweaked after the first attempt didn’t quite turn out right. Real advice, real materials, real results.
1. Make a Dried Orange Slice Garland for Natural Fall Texture
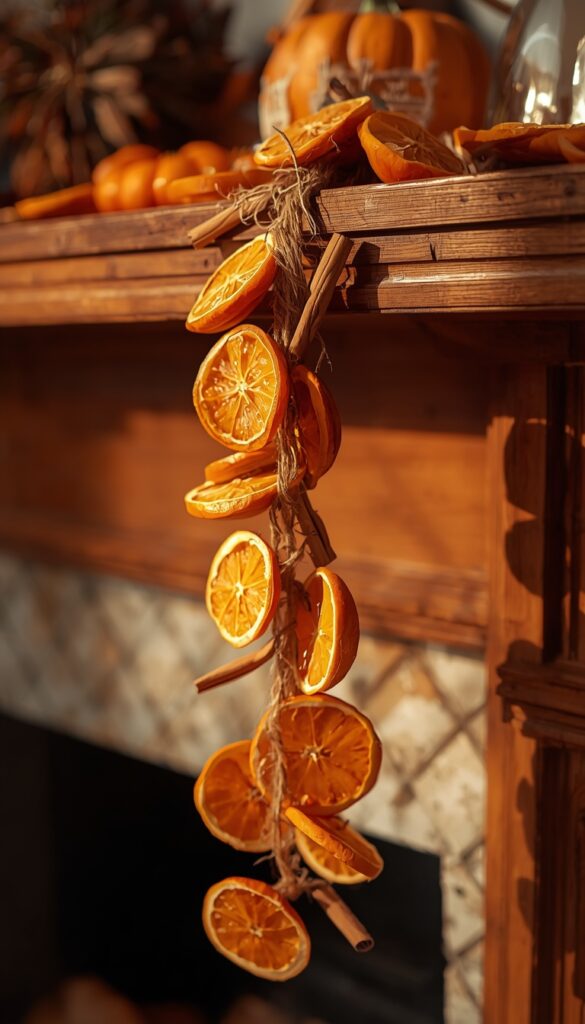
Dried orange slices strung into a garland bring genuine warmth and a subtle citrus scent into any room, and the process is far simpler than people expect. Slice oranges about a quarter inch thick, pat them dry, and bake at 200 degrees for two to three hours, flipping halfway through, until they’re fully dehydrated but not browned. A lower, slower oven setting always beats rushing this step.
I always poke a small hole near the top of each slice before baking, not after, since the dried fruit becomes brittle and cracks easily once it’s fully dehydrated. A wooden skewer or a thin straw works perfectly for this. Threading twine or thin jute cord through these pre-made holes afterward becomes effortless instead of frustrating once the slices are fully dry and ready.
Adding whole cinnamon sticks or small clusters of dried bay leaves between the orange slices breaks up the visual rhythm and adds extra texture along the garland’s length. I hang mine across a mantel or draped along a window frame, where the slight curl each slice develops during drying actually adds dimension rather than looking like a flaw in the finished piece.
2. Create a Pinecone and Berry Centerpiece for the Table
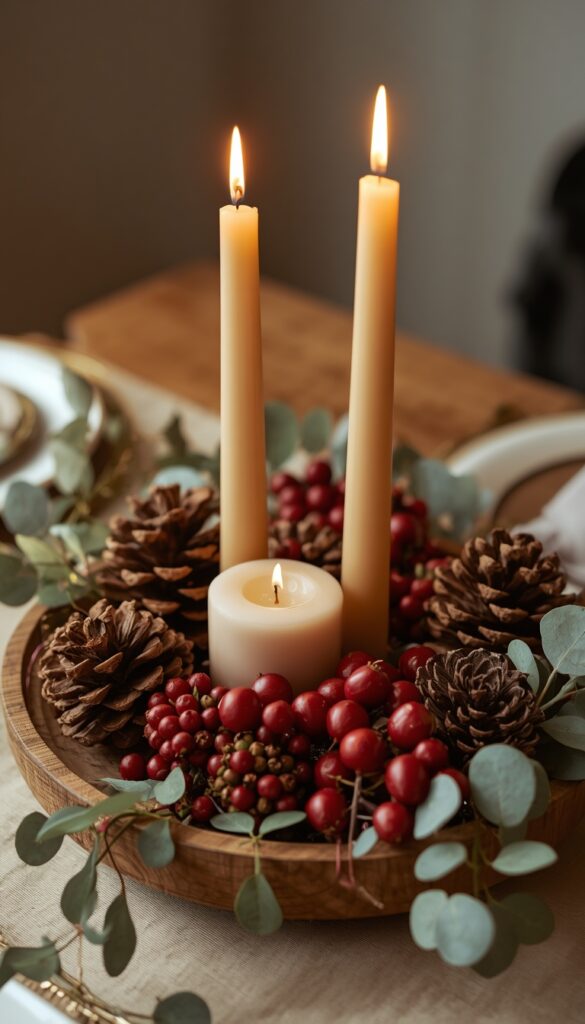
A centerpiece built from foraged or store bought pinecones, dried berries, and a few sprigs of greenery brings genuine seasonal texture to a table without requiring fresh flowers that won’t last through the season anyway. I start with a shallow wood tray or a low ceramic dish as the base, then build the arrangement directly on top rather than trying to fit everything into a tall vase.
Pinecone selection matters more than people think. I look for cones that are fully open rather than tightly closed, since closed cones sometimes still contain sap or moisture and can open unexpectedly indoors near heat, dropping debris on your table. A light spray of clear sealant also helps lock in their shape and prevents shedding over the following weeks.
Dried berries, like preserved rose hips or faux but realistic looking branches, add genuine color variation against the pinecones’ brown and tan tones. I tuck a few sprigs of dried eucalyptus or preserved boxwood throughout the arrangement for greenery that won’t wilt, then finish with one or two thick taper candles nestled directly among the pinecones for evening ambiance.
3. Craft No Carve Pumpkins Using Paint and Texture
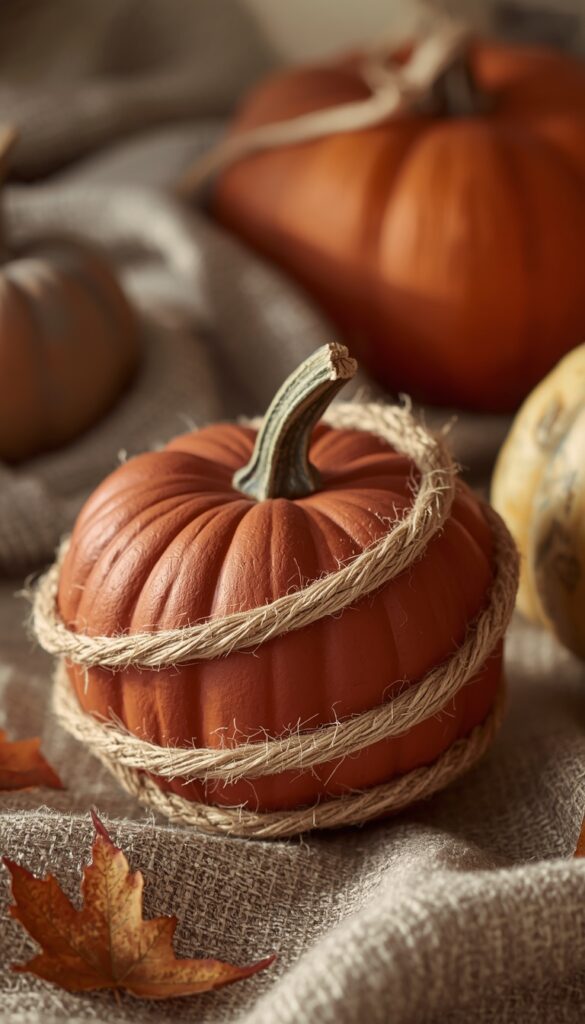
No carve pumpkins solve the real problem of carved pumpkins rotting within just days, especially in warmer climates where Halloween still falls during genuinely warm weather. I use real pumpkins for this project specifically, since the texture and slight imperfections of a real gourd take paint and embellishment far better than a smooth plastic version ever could.
Chalk paint works best here, since its matte finish actually adheres to a pumpkin’s slightly waxy skin better than glossy acrylic, which tends to bead up and slide around during application. I always do a light coat first, let it dry completely, then add a second coat for full, even coverage rather than trying to achieve solid color in one heavy application.
Texture additions elevate this project significantly beyond just solid paint. I wrap thin jute twine around the pumpkin’s ridges in a spiral pattern, securing it with hot glue at the stem, or press small dried flowers directly into a final coat of paint while it’s still slightly tacky. Both tricks add genuine dimension that a flat painted pumpkin alone doesn’t achieve.
4. Build a Cinnamon Stick Bundle for Warm, Natural Decor
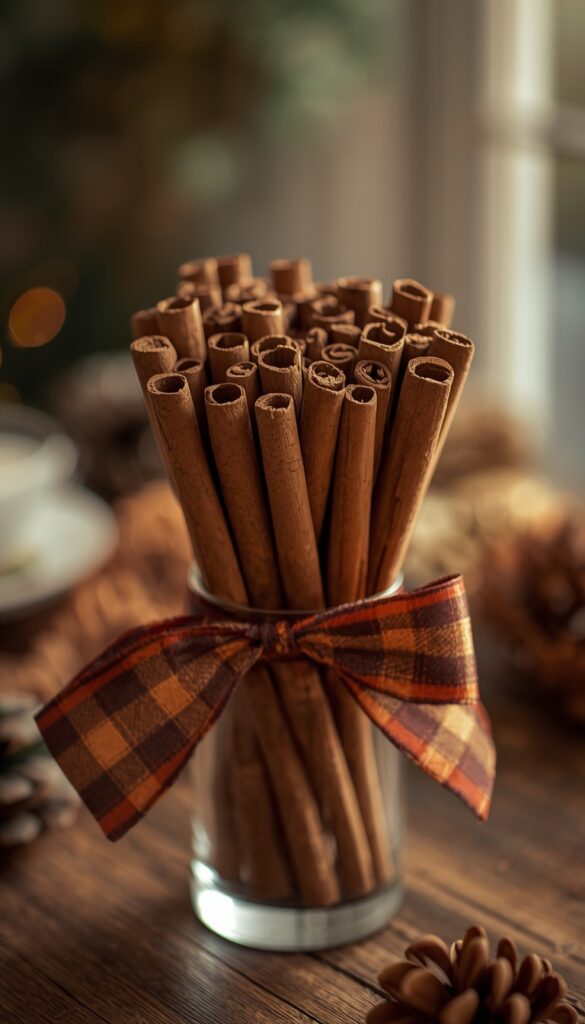
Bundled cinnamon sticks, tied together with twine or a small strip of plaid ribbon, make one of the simplest fall crafts that still genuinely elevates a room’s seasonal scent and texture. I buy cinnamon sticks specifically labeled for crafting rather than the smaller culinary jars, since craft grade sticks run longer and more uniform in size, which matters for how the finished bundle actually looks.
Bundle size affects where this piece works best in your space. I make smaller bundles of five or six sticks for tucking into a wreath or a centerpiece, and larger bundles of ten or more for standing upright in a tall vase or glass cylinder as a standalone accent. Securing the twine with a double knot, then trimming the ends at an angle, keeps the finished look clean rather than ragged.
Refreshing the scent matters more than people realize with this particular craft, since cinnamon’s fragrance does fade noticeably after a few weeks sitting out in open air. I add a few drops of cinnamon essential oil directly onto the sticks every couple of weeks, which revives the scent without needing to remake the entire bundle from scratch.
5. Make Pressed Leaf Art for Framed Wall Decor
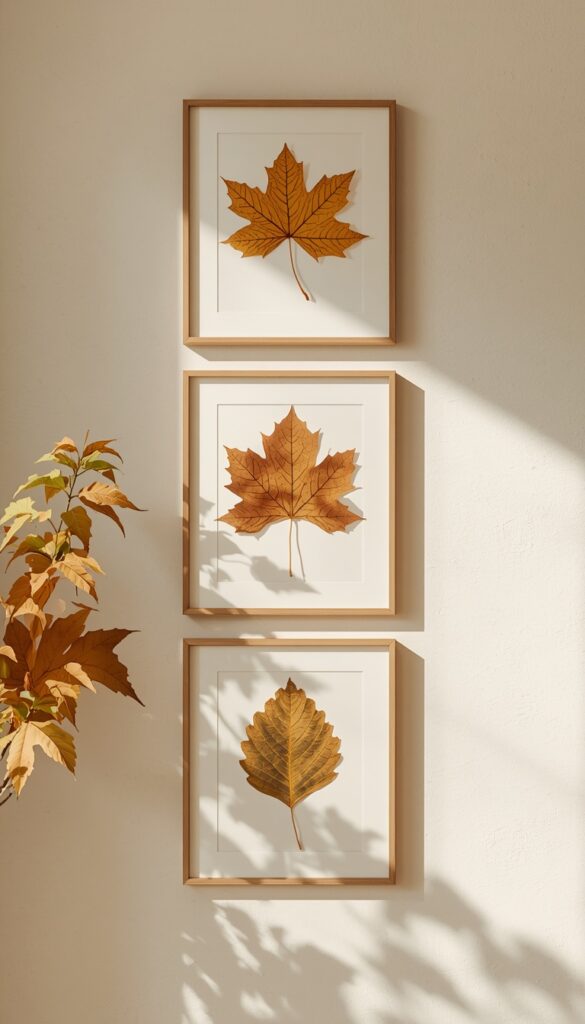
Pressed leaf art turns fallen leaves into genuinely beautiful, lasting wall decor, and the technique itself is simple once you know the timing that actually works. I collect leaves at peak color, just before they start curling or browning at the edges, then press them between heavy books with parchment paper on each side for at least one full week before they’re ready to use.
Leaf selection affects the final look significantly. I choose leaves with strong, defined shapes; maple, oak, or ginkgo work beautifully, rather than thin, delicate leaves that tend to crumble during the pressing process. Slightly varying leaf sizes within one frame, rather than uniform matching leaves, creates a more natural, intentional composition once everything’s arranged.
Mounting pressed leaves between two pieces of glass in a simple frame, rather than gluing them to paper, lets natural light pass through and genuinely highlights each leaf’s actual color and vein detail. I arrange three to five leaves per frame with generous negative space around each one, since overcrowding a single frame makes the composition feel cluttered rather than intentional.
6. Create a Felted Wool Acorn Set for Tabletop Display
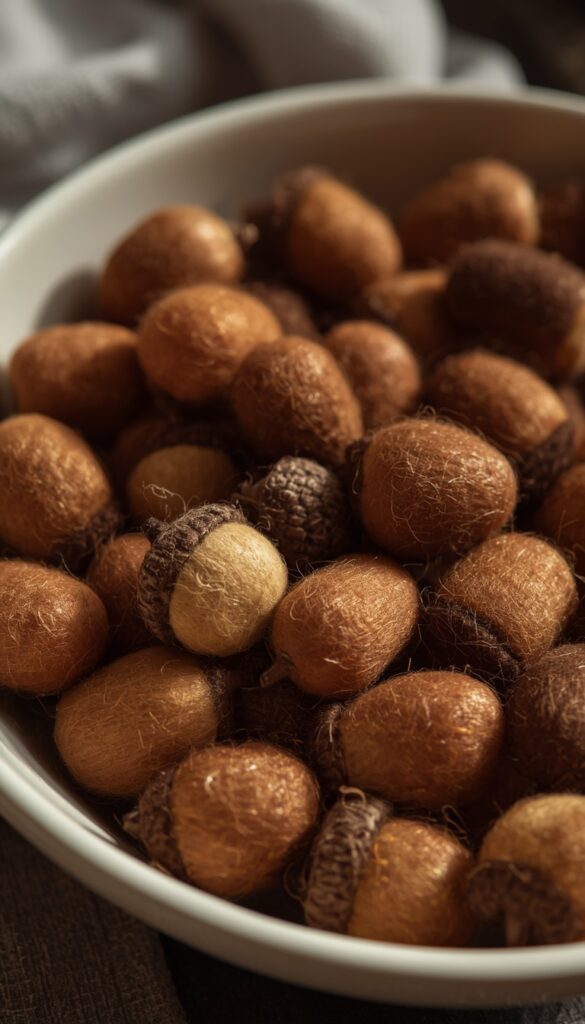
Felted wool acorns make a genuinely charming tabletop accent, and the needle felting technique, while it takes some patience, doesn’t require any prior craft experience to get a satisfying result. I use wool roving in warm brown and tan tones, wrapping and felting it into a rounded shape with a felting needle, then attaching a real acorn cap on top with a small dab of hot glue.
Roving density affects how the finished acorn holds its shape over time. I felt mine fairly densely, repeatedly stabbing the wool with the needle until it firmed up significantly, since a loosely felted acorn can lose shape or flatten slightly with regular handling. This step takes longer than people expect; budget at least twenty minutes per acorn for a properly dense result.
Real acorn caps, collected outdoors and dried for a few days before gluing, look far more convincing than craft store fake caps, which often have an obviously uniform, plastic look. I display a small cluster of these felted acorns in a shallow dish or scattered along a mantel, where their soft texture contrasts nicely against harder surfaces like wood or stone.
7. Make a DIY Fall Wreath with Dried Foliage
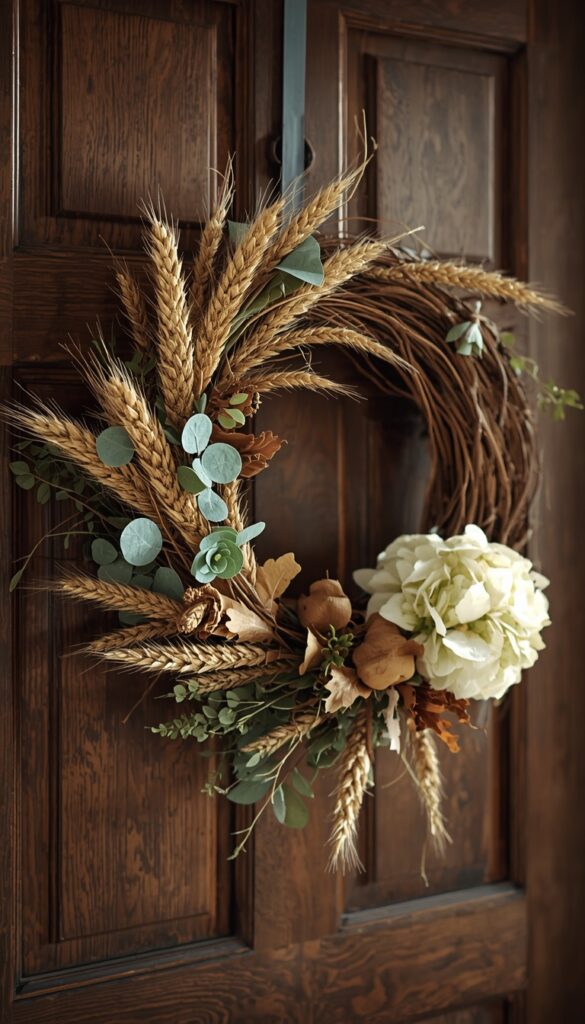
A handmade fall wreath built from dried foliage genuinely outlasts the fresh versions sold at most stores, which tend to wilt and brown within just a week or two once hung outdoors. I start with a simple grapevine or straw wreath base, then wire small bundles of dried wheat, preserved eucalyptus, and dried hydrangea directly onto the base, working in one consistent direction around the circle.
Wiring technique matters more than glue for outdoor durability, since hot glue can soften and fail in warmer fall afternoons, especially on a south facing door that gets direct sun. I use thin floral wire specifically, wrapping each small bundle securely before moving to the next section, which holds up reliably through wind and temperature swings far better than adhesive alone.
Layering technique creates a fuller, more professional looking wreath than simply attaching individual stems randomly. I work in small, overlapping bundles around the entire base, each bundle covering the wire from the previous one, which builds genuine depth and fullness rather than leaving visible gaps or a flat, sparse appearance once the wreath is fully assembled.
8. Craft Mini Pumpkin Candles from Real Pumpkin Shells
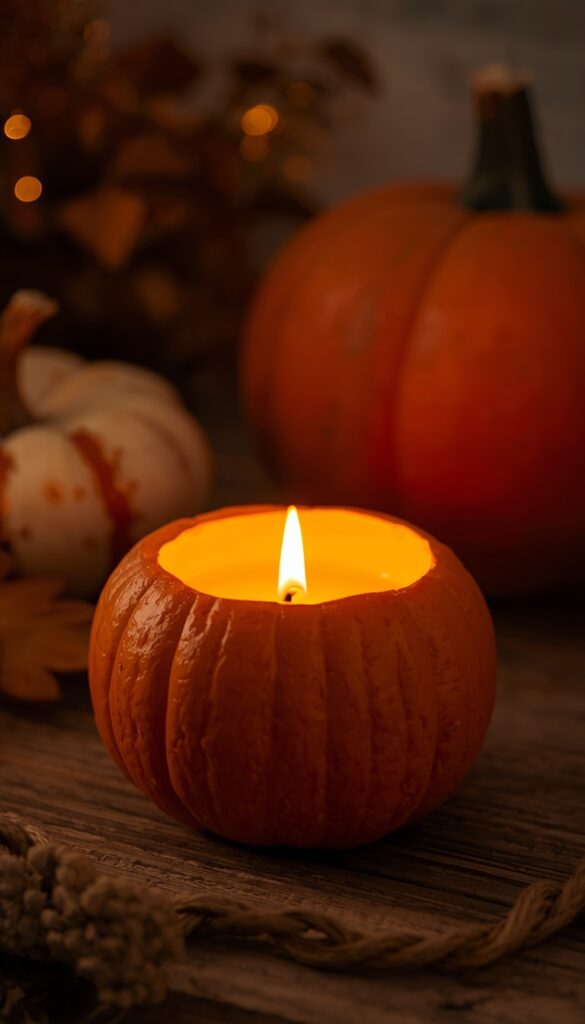
Hollowed mini pumpkins, filled with melted wax and a wick, make genuinely impressive seasonal candles that smell incredible once lit, especially if you add a touch of cinnamon or clove to the wax itself. I choose small sugar pumpkins specifically for this project, since their thicker flesh holds up better to the heat of melted wax than larger, thinner walled jack o lantern varieties.
Hollowing technique affects both the finished look and the candle’s actual burn safety. I scoop out the seeds and as much flesh as possible, leaving roughly half an inch of wall thickness, then let the hollowed pumpkin dry out for a full day before pouring wax, since residual moisture can cause unexpected sizzling or uneven burning once the candle is lit.
Soy wax works better than paraffin for this specific project, since it burns at a slightly lower, gentler temperature that’s less likely to scorch the pumpkin’s interior walls during a longer burn. I always trim the wick to a quarter inch after the first burn and never leave these candles burning unattended, since natural pumpkin shells do still carry some fire risk compared to manufactured candle vessels.
9. Make a Cozy Knit or Crochet Pillow Cover for Fall
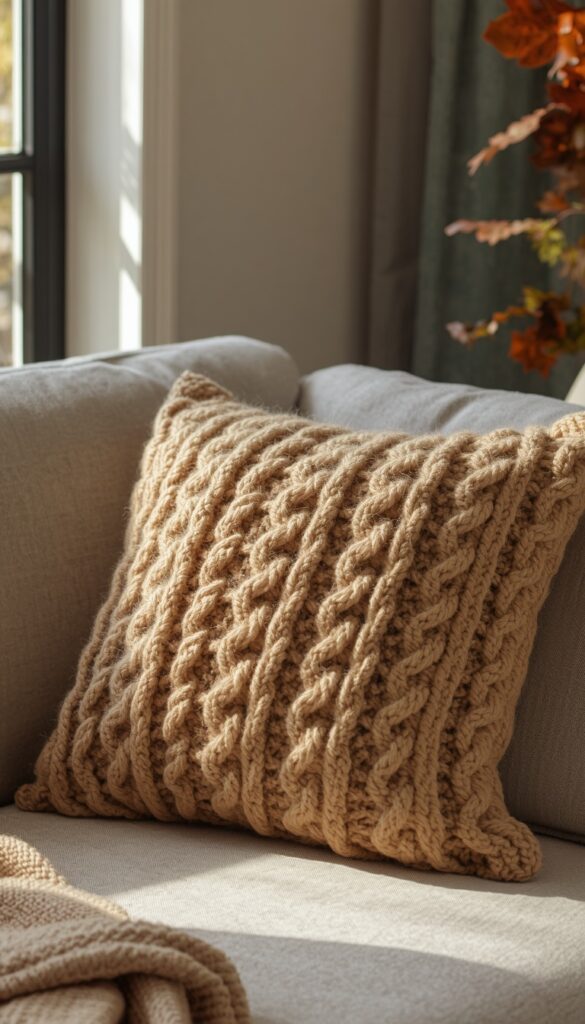
A handmade knit or crochet pillow cover adds genuine textural warmth to a sofa or bed, and even a fairly simple stitch pattern looks impressively polished once it’s finished and stuffed. I recommend a basic garter stitch or single crochet pattern for anyone newer to this craft, since the simplicity lets the chunky yarn’s natural texture do most of the visual work without needing complex stitch variation.
Yarn weight matters significantly for how the finished cover actually feels and looks. I choose a bulky or super bulky weight wool or wool blend yarn specifically for fall pillow covers, since the chunky texture reads as distinctly cozy and seasonal in a way a thinner, lighter yarn simply doesn’t achieve, even with the exact same stitch pattern underneath.
Sizing the cover correctly before starting saves real frustration partway through the project. I measure my actual pillow insert first, then knit or crochet to roughly ninety percent of that measurement on each side, since the natural stretch of most stitch patterns means a cover knit to the exact pillow size often ends up looser and less structured than intended once it’s actually stuffed.
10. Build a Mason Jar Luminary with Pressed Leaves
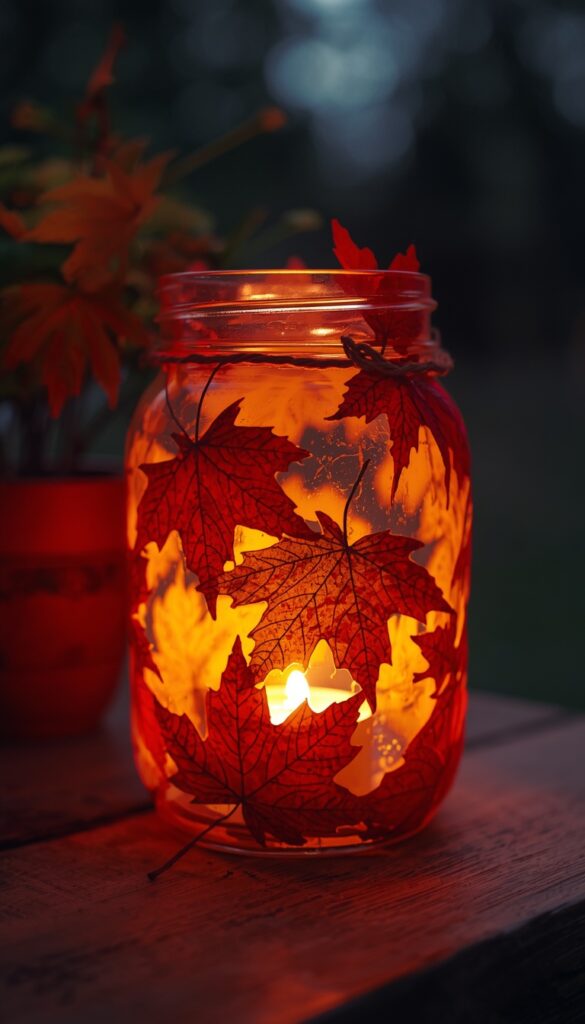
Mason jar luminaries, decorated with pressed leaves or fall foliage, create a genuinely warm, glowing accent for a porch, mantel, or dinner table once a candle or fairy lights go inside. I use a thin layer of decoupage glue brushed directly onto the jar’s exterior, then press dried leaves onto the wet glue before sealing with a second coat once the leaves are positioned.
Leaf selection should favor thinner, more translucent leaves over thick, waxy ones for this particular project, since light needs to pass through the leaf itself once a candle is lit inside. I’ve found maple and birch leaves work beautifully here, letting warm light filter through their natural vein patterns in a way thicker leaves like oak simply block instead.
Battery powered tea lights are genuinely the safer choice for this project, especially with the decoupage glue and dried leaf material directly on the jar’s exterior surface. I reserve real flame candles only for luminaries I’m using briefly and watching directly, since the combination of dried plant material and an open flame deserves real caution regardless of how charming the finished look turns out.
11. Make a Twig and Branch Wall Arrangement
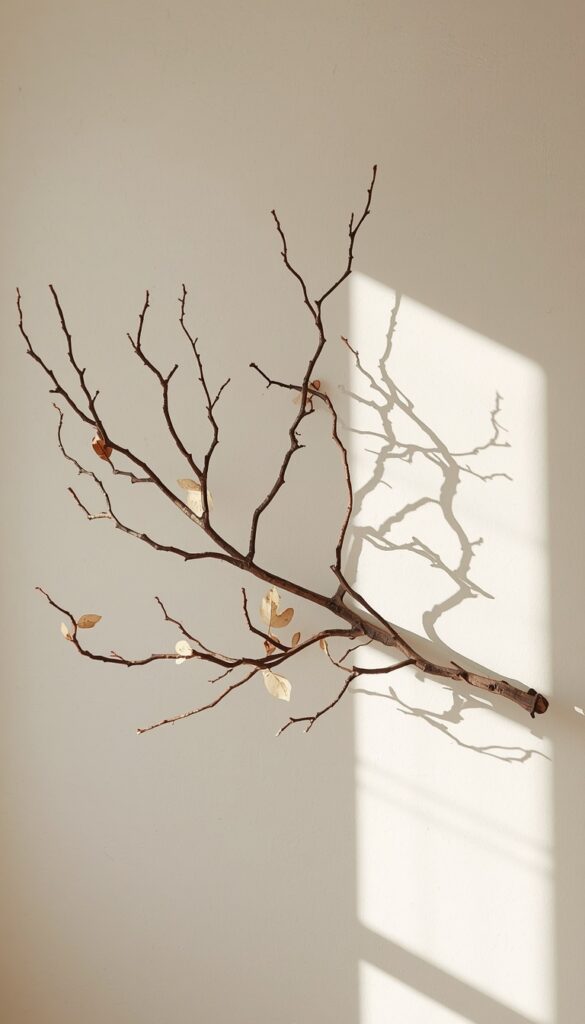
A wall arrangement built from collected twigs and bare branches brings genuine sculptural interest into a room, echoing the season’s natural transition as trees lose their leaves outdoors. I collect mine during a fall walk specifically, looking for branches with interesting natural curves or forking patterns rather than perfectly straight pieces, since the irregular shapes read as more organic once arranged.
Mounting technique matters for how secure and intentional this piece looks on the wall. I use small, nearly invisible wire loops or clear fishing line looped around each branch’s natural curve, then hang from a single nail or hook, letting the branches fan outward in a loose, asymmetric pattern rather than a rigid, symmetrical arrangement.
Adding a few dried leaves or small clusters of dried berries directly onto the branches with a dab of hot glue breaks up the bare wood and adds seasonal color without overwhelming the piece’s overall simplicity. I keep this addition minimal, just a few accents, since the branches’ natural form should remain the genuine visual focus of the entire arrangement.
12. Create Hand Painted Fall Leaf Coasters
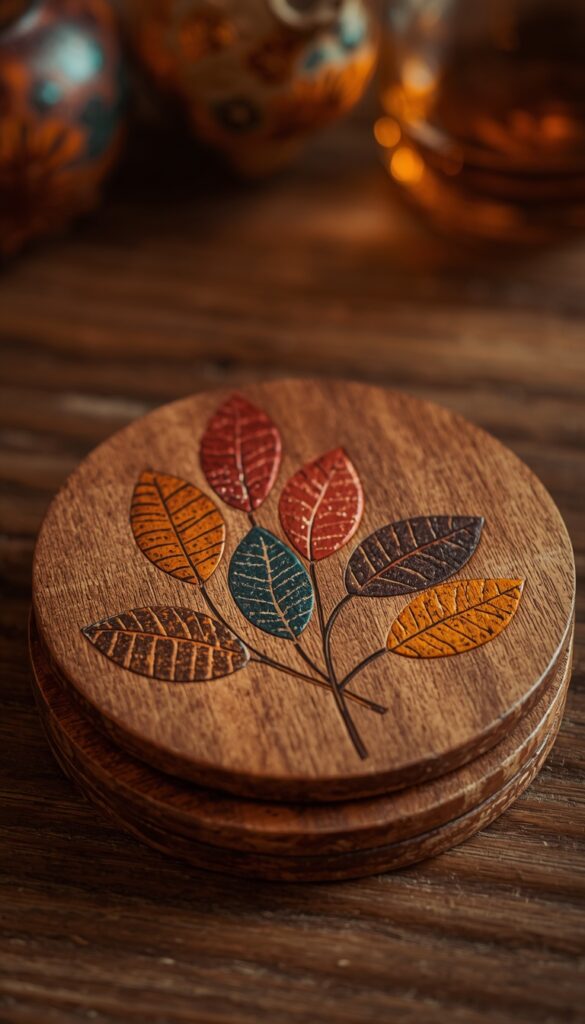
Hand painted leaf coasters, made from sliced wood rounds or simple cork bases, make a genuinely useful fall craft that doubles as a thoughtful handmade gift. I trace a real leaf onto each wood round first using a pencil, then fill in the traced shape with acrylic paint in warm amber, rust, or deep red tones, layering two thin coats for the most even coverage.
Sealing the finished paint matters significantly for actual everyday use as coasters, since unsealed acrylic paint can scratch or wear away with repeated contact from glasses and mugs. I apply two coats of a clear, food safe polyurethane sealant once the paint fully cures, waiting at least 24 hours between the painting and sealing steps for the best, most durable result.
Adding fine gold or copper detail lines along the leaf’s veins, using a thin paintbrush after the base color dries, elevates these from simple craft projects into something that genuinely looks intentional and well made. I keep this metallic detailing minimal, just the main vein lines, since too much gold accent can overwhelm the leaf’s natural, simple silhouette.
13. Make a Dried Hydrangea Wreath for Lasting Color
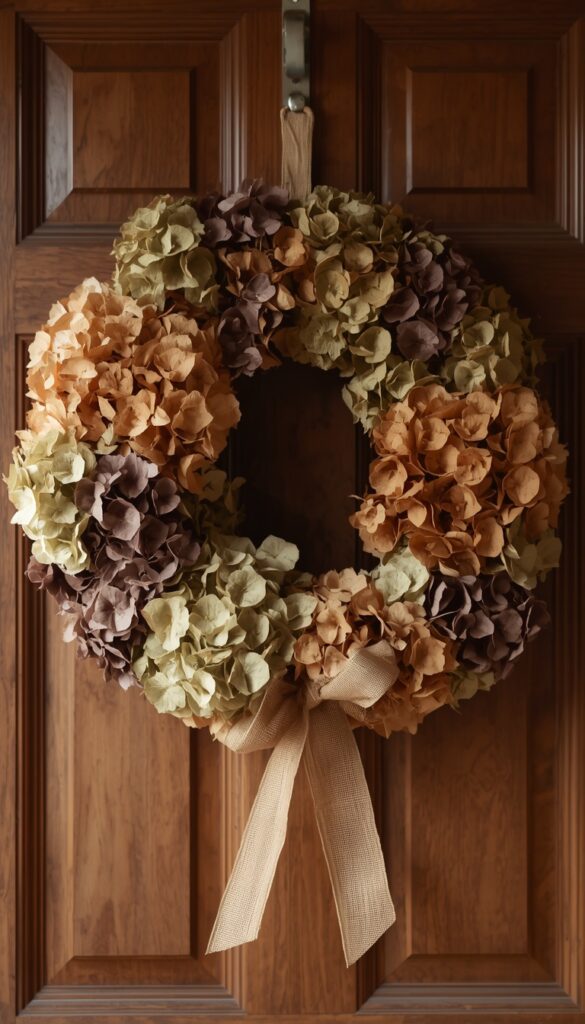
Dried hydrangea blooms, with their naturally papery texture and soft, faded color variation, make a genuinely beautiful wreath base that lasts the entire fall season without wilting the way fresh flower wreaths inevitably do within days. I dry mine by hanging fresh cut hydrangea stems upside down in a dark, well ventilated space for roughly two weeks before they’re ready to use in any arrangement.
Color variation within dried hydrangea blooms actually works in this project’s favor rather than against it. I select blooms ranging from soft sage green through dusty mauve and warm tan, wiring each cluster directly onto a grapevine wreath base, since this natural color range creates visual depth that a single, uniform colored wreath simply can’t replicate.
Wiring technique should overlap each hydrangea cluster slightly, covering the stem and wire from the previous section, the same layering approach used for other dried foliage wreaths. I finish mine with a simple raffia or burlap ribbon bow at the bottom, which echoes the wreath’s natural, slightly rustic texture better than a glossy, formal ribbon would.
14. Build a Cozy Reading Nook Blanket Ladder Display
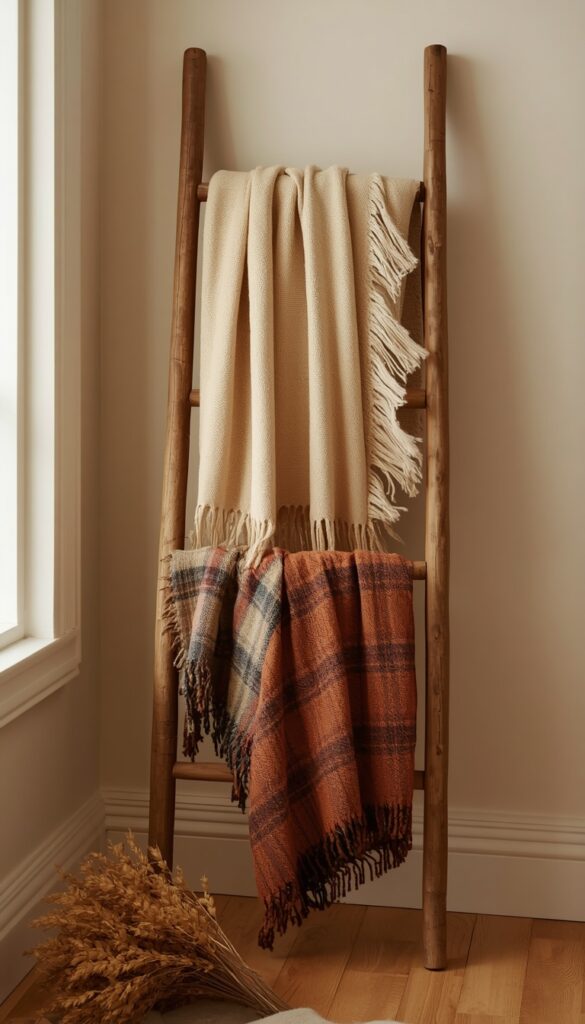
A wood blanket ladder, leaned against a wall and draped with several seasonal throws, creates genuine functional storage while doubling as a styled fall decor piece for a reading nook or living room corner. I build mine from simple pine boards and dowel rods, sanding and applying a light wood stain rather than paint, since the natural wood grain suits fall styling better than a solid painted finish.
Throw selection and draping order matter for how intentional this display looks once it’s finished. I layer a chunky cream knit throw on the bottom rung, a plaid flannel blanket in the middle, and a smaller, more textured throw on top, varying both color and texture across the three rungs rather than using three similar blankets that blend together visually.
A single seasonal accent, a small bundle of dried wheat or a mini pumpkin tucked at the base of the ladder, finishes this display without overcrowding it. I keep the ladder itself the clear visual anchor here, since too many added decorations around its base start competing with the genuinely simple, functional charm the piece offers on its own.
Bringing It All Together
Fall crafting rewards patience and a willingness to let things look a little imperfect, which is honestly part of the charm. Every project here uses real, natural materials that age and change slightly over the season instead of staying frozen in one static moment, and that’s exactly what makes them feel genuinely seasonal rather than just decorative. I’ve made nearly every one of these more than once, tweaking small details each time until they actually worked the way I wanted. You don’t need to tackle all fourteen this year. Pick one fall craft idea that excites you, set aside an afternoon, and let the process itself be part of the cozy season you’re creating.
Frequently Asked Questions
Q: How long do dried orange slices last as fall decor? A: Properly dried orange slices, fully dehydrated with no remaining moisture, typically last several months when kept away from humidity. Storing them in an airtight container between uses extends their life even further. Watch for any softening or mold, which signals they weren’t fully dried before storage.
Q: What’s the easiest fall craft for beginners? A: Dried orange slice garlands and cinnamon stick bundles require almost no special skill or equipment beyond an oven and some twine. Both projects forgive small mistakes easily and still look genuinely polished, making them perfect starting points if you’re newer to seasonal crafting altogether.
Q: Can you use a real pumpkin for no carve painted designs? A: Yes, and real pumpkins actually take paint and texture better than artificial versions, since their slightly bumpy, organic surface holds embellishments like twine or pressed flowers more securely. Just remember that real pumpkins eventually soften, so plan to enjoy your painted design for several weeks rather than indefinitely.
Q: How do you keep a fall wreath from falling apart outdoors? A: Wiring foliage bundles directly onto the wreath base, rather than relying on hot glue alone, holds up far better against wind and temperature changes. Choosing a covered porch location, away from direct rain exposure, also significantly extends how long a handmade dried wreath stays intact and looking fresh.
Q: What yarn works best for a cozy fall knit project? A: Bulky or super bulky weight wool or wool blend yarn creates the chunky, textured look most associated with cozy fall knitting projects. This heavier weight also works up faster than thinner yarn, which matters if you’re hoping to finish a pillow cover or throw within just a few crafting sessions.
Q: Are pumpkin candles safe to actually burn? A: They can be, with reasonable precautions. Hollowing the pumpkin thoroughly, letting it dry before pouring wax, and never leaving the candle burning unattended all reduce risk significantly. Soy wax burns gentler than paraffin, making it a safer choice specifically for this natural, slightly more fire conscious project.
Q: How do you press leaves without them turning brown? A: Collecting leaves at peak color, before they naturally start browning on the tree, makes the biggest difference in the final result. Pressing them quickly after collection, between parchment paper inside heavy books, also helps lock in color better than waiting several days while the leaves continue drying out unpressed.