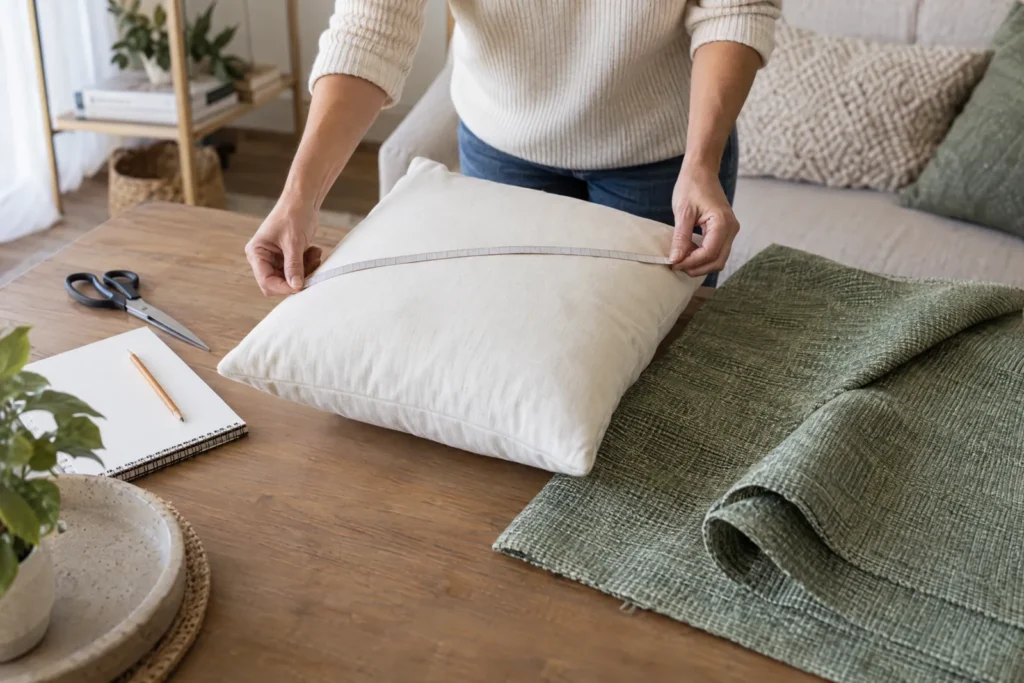
For a removable throw-pillow cover without a sewing machine, start with the insert, not a nominal pillow size. This article uses one specific construction: a removable three-panel envelope cover with one front panel and two identical back panels. The rear panels overlap at the center opening, so the insert is not glued into the cover.
For this design, measure the finished insert width and height, then choose three planning values: the outer allowance per edge, the finished rear overlap, and the opening-edge hem turn. The cut list is:
Front panel:
W + 2swide byH + 2shigh
Each of two equal back panels:(W + O) / 2 + s + ewide byH + 2shigh
Here, width is the horizontal direction and height is the vertical direction. These formulas apply only to this three-panel envelope design and its stated assumptions. They are not a general rule for every no-sew pillow project.
Before using no-sew pillow cover measurements
Measure the actual insert you plan to use. A label that says 18 inches may describe a nominal size, while an overfilled or rounded insert can occupy more space than a flat ruler measurement suggests. Record finished width from left to right and finished height from top to bottom without forcing the insert flat. Note whether it is plump, compressible, lopsided, or stretchy before choosing allowances.
A stable woven fabric and a fabric with visible give will not behave alike. Thickness also matters because adhesive folds add bulk. Your chosen fit may be relaxed or close, depending on the insert, fabric, and bonding product’s directions.
Make a rough mock-up before cutting final fabric. Paper, inexpensive fabric, or another stable material can show whether the insert fills the cover, the overlap stays closed, and the dimensions work. This is especially important for a compressible insert, directional print, bulky fabric, or stretchy fabric.
Define the five variables
Use these names throughout the worksheet and cut list:
Wis the finished insert width, measured horizontally.His the finished insert height, measured vertically.sis the chosen outer allowance on each edge. It is added around the front and around the outer perimeter of each back panel for this design. It is a planning parameter, not a universal seam allowance.Ois the desired finished rear overlap. It is the amount the two back panels overlap across the center opening after their opening edges are folded or bonded.eis the opening-edge hem turn reserved on the inner edge of each back panel before that edge is folded or bonded.
Keep O separate from s and e. An overlap is part of the closure geometry. The outer allowance and opening-edge hem turn account for different edges and should not be hidden inside one unexplained addition.
The cut-list formulas
Front panel
Cut one front panel:
W + 2s wide by H + 2s high
The 2s means one outer allowance on each side for width and one on each end for height. Keep a rectangular insert’s width and height in their original directions, especially with a directional design.
Each back panel
Cut two identical back panels:
(W + O) / 2 + s + e wide by H + 2s high
Both backs have the same horizontal width and vertical height before edge finishing. W + O is the effective span needed after overlap is accounted for; division by two makes the panels equal. s adds the outer allowance and e reserves the inner opening-edge hem turn on each back.
The overlap is created at the rear center opening. It is not a second opening, a tie closure, or a separate flap formula. Tied fringe, wrap, braided-strip, napkin, and other no-sew methods have different geometry, so their measurements should not be combined with this calculation.
Illustrative 18 by 18 inch example
Illustrative example, not a universal direction:
W = 18 inH = 18 ins = 0.5 inon each outer edgeO = 4 infinished rear overlape = 0.5 inopening-edge hem allowance per back panel
The front panel is:
18 + (2 x 0.5) = 19 in wide by 18 + (2 x 0.5) = 19 in high
Each back panel is:
(18 + 4) / 2 + 0.5 + 0.5 = 11 + 1 = 12 in wide by 18 + 1 = 19 in high
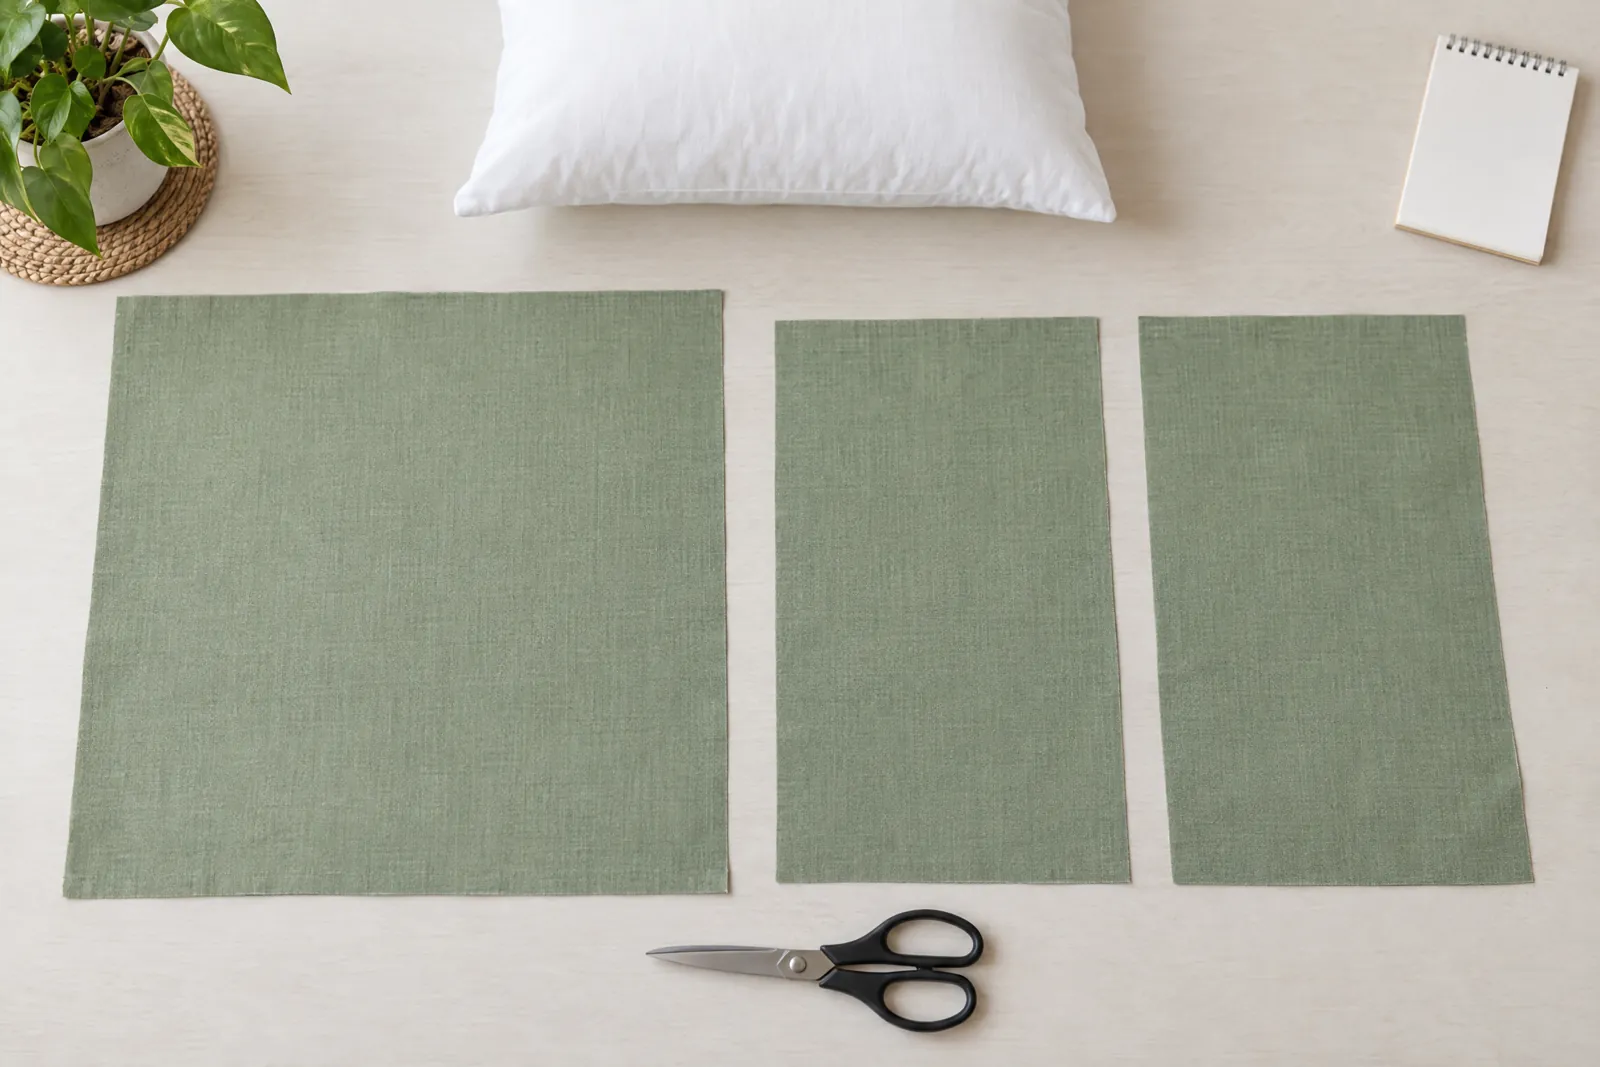
The cut list is therefore one 19 by 19 inch front and two 12 by 19 inch backs.
Pair arithmetic check
The two back panels have 24 inches of total cut width. Subtract the two outer allowances, 0.5 + 0.5 = 1 inch, and the two opening-edge hem allowances, 0.5 + 0.5 = 1 inch. The effective span is:
24 - 1 - 1 = 22 in
That equals the insert width plus the selected overlap:
18 + 4 = 22 in
The example values are illustrative planning parameters, not standards. Insert thickness, desired tightness, fabric give, and the selected product may require different choices. Mock up and recalculate before final cutting.
Keep fractional calculations in decimal inches until the final cut list. Round only when your ruler or cutting method requires it. Apply the same rounding decision to both back panels, and never round one back independently from the other.
Worksheet 1: Insert and fit inputs
“Finished insert size” means the size of the actual insert in hand, not merely its package label. Note fullness and compression because they can change how much room the cover needs.
| Field | Entry |
|---|---|
Insert width W |
[enter] in |
Insert height H |
[enter] in |
| Insert thickness or fluffiness notes | [enter] |
| Insert shape: square, rectangular, overfilled, or compressible | [enter] |
| Fabric stretch or give: none, some, or substantial; notes | [enter] |
| Desired cover fit: relaxed, close, or other | [enter] |
| Mock-up material and result | [enter] |
After the mock-up, decide whether the insert sits comfortably. If the cover looks strained or unusually loose, change the parameters deliberately and recalculate all pieces.
Worksheet 2: Design parameters
These entries belong to the selected removable three-panel envelope design. They are chosen parameters, not numbers copied from a universal envelope formula.
| Field | Entry |
|---|---|
Outer allowance per edge s |
[enter] in |
Finished rear overlap O |
[enter] in |
Opening-edge hem allowance per back panel e |
[enter] in |
| Adhesive or bonding product selected | [enter] |
| Product label permits this fabric and construction? yes, no, or unclear | [enter] |
| Why these parameter choices fit this fabric and use | [enter] |
Choose s, O, and e after considering insert thickness, fabric stretch, edge finish, and the actual adhesive instructions. If a value does not suit the material and use, pause and mock up instead of relying on a familiar-looking number.
Worksheet 3: No-sew pillow cover measurements calculator
Write the dimensions in the same orientation every time: width first, height second.
| Piece | Calculation | Final cut |
|---|---|---|
| Front | W + 2s by H + 2s |
[enter] in wide x [enter] in high |
| Back A | (W + O) / 2 + s + e by H + 2s |
[enter] in wide x [enter] in high |
| Back B | Same as Back A | [enter] in wide x [enter] in high |
Duplication check: Back A must equal Back B exactly before edge finishing. If one differs, correct or recalculate both. Do not trim only one back to force the overlap.
Worksheet 4: Fabric, layout, and bond check
Cut dimensions alone do not establish how much fabric to buy. Compare the pieces with usable fabric width between selvages and with the actual print or grain direction.
| Check | Entry or decision |
|---|---|
| Usable fabric width between selvages | [enter] in |
| Required cut dimensions fit usable width? yes, no, or layout needed | [enter] |
| Nap, pile, print, stripe, or one-way pattern | [enter] |
| Grain and selvage orientation chosen | [enter] |
| Pattern matching or motif placement allowance | [enter] |
| Fabric prewashing or manufacturer preparation instructions checked? yes, no, or not applicable | [enter] |
| Adhesive compatibility test on a scrap completed? yes or no | [enter] |
| Bonded sample peeled or tested according to product directions? yes or no | [enter] |
| Full cure and care instructions recorded from product label | [enter] |
| Final cut layout approved before cutting? yes or no | [enter] |
Selvages, nap, one-way motifs, and pattern matching can reduce an efficient layout. Check the real usable fabric, not just nominal bolt width, before buying yardage.
For the illustrative cut list, a single 19-inch-high cutting row with the three pieces side by side would use 19 + 12 + 12 = 43 inches of usable fabric width, plus cutting gaps and edge allowance. It would use at least 19 inches of fabric length, plus any cutting, print or shrinkage allowances, only if the actual usable width and fabric direction permit that row. This is a layout example, not a minimum bolt width or a yardage promise. If the fabric is narrower, draw a different layout and recompute the length before buying.
High-level assembly for this exact design
- Prepare and test the fabric. Follow the fabric manufacturer’s preparation directions, including prewashing guidance. Test the product on an exact-fabric scrap with the same layers and label-directed heat, pressure, moisture, or pressing cloth.
- Cut one front and two identical backs. Mark width and height, keeping the backs aligned for comparison before bonding.
- Finish the opening edges first. This is the inner vertical edge of each back facing the center rear opening. Fold or bond the reserved
eturn according to the product directions. Iron-on web, hem tape, and liquid fabric glue do not necessarily use the same method. - Plan the overlap. Place the finished backs over the front with opening edges crossing at the rear center. Confirm the selected
Oand that the insert can enter. - Bond the outer perimeter. Follow the product’s sequence around the outer edges, maintaining
sand keeping adhesive out of the opening. - Allow full cure. Wait for the product’s stated full cure or set process before inserting or using the cover. Its label controls timing, heat, pressure, ventilation, and handling.
Liquid fabric glue and heat-activated bonding web are different methods with different application and cure processes. Coated, fuzzy, silky, thick, or heat-sensitive fabrics may affect compatibility. Choose a product labeled for your specific fabric and application.
Care and use limits
Do not assume the cover is washable because a product is called fabric glue, bonding web, or hem tape. Washability depends on the specific adhesive, fabric, construction, and care directions. Read both manufacturers’ instructions, record care in Worksheet 4, and test a bonded sample if cleaning will be needed.
This planning method does not establish durability, weather resistance, waterproof performance, or seam strength equal to sewing. It is intended for a decorative throw pillow. Do not use a bonded decorative cover for infant sleep, bedding, or load-bearing applications. Outdoor use requires separate product, fabric, and construction suitability checks rather than an assumption based on the word “fabric.”
Why another tutorial may show different dimensions
A measurement can be correct for one construction and wrong for another. Tied fringe uses knot spacing, a wrap may use one long rectangle, and a napkin method starts with a purchased item’s dimensions. Fusible web may allocate material differently from liquid glue. These are not interchangeable cut lists.
This calculator stays narrow: one front, two equal backs, a finished rear overlap, outer allowances, and an opening-edge hem turn. If you switch construction or panel arrangement, redraw its geometry instead.
FAQ
Is the cover removable?
Yes. The two back panels overlap and the insert is not bonded into the finished perimeter, so it can be taken out through the rear opening if the fit permits.
How much overlap should I choose?
Choose O after considering the insert, fabric, and desired rear appearance. The 4-inch example is not universal. Test the opening in a mock-up.
What if my ruler cannot show the decimal result?
Keep arithmetic in decimal inches, then make one rounding decision for the final cut list. Apply it to both backs. If rounding changes fit or overlap, check the revised dimensions in a mock-up.
Can I calculate yardage from these formulas alone?
No. Compare the pieces with usable width, selvages, grain, nap, pattern direction, motif placement, and waste. The 43-inch figure describes the width occupied by a possible single-row layout, not a universal fabric or yardage requirement.
When should I mock up again?
Repeat the mock-up whenever you change the insert, fabric, adhesive, fit, overlap, edge finish, or layout, or if a bonded scrap peels, puckers, shows heat damage, or fails its product-directed test.
For color and fabric styling after the measurements are settled, see 15 fall pillow covers that set the vibe. It is a decor follow-up, not a size authority.