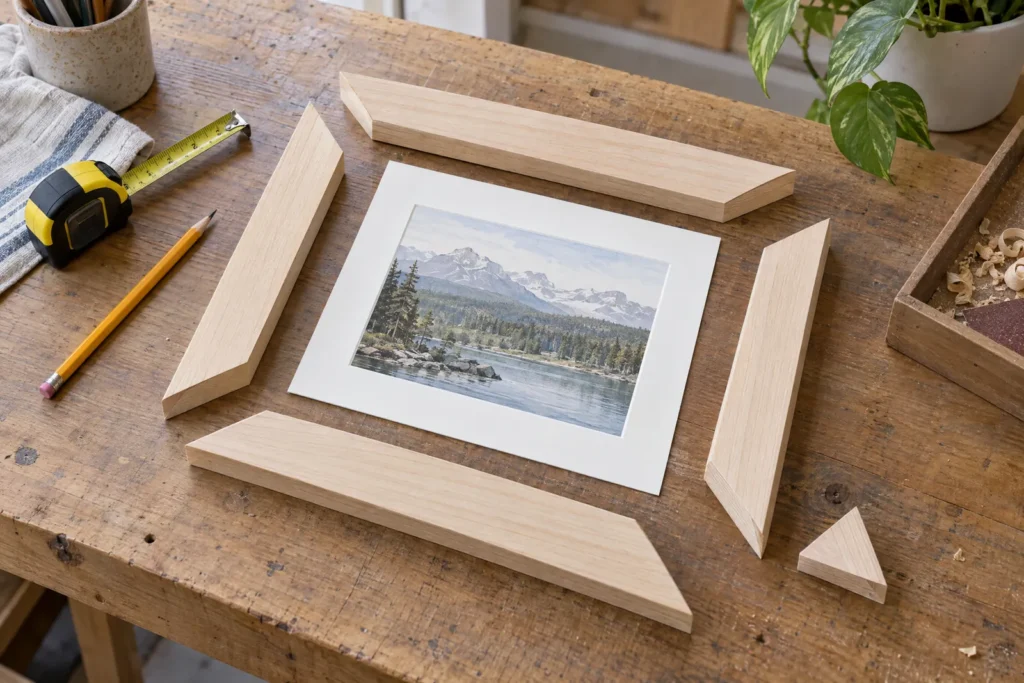
Measure two different edges for two different jobs. First, measure the rear rabbet seat so the physical stack of glazing, mat, artwork, and backing can fit. Then establish the outside long tips for the two pairs of 45-degree miters. The front sight opening is a separate measurement: it tells you what will be visible from the room side and must be checked at the face of the frame, not inferred from the rear opening.
That distinction is the key to learning how to measure picture frame molding without trusting a number that belongs to a different profile or saw setup. In U.S. woodworking, you may also see moulding, especially in framing references. The spelling varies, but the measurement problem is the same.
This worksheet is for one simple, flat, rectangular, four-piece wood frame with four 45-degree miters. It does not cover floater frames, compound miters, oval frames, ornate pattern matching, liners, or complex joinery. The goal is a labeled, test-verified picture frame cut list for your actual contents and actual profile, not a universal calculator.
Why the reference edge matters
A picture can be labeled 8 by 10 inches while the part that enters the frame is a mat outside dimension, a glazing sheet, a mounted print, or an entire backing stack. Those are not interchangeable. Two frames can accept the same art but require different cuts because their rabbets sit in different places, their faces have different widths, and their lips cover different amounts of the front edge.
A calculator can also appear to disagree with a tape measure because the calculator may start at a mat edge, rabbet corner, short point, outside edge, or a shop-specific stop. Before writing any number on a cut list, name the edge that number describes. In this article, the rear opening is called the rabbet-seat opening, and a corner-to-corner measurement across the outside tips of a finished miter pair is called the outside long-tip length.
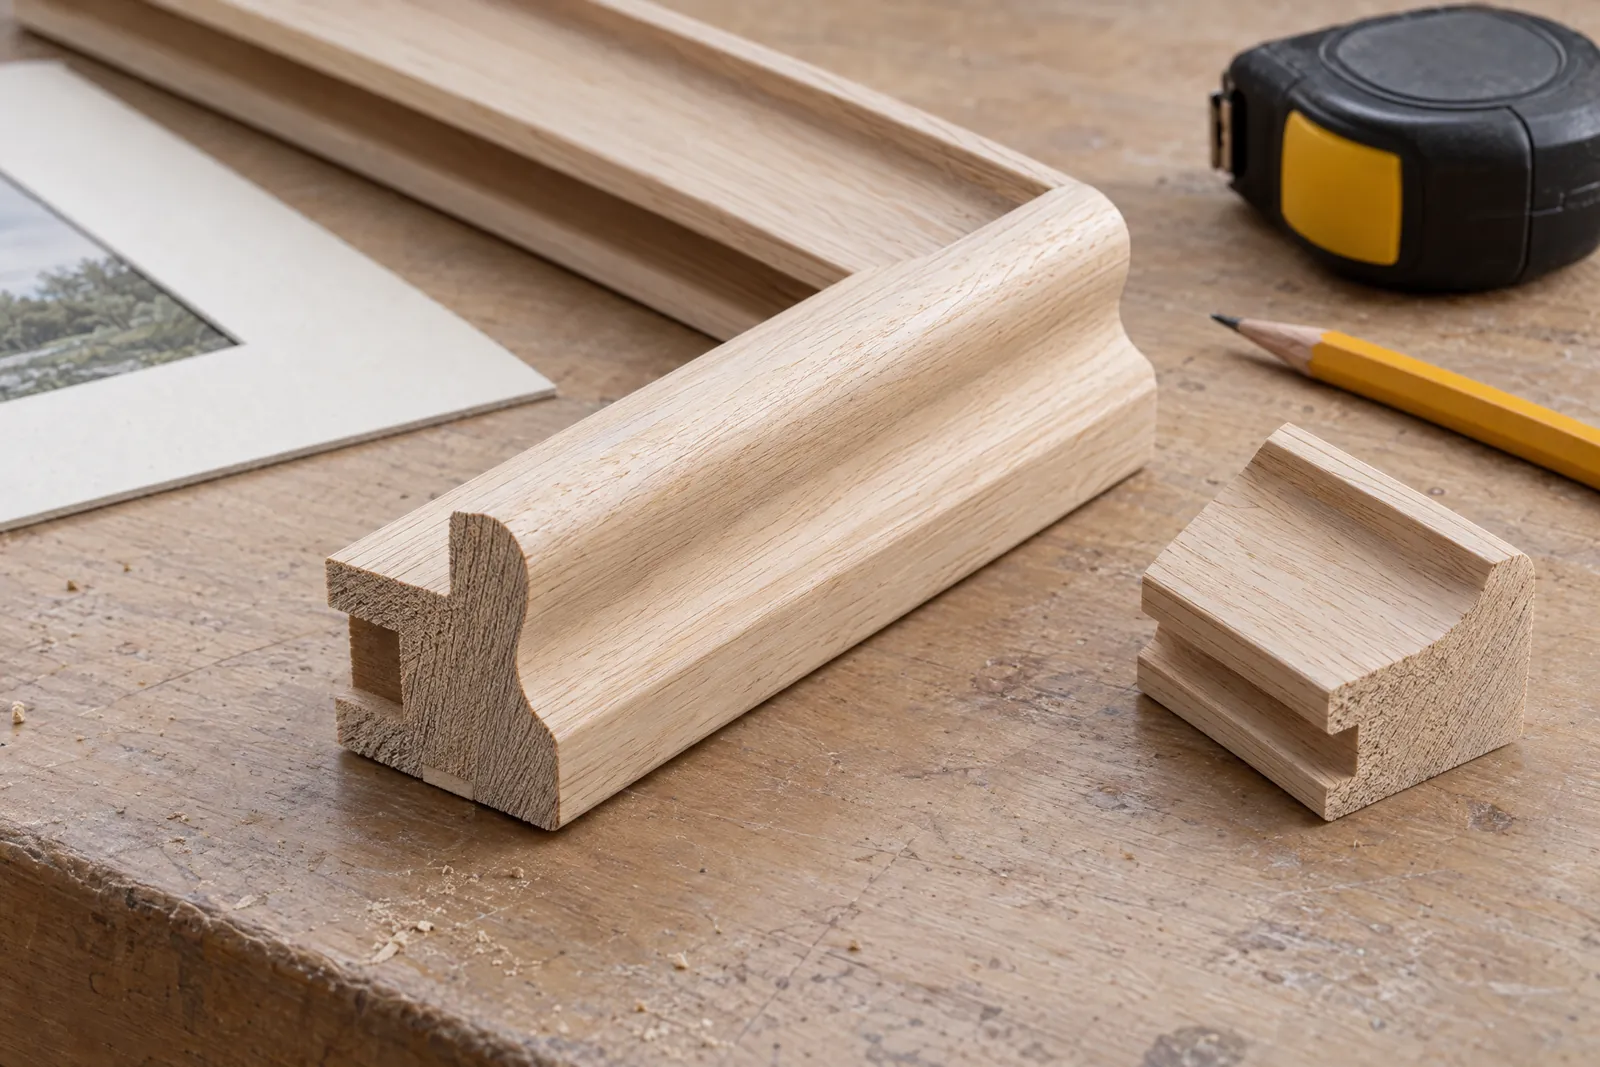
The rear rabbet is the recess that receives the framing package. Its depth or height relates to stack thickness. Its width, sometimes called the lip or ledge, controls coverage at the front edge. The visible opening, often called the sight opening, is the area left exposed when you look through the front of the frame. A wider lip can hide more of the art or mat without changing the stack thickness.
For useful profile vocabulary, the Frame Destination explanation of picture-frame profiles is a helpful terminology reference. Use its definitions to label your sample, then measure your own piece rather than assuming a nominal stock size describes the profile.
Start with the real framing stack
Put together the components that will actually live in the frame, or use components already cut for the project. Measure the physical art or photograph, mat outside dimensions if there is a mat, glazing, and backing. A mat window is the opening that reveals the picture; the mat outside is the full sheet that enters the rabbet. Write both down when both apply.
Do not silently substitute an art size for a mat outside size. If a photograph is mounted to board, the board may be the component that controls the rear fit. If the glass is already cut, measure it. If the backing is a slightly different size, record that difference instead of averaging it away.
Stack thickness deserves its own check. Add the actual glazing, mat or mats, art, mounting board, and backing thicknesses, then compare the total with the measured rabbet height or depth. A recess that is too shallow can leave contents proud, bowed, or under pressure. The fit should hold the package without forcing it.
Six reference points to record
Use this table as a paper worksheet or copy it into your project notes. Mark N/A when a component does not apply. The final row is important because a repeatable tool datum is only useful if it matches how the profile sits against your fence, stop, or measuring reference.
| Reference point | Reader records | What to identify before making a cut list |
|---|---|---|
| 1. Physical contents | Art/photo width: ____ Height: ____ |
Measure the retained object at the edge that will be covered or held. Note whether it is loose, mounted, or already attached to a mat. |
| 2. Mat geometry | Window width: ____ Height: ____ Outside width: ____ Height: ____ |
Keep the visible mat window separate from the mat outside. The window describes presentation; the outside may control rear fit. |
| 3. Glazing and backing | Glazing width × height: ____ Backing width × height: ____ |
Record actual glass or acrylic and actual backing if they are already cut. Mark N/A if either is not part of the stack. |
| 4. Stack and rear seat | Full stack thickness: ____ Rabbet-seat opening target: ____ × ____ Supplier/component allowance: ____ |
Measure the assembled stack and the actual rear rabbet seat. State whether any allowance is per side or total per dimension, and record its source. |
| 5. Front profile | Sight opening target: ____ × ____ Face width: ____ Lip/ledge width: ____ Rabbet height/depth: ____ |
Check the sight opening from the front. Measure face and lip on the actual profile. Do not use the rear opening as a substitute. |
| 6. Cut datum and verification | Rabbet-to-outside offset: ____ Fence/stop contact edge: ____ Long-tip result: ____ Scrap test: ____ |
Label front, back, rabbet, inside, and outside. Name the exact 45-degree profile reference used for the outside long tip and record the test result. |
This inventory prevents the most common category error: asking one dimension to do three jobs. The art size helps describe the contents. The rabbet seat accepts the stack. The sight opening controls the front view. The face, lip, and rabbet geometry translate the rear opening into a specific profile and long-tip reference.
Measure the profile, not just the stick
Select one representative piece of the exact moulding you intend to use. Look at the end grain or a clean cross-section and mark the front, back, inside edge, outside edge, and rabbet. Measure the finished face width rather than relying on a label such as 2-inch moulding. That label may describe a nominal dimension, a broadest projection, or a catalog family rather than the visible face you need.
Measure the lip or ledge from the front opening toward the rabbet. Then measure the rabbet height or depth in the direction that receives the stack. Finally, measure the distance from your chosen rabbet-seat reference to the outside long-tip reference along the actual 45-degree profile. That offset is profile-specific. The datum must match the actual 45-degree profile and the way that profile is supported against the tool reference.
A useful descriptive example is the Fine Woodworking workshop method for finding picture-frame moulding length. Its scoped 45-degree geometry example uses a named rabbet-to-outside distance, which is exactly why naming the datum matters. Read it as a geometry example, not as permission to copy its allowance or measurement edge onto another profile.
Likewise, the Logan Graphic guide to cutting picture-frame moulding describes placing a rabbet corner against a marked fence reference for a particular saw practice. That is a useful reminder to use a consistent corner and pair orientation, not a universal saw reference for every setup. Your tool manual, fence, stop, and profile may require a different named contact edge.
A hypothetical example, checked from the rear seat
The following numbers are hypothetical and are not measured from a photo. They show the order of the arithmetic only.
Suppose the real framing stack measures 8 by 10 inches outside. The owner selects a total 1/8-inch back-seat clearance per dimension after checking the actual components and the supplier or frame fit. That 1/8 inch is illustrative, not a standard. It is not a recommendation to use the same clearance for every material or profile.
The target rabbet-seat opening becomes:
- Width: 8 inches + 1/8 inch = 8 1/8 inches
- Height: 10 inches + 1/8 inch = 10 1/8 inches
On this particular 45-degree profile, the measured offset from the rabbet-seat reference to the outside long tip is 1 1/4 inches per end. Add that offset twice to each corresponding seat dimension:
- Short-side pair outside long-tip length: 8 1/8 + 1 1/4 + 1 1/4 = 10 5/8 inches
- Long-side pair outside long-tip length: 10 1/8 + 1 1/4 + 1 1/4 = 12 5/8 inches
The four finished long-tip measurements total 2 × 10 5/8 plus 2 × 12 5/8, or 46 1/2 inches. That sum is not the stock length to buy. It leaves out blade kerf, unusable ends, defects, pattern or finish matching, and a reserve for a correction or recut.
Also, this equation says nothing by itself about the front sight opening. The actual sight opening must be checked from the front against the face and lip. It cannot be inferred from the same rear-seat equation unless the profile drawing, coverage, and datum have all been measured and verified. If the lip hides too much, the correct response is to revisit the profile and presentation, not to pretend that changing the stack clearance solves the front view.
Make a verified four-piece cut list
A cut list should describe finished pieces and orientation, not only four numbers. Label the pair that runs along the longer dimension and the pair that runs along the shorter dimension. Mark the opposite miter direction on each piece so a mirrored or inverted rail does not quietly enter the dry fit.
Before cutting the useful rails, make a scrap test from the same moulding and use the same reference edge, blade, support, and intended orientation. Test both the rabbet relationship and the outside long tip. If the scrap reveals that your reference was short point, stop position, or a different corner than you assumed, correct the recorded datum before cutting useful stock.
The scrap-test and dry-fit columns mark different stages. Verify the reference with scrap before cutting the four useful rails. Then dry-fit those four rails around the actual stack before gluing. A piece is not ready for assembly because its number looks right.
| Piece | Pair and finished role | Outside long-tip length | Left and right end marks with face up | Scrap test pass | Actual four-piece dry-fit pass |
|---|---|---|---|---|---|
| 1 | Long-side pair, left or top: ____ |
____ |
Left tip: ____ Right tip: ____ |
Pass / revise: ____ |
Pass / revise: ____ |
| 2 | Long-side pair, matching piece: ____ |
____ |
Left tip: ____ Right tip: ____ |
Pass / revise: ____ |
Pass / revise: ____ |
| 3 | Short-side pair, left or bottom: ____ |
____ |
Left tip: ____ Right tip: ____ |
Pass / revise: ____ |
Pass / revise: ____ |
| 4 | Short-side pair, matching piece: ____ |
____ |
Left tip: ____ Right tip: ____ |
Pass / revise: ____ |
Pass / revise: ____ |
Keep the labels on the back of each rail. “Long side” should mean the intended finished pair, not simply the longest piece remaining after a mistake. Confirm that each pair is equal at its stated long-tip reference and that the profile face continues in the same direction around all four corners.
Separate the cut list from the stock-yield plan
Finished dimensions tell you what the frame needs. They do not tell you how much moulding to purchase. Stock planning is a separate exercise that accounts for the available stick lengths, kerf from each cut, damaged or unusable ends, knots or checks, bow or twist, finish defects, grain or pattern matching, and reserve for a failed test or recut.
Lay out the requested pieces against real available stock only after the datum and pair lengths have been verified. A nominal total can hide an awkward remainder: a stick may be long enough in arithmetic but unusable because a defect falls in the piece, or because the required opposite miters cannot be arranged with the available ends. Preserve useful offcuts when your layout allows, but do not count a damaged or unsafe section as yield.
The stock table below is intentionally blank. Fill in actual stick lengths and mark what portion is unavailable. The “reserve” column is a planning decision, not a universal percentage or extra-inch rule.
| Stock stick | Available length | Defects and unusable ends | Kerf allowance for planned cuts | Assigned finished pieces | Reserve after layout |
|---|---|---|---|---|---|
| Stick 1 | ____ |
____ |
____ |
____ |
____ |
| Stick 2 | ____ |
____ |
____ |
____ |
____ |
| Stick 3 | ____ |
____ |
____ |
____ |
____ |
| Stick 4 or blank | ____ |
____ |
____ |
____ |
____ |
| Additional stick or shop reserve | ____ |
____ |
____ |
____ |
____ |
Do not confuse the 46 1/2-inch finished long-tip total with a shopping recommendation. Reserve may need to be larger for defective stock, strong grain direction, repeating finish, or costly recuts. It may be smaller in a forgiving, straight, unpatterned stick, but that choice depends on the actual material and layout.
Front and back checks before assembly
Place all four labelled pieces around the actual framing stack without forcing the contents. Look at the back first. The glazing, mat, art, and backing should sit within the rabbet seat as planned, with the selected fit allowance and no bulge. Check that a corner does not pinch the stack and that the frame is not relying on a single proud component to appear square.
Then turn attention to the front. Confirm the sight opening at all four sides. Check that the lip covers the intended edge consistently and that the mat window, if present, remains the visual opening you selected. A frame can close neatly at the outside tips while displaying too little art because the profile’s face or lip was measured incorrectly.
Check the pair equality, corner closure, profile continuity, and whether the frame sits flat. A small gap can indicate a wrong orientation, a wrong datum, a short tip, a poor support, or an untrue piece. Record the cause before changing a dimension. Do not force the contents into a frame that has not passed the rear and front checks.
A scrap test comes before cutting the four useful rails; an actual four-piece dry fit comes before gluing. If either gate fails, stop and return to the reference-point inventory. The useful correction is usually a clarified edge or profile measurement, not a copied allowance from a different project.
Tool and shop safety boundaries
Only attempt saw work if you are trained to use the specific tool and understand its manual. Follow the manufacturer’s instructions and applicable shop safety requirements. Wear eye protection and use hearing, respiratory, and dust-control protection appropriate to the machine, material, finish, and shop setup. Keep hands out of the blade path, support long stock, and make sure the workpiece cannot pivot or fall into the blade.
Before any cut, verify that the guard, fence, stop, miter guide or jig, support, and moulding orientation are appropriate for the setup. Never reach toward a moving blade. Wait for the blade to stop before clearing an offcut, changing a setting, removing dust, or inspecting a cut. Keep the profile seated consistently against its chosen reference and do not improvise a hazardous short-stock operation.
Inspect the moulding for splits, loose material, bow, twist, damaged ends, and finish defects. Control dust and consider material and finish hazards according to the applicable manufacturer or shop guidance. These reminders are not a substitute for a machine manual or hands-on instruction. If you are not trained or do not have suitable equipment, a picture-frame shop or woodworking shop can cut the four pieces from your labelled measurements.
The finished worksheet is the result
A good picture frame cut list is not a magic number. It is a traceable record: the real contents, the real rear seat, the selected fit allowance and its convention, the independently checked front sight opening, the face and lip geometry, the actual rabbet-to-long-tip offset, the tool datum, the tested pair lengths, and the stock plan.
Print or copy the three worksheets, fill them in beside the actual profile, and keep the scrap result with the frame pieces. The success condition is a dry-fitting four-piece rectangle that accepts its stack without pressure, shows the intended front opening, closes at all four corners, and uses clearly labelled opposite miters. Once that check passes, you can decide whether to assemble it yourself or take the verified pieces and measurements to a shop.
For decorating context after the construction decisions are complete, browse 14 DIY picture frame ideas to try. That article is inspiration for how a finished frame might be used in a room, not a substitute for the profile measurements or cut verification above.