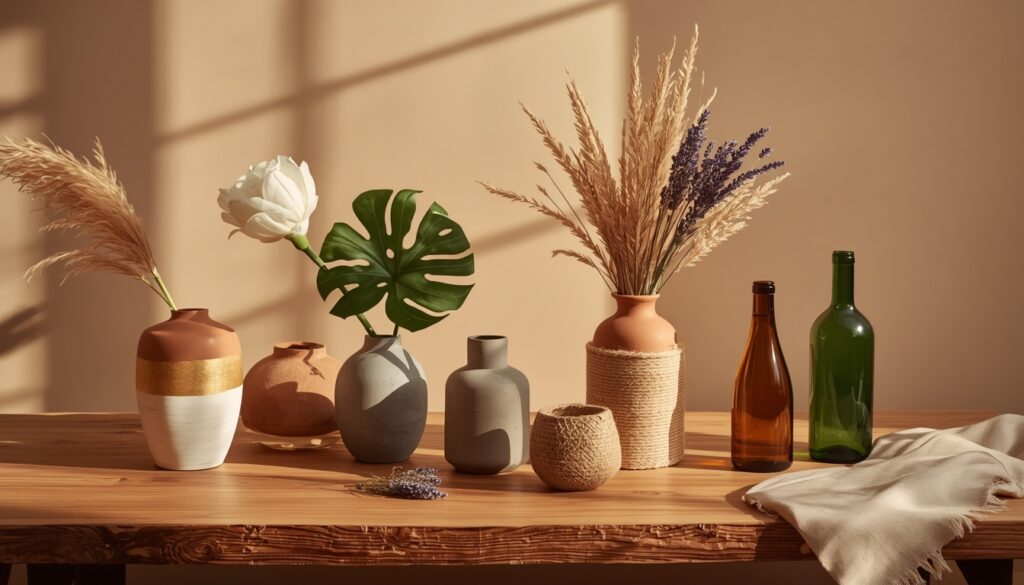
A plain vase sitting on your shelf isn’t doing anyone any favors. But here’s the thing , you don’t need to throw it out and buy something new. Some of the most beautiful vases I’ve ever styled in a room started as dollar store finds, thrift store rescues, or basic glass cylinders that were completely forgettable on their own. The right makeover transforms them into pieces that look like they came from a boutique home store. And the satisfaction of making something beautiful with your own hands? That part never gets old.
What makes a vase makeover genuinely worth doing , versus just slapping paint on something and hoping for the best , is understanding which technique suits which shape, and which finish suits which room. That’s exactly what this article is here to help you with. Every idea below comes with specific material guidance, honest tips about what works and what doesn’t, and enough detail to actually execute the project well. No vague inspiration here. Just real, actionable DIY vase makeover ideas that deliver results you’ll want to display proudly.
1. Chalk Paint Vase Makeover for a Matte Earthy Finish
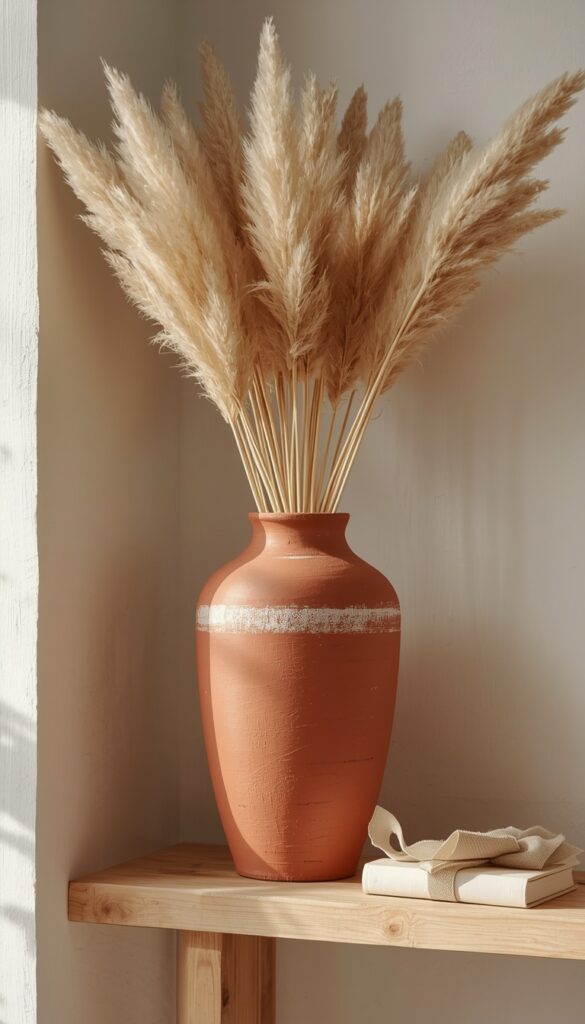
Chalk paint is one of the most forgiving materials a DIY decorator can work with , and on a vase, it delivers a thick, matte, almost chalky surface that looks genuinely expensive. The magic is in the texture. Unlike regular craft paint, chalk paint has a body to it that hides imperfections in the vase surface and builds up beautifully in just two coats. It works on glass, ceramic, terracotta, and even plastic vases without any primer. For a modern earthy finish, reach for shades in warm clay, dusty sage, muted terracotta, or aged linen , these tones photograph beautifully and work in almost every decorating style.
Apply chalk paint with a wide, flat brush using short, slightly overlapping strokes. Don’t try to make the coverage perfectly smooth ,the slight texture and visible brushwork is part of the charm. Let the first coat dry completely (about thirty minutes) before adding the second. Two coats is the sweet spot for most vases. After the second coat dries, you have a choice: leave it completely raw for a rough, artisan feel, or seal it with a matte wax like Annie Sloan’s Clear Wax applied with a lint free cloth. The wax deepens the color very slightly and protects the paint from chips and water marks.
One technique worth trying on taller vases is the dry brush distress. Apply the second coat of chalk paint, then immediately take a barely damp cloth and lightly wipe the raised edges and rim of the vase. This removes just enough paint to reveal the vase’s original surface below, creating a beautifully worn, aged effect that looks like it took decades to develop naturally. Pair a chalk painted clay toned vase with dried pampas grass or preserved eucalyptus , the matte surface and natural botanicals create a cohesive, editorial vignette that elevates a bookshelf or console table instantly.
2. Gold Leaf Vase Makeover That Looks Genuinely Luxurious
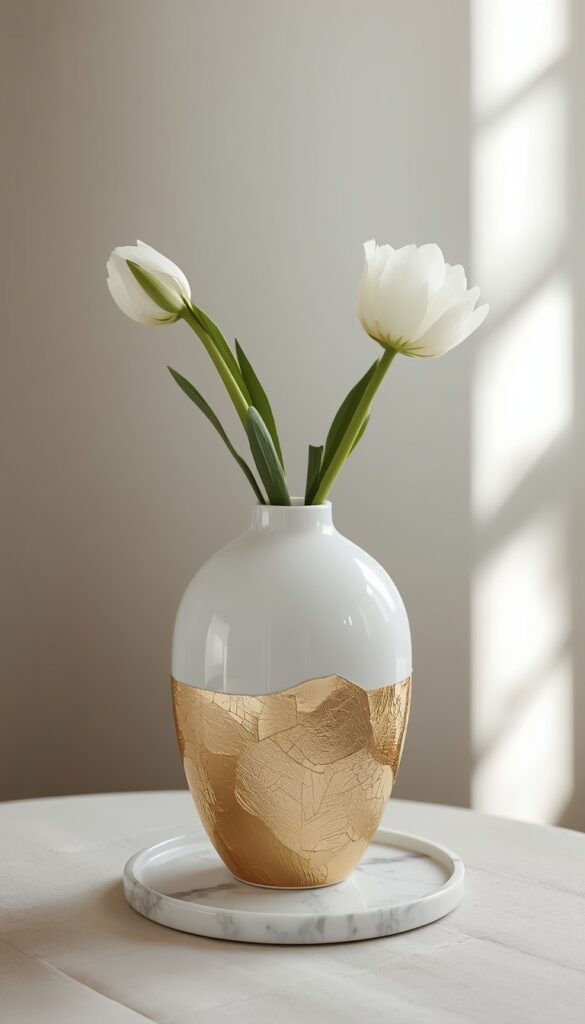
Gold leaf on a vase sounds intimidating until you actually do it and then you realize it’s one of the easiest ways to transform a basic piece into something that looks like a high end design object. Imitation gold leaf (also called composition gold leaf) is the product to use for DIY projects. It’s available at craft stores in booklets of 25 sheets and costs a fraction of real gold leaf while delivering nearly identical visual results on vases and home objects. You’ll also need gold leaf size , a specialized adhesive that goes on milky and dries clear, signaling when it’s ready for the leaf.
Brush a thin, even coat of gold leaf size onto the sections of the vase you want to gild. The critical timing: wait until the size turns from milky white to completely clear and tacky ,usually 30 to 45 minutes, depending on humidity. If you apply the leaf too early, it won’t adhere correctly. If you wait too long, the size loses its tack. When the timing is right, gently lay individual sheets of gold leaf onto the sized surface and press lightly with a soft dry brush. The leaf will break and crackle as you work , lean into this. The cracks and gaps are what give gilded vases their organic, handcrafted quality.
For a modern interpretation, don’t gild the entire vase. A partial gilding technique ,covering only the bottom third of a tall vase, or creating an irregular diagonal band of gold across the middle , reads as intentional and contemporary rather than old-fashioned. After the leaf is fully adhered, burnish it gently with a soft brush to remove loose flakes, then seal with a spray matte or satin varnish to protect the finish. A gold leafed vase styled with a single stem of white ranunculus or a tall dried protea on a marble surface is an arrangement that looks genuinely gallery worthy.
3. Rope Wrapped Vase Makeover for a Coastal Textural Look
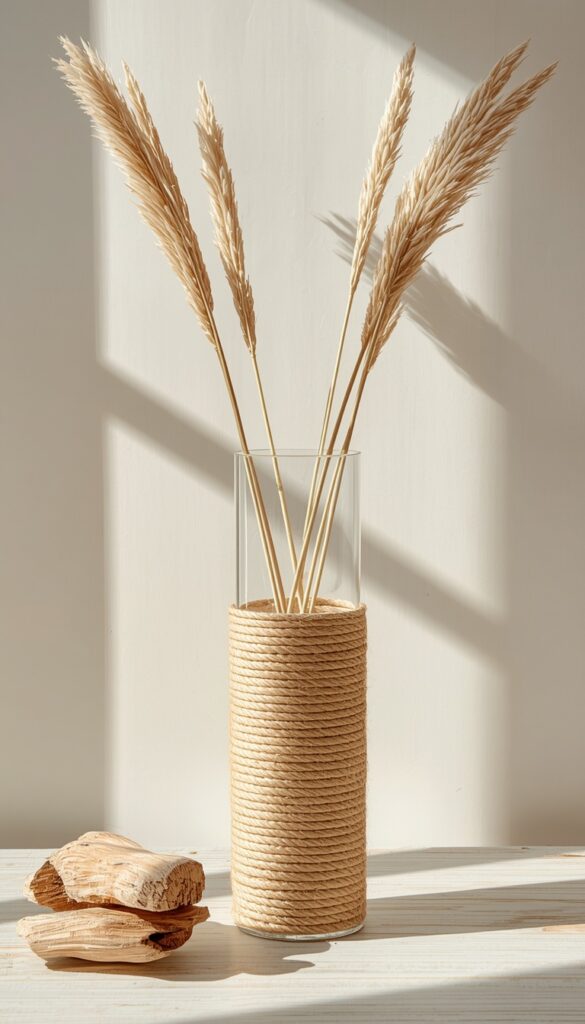
Wrapping a vase in natural rope or jute twine is one of those makeovers that costs almost nothing and produces a result that people consistently ask about when they see it. It works particularly well on straight sided glass cylinders, which would otherwise be completely uninteresting, and on tall, narrow necked bottles that have beautiful shapes but dull surfaces. The rope adds warmth, texture, and a natural material presence that transforms a transparent or plain colored vessel into something tactile and genuinely appealing to touch.
Use a hot glue gun for this project ,it’s the most reliable adhesion method for rope on glass and ceramic. Start at the base of the vase and work upward in tight, continuous horizontal rows, keeping consistent tension on the rope as you go. Apply a small bead of glue every few inches rather than continuously, which prevents visible glue strings from appearing at the surface. Natural jute in its raw beige brown tone is the most versatile choice. Bleached white cotton rope creates a cleaner, more Scandi coastal result. Black waxed cord creates a completely different, more dramatic and architectural vibe on the same shape.
For a more sophisticated version of this technique, wrap only the lower two thirds of the vase and leave the neck and rim exposed. The contrast between the raw rope texture below and the smooth glass or ceramic above creates a deliberate, designed quality. You can also mix rope gauges , start with thick rope at the base and transition to thinner twine toward the middle ,for a gradual texture change that looks far more considered than single gauge wrapping throughout. Style the finished vase with cotton stems, dried sea grass, or structural dried botanicals to complete the natural material story.
4. Ombre Paint Vase Makeover With a Gradient Color Effect
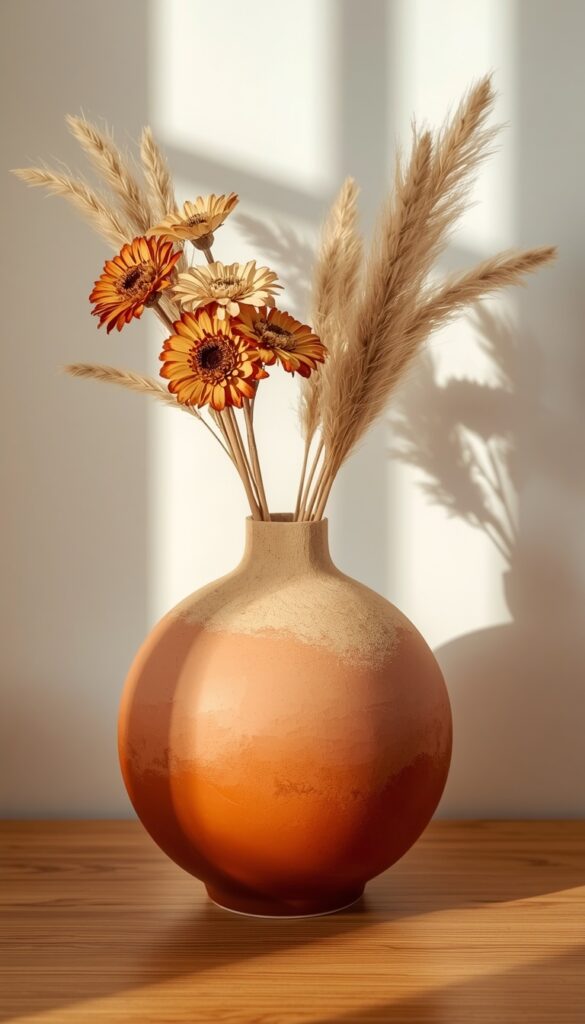
An ombre vase is one of the most visually striking makeovers you can do with basic craft paint and a sea sponge, and the technique is far more forgiving than it looks in finished photographs. The gradient effect , where one color fades seamlessly into another ,works especially beautifully on smooth ceramic or glass vases with a curved, bulbous shape. The curvature of the surface helps the color transition blend naturally as you apply it. Choose two or three tones from the same color family: deep terracotta fading into sandy peach, navy fading to pale sky blue, or forest green fading to warm sage.
Start with your darkest color at the base of the vase. Apply it with a sea sponge ,not a brush , and stipple it upward in a rough band that covers the bottom third of the vase. While the paint is still slightly wet, load your sponge with the mid tone color and blend it directly into the top edge of the dark band with an overlapping stipple motion. This overlapping wet into wet zone is where the magic happens , the two colors blur together without a hard line. If you’re using three tones, continue the process upward with your lightest shade. Work quickly, because the blend window closes as the paint dries.
Seal the finished ombre vase with two light coats of spray matte varnish ,this protects the paint and eliminates any sponge texture inconsistencies that catch the light unevenly. One important detail that makes a big difference: before you begin painting, wipe the vase surface with rubbing alcohol on a cotton pad to remove any oils or residue. This prep step takes thirty seconds and dramatically improves how well the paint adheres. Display the finished vase without flowers initially , an ombre vase is architectural enough to stand alone as a decorative object, which is the mark of a genuinely successful makeover.
5. Concrete Effect Vase Makeover Using Paint and Texture Medium
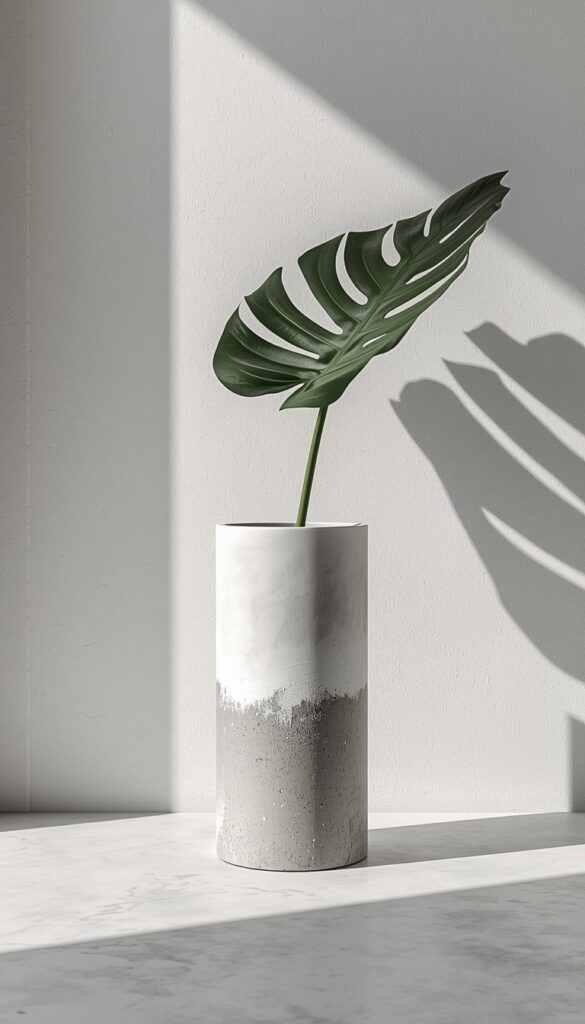
A concrete effect vase is one of the most on trend, design forward makeovers you can create at home , and the technique uses materials available at any craft store for under ten dollars total. The key product is texture medium, a thick additive that mixes into craft paint to give it a gritty, stone like surface quality when dry. Mixed with a cool grey paint and applied with a sea sponge or crumpled plastic bag, it produces a surface that genuinely reads as raw concrete to the eye and the hand. It’s the kind of finish that makes people pick up the vase and examine it closely.
Mix your grey craft paint with texture medium at roughly a 2:1 ratio ,two parts paint to one part texture medium. The mixture should look thick and slightly grainy. Apply it to the prepared vase in an uneven, slightly stippled way using a sea sponge or crumpled piece of plastic wrap for a more irregular surface. The plastic wrap method creates a beautifully random surface pattern that’s more interesting than a sponge alone. Apply two coats, letting each dry fully before adding the next. The finished surface should feel slightly rough when you run your finger across it, which is exactly what you want.
To push the concrete illusion further, add a light dry brush application of white craft paint over the dried grey surface, using a barely loaded wide brush swept in random directions. This mimics the natural variation in color that real concrete shows when it’s been aged and worn. Follow with a very light dry brush of a slightly darker grey in other areas. Seal with matte spray varnish. A concrete effect vase sits beautifully in minimalist, Scandinavian, and industrial interiors, and it pairs extraordinarily well with a single stem of sculptural greenery like a monstera leaf or a deep burgundy king protea.
6. Decoupage Vase Makeover With Tissue Paper or Map Prints
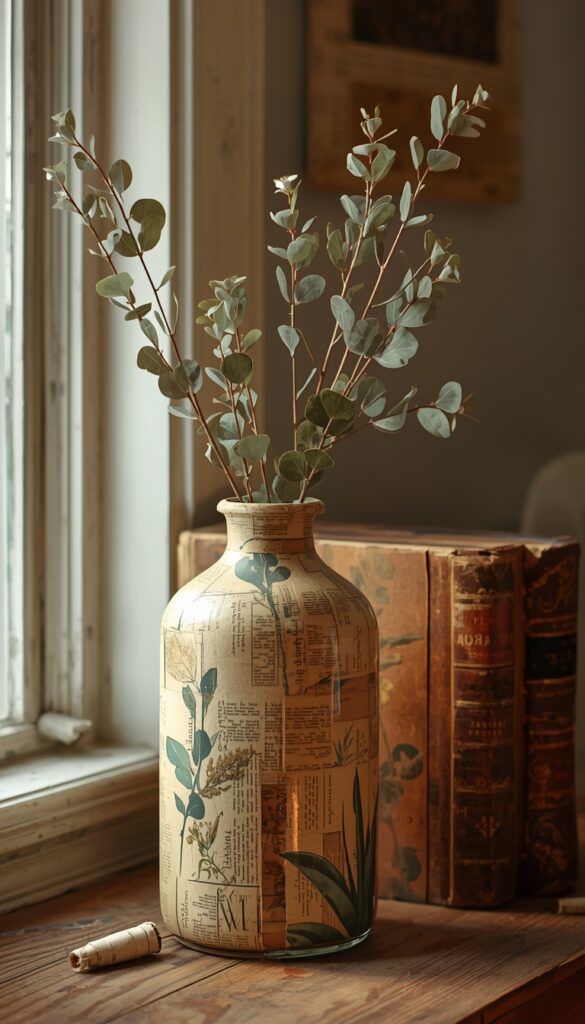
Decoupage is one of those techniques that sounds dated until you see what’s possible with the right paper choices , and on a vase, it can produce results that look genuinely artistic and collected. The technique involves adhering layers of thin paper to a vase surface with decoupage medium (Mod Podge is the most widely available option), building up layers until the paper becomes part of the vessel’s surface. The papers that produce the most beautiful results on vases are tissue paper in solid earthy tones, vintage map pages, sheet music, botanical illustration prints, and torn pages from old books.
Tear rather than cut your chosen paper into irregular pieces roughly two to four inches across. Tearing creates soft, feathered edges that blend invisibly into each other when layered , cut edges leave visible hard lines. Brush a thin coat of Mod Podge onto a small section of the vase, lay a paper piece onto the wet medium, then brush another coat of Mod Podge over the top of the paper to seal it flat. Work in sections, overlapping pieces by about half an inch, and smooth out any air bubbles with your fingertip as you go. The vessel should be completely covered with two to three overlapping layers before the final seal coat goes on.
For a refined, editorial finish, use a single color tissue paper for the first full layer to create an even base tone, then add a second layer of more patterned or printed paper sparingly , concentrating it in certain areas while letting the base tone show through in others. This partial layering technique creates a depth and visual interest that full coverage doesn’t achieve. Seal the completed vase with three coats of matte Mod Podge, letting each coat dry fully. The sealed surface has a beautiful slight sheen that protects the paper while giving the vase a professionally finished quality.
7. Fluted Texture Vase Makeover Using Air Dry Clay
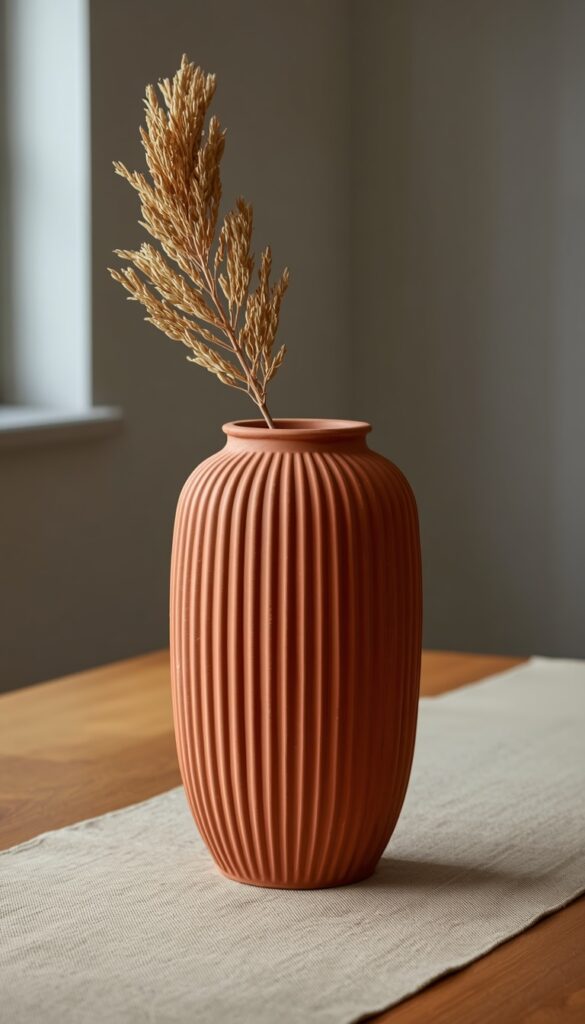
Adding a fluted or ribbed texture to an existing vase using air dry clay is one of the most impressive looking makeovers in this entire article , and it’s genuinely achievable with no prior sculpting experience. The technique involves pressing thin ropes or slabs of air dry clay directly onto the outer surface of the vase to create raised vertical ridges, geometric patterns, or organic textural panels. When dry and painted, the result looks like an expensive studio pottery piece rather than a DIY project. The contrast between the dimensional texture and the flat paint finish is what makes it so visually compelling.
Roll thin, even ropes of air dry clay between your palms , aim for roughly pencil thickness. Press them vertically onto the vase surface in evenly spaced parallel lines from the base up to the neck. Press firmly to ensure good contact, then smooth the edges where each rope meets the vase surface using a damp fingertip. This blending step is critical , unblended edges will lift and crack as the clay dries. Alternatively, roll clay into thin flat slabs and press them on as geometric panels or irregular organic shapes. The vase needs to sit undisturbed on a flat surface for 24 to 48 hours while the clay cures completely.
Once fully dry, paint the entire vase , clay and all , in one unified color. Matte white and warm cream reveal the texture most beautifully by creating subtle shadows in the ridges. Deep charcoal and matte black create a more dramatic, sculptural effect. A soft terracotta or warm blush gives the finished piece an organic, ceramic shop quality that feels genuinely artisan. Two coats of paint followed by a matte sealing spray is all the finishing it needs. Display this vase on its own , it’s dimensional enough to be a statement object without any flowers needed.
8. Spray Paint Ombre Vase Makeover for a Sleek Modern Finish
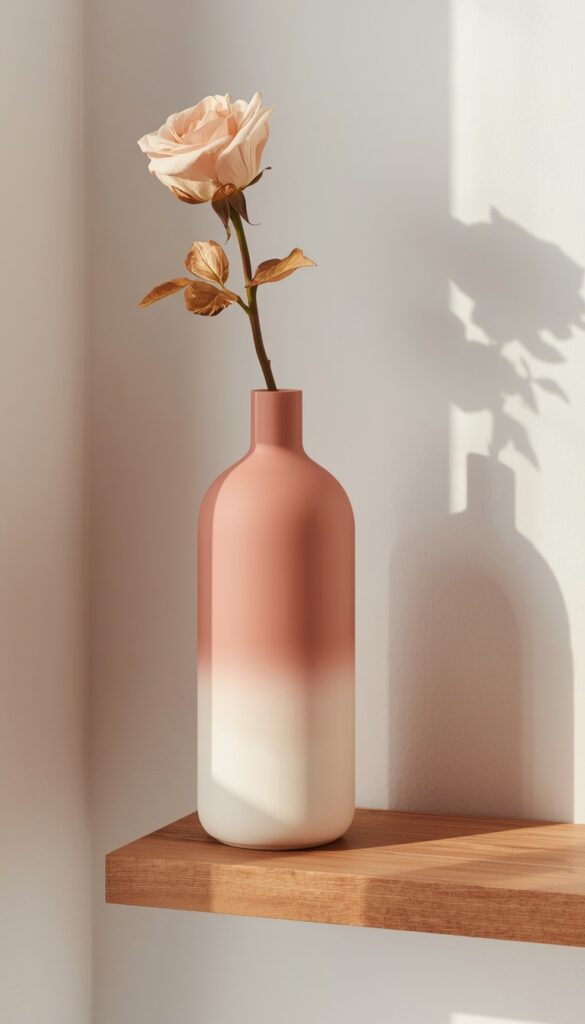
Spray paint creates a completely different kind of ombre than brush applied paint , smoother, more seamless, and with a finish quality that looks almost professional. The technique uses two complementary spray paint colors and a simple masking method to create a clean, gradient transition. It works best on glass bottles, smooth ceramic vases, and even plastic containers that have been primed first. The finish options available in spray paint , matte, satin, metallic, stone effect , make this one of the most versatile makeover methods in the DIY toolkit.
Start by masking the top third of the vase with painter’s tape and a loose newspaper collar, leaving the bottom two thirds fully exposed. Apply the first color , your darker or more saturated tone , in light, even passes from below the tape line downward. Remove the tape, let this coat dry, then reposition the tape and newspaper to mask the bottom half of the vase and leave the top half exposed. Apply the second color , your lighter or contrasting tone , across the exposed top section. The overlap zone between the two colors in the middle is where you blend them by alternating light passes of each color into each other while both are still slightly fresh.
The spray distance matters significantly. Holding the can 10 to 12 inches from the surface gives the most controlled, even coverage. Closer creates streaks; farther creates a dry, dusty texture. Always spray in short, sweeping passes rather than holding the nozzle in place , the latter creates paint pooling. After the final coat is fully dry (allow at least four hours for full hardness), seal with a spray clear coat in your desired finish. A spray painted ombre glass bottle in dusty rose fading to antique white on a timber shelf with a single dried rose stem is a composition that looks effortlessly chic.
9. Washi Tape Geometric Vase Makeover for Colorful Pattern
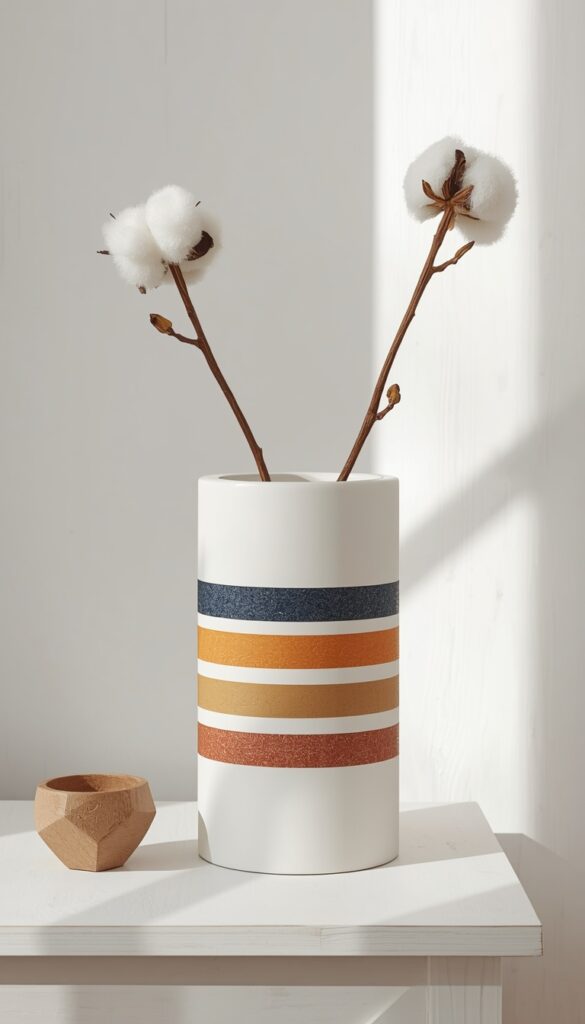
Washi tape is the underrated hero of no mess, no commitment vase makeovers. It’s paper based, repositionable for about 30 seconds after placement, and available in hundreds of patterns and colors. On a vase, washi tape applied in geometric formations ,chevrons, grids, diagonal stripes, triangles , creates a graphic, contemporary look that’s completely removable if you change your mind. It’s the only vase makeover in this article that requires zero drying time, zero skill, and zero mess. That’s not a compromise , the results can be genuinely beautiful when the tape colors and patterns are chosen with care.
The key to a polished washi tape vase is tape selection and discipline. Choose two or three tapes in complementary colors or a pattern family , mixing too many unrelated patterns creates visual chaos. Wide tapes (15mm and above) are easier to apply neatly to curved surfaces than narrow ones. Press the tape firmly from the center outward as you apply each strip to prevent air bubbles from forming under the surface. On a round vase, horizontal bands of tape sit most smoothly; diagonal or vertical applications require patience and small adjustments to prevent puckering around the curve.
For a geometric design on a cylindrical vase, apply horizontal tape strips at varying intervals , wide gaps between some bands, closely spaced clusters in others , to create rhythm and visual interest without a rigid, mechanical feel. Tuck the tape ends neatly inside the vase rim or fold them cleanly over the lip to finish the edges. No sealant is needed, and the tape can be peeled off cleanly when you want a fresh look. This makes washi tape ideal for seasonal vase refreshes , autumn tones in terracotta and mustard, winter graphics in deep navy and gold ,without committing to a permanent finish.
10. Sand and Glue Textured Vase for an Organic Earthy Look
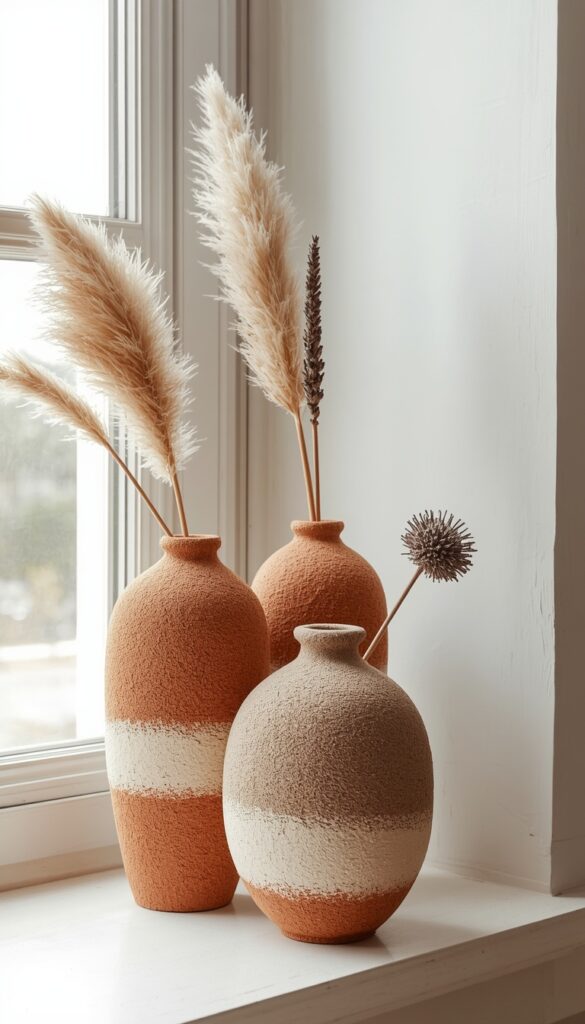
A sand textured vase costs almost nothing to make and produces a finish that looks organic, handcrafted, and genuinely interesting up close. The technique is straightforward: mix fine craft sand into a PVA glue and paint mixture and apply it to the vase surface. When dry, it creates a rough, granular texture that absorbs paint beautifully and reads as almost stone like. It’s particularly effective on plain glass vases and cheap ceramic pieces that have no surface texture of their own , the sand coating completely disguises the base material and gives the vase an entirely new material identity.
Mix one part PVA glue with two parts craft paint in your desired base color, then stir in enough fine sand to create a thick, spreadable mixture ,roughly the consistency of hummus. Apply it to the vase surface with an old stiff bristled brush or a palette knife, using dabbing and dragging motions rather than smooth strokes. An uneven, slightly rough application is exactly right , you want the texture to look random and natural, not uniform. Let each coat dry completely before adding another. Two to three coats build up a properly substantial texture that won’t flake or chip under normal handling.
Once the sand coat is fully cured (give it 24 hours to be safe), dry brush a lighter paint tone over the surface with a barely loaded brush to highlight the raised texture and deepen the three dimensional quality. Terracotta toned sand vases with a lighter sand dry brush look remarkably like hand thrown studio pottery. Warm grey sand vases with a white highlight dry brush read as weathered stone. Seal with a matte spray varnish. These vases look exceptionally grouped in threes of varying heights on a windowsill or floating shelf, styled with dried botanicals or simple cotton stems.
11. Painted Striped Vase Makeover With Painter’s Tape Precision
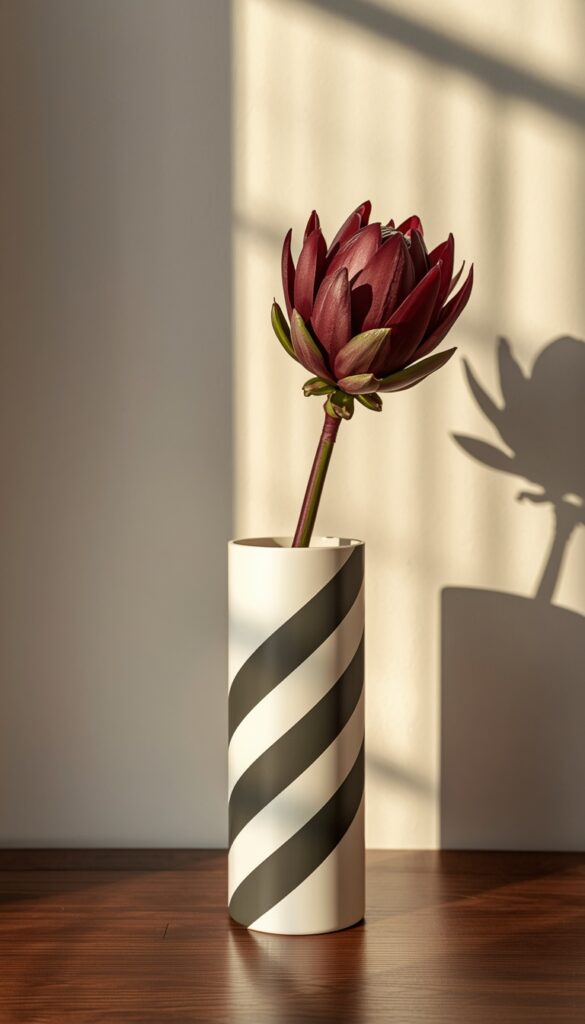
Painted stripes on a vase are one of those ideas that sounds simple but requires specific technique to execute cleanly , and when you get it right, the result is incredibly crisp and satisfying. The key material is low tack painter’s tape (the blue kind, or the Frog Tape green variety for the sharpest edges). Frog Tape in particular uses a paint block technology in its adhesive that actively prevents paint from bleeding under the tape edge, which is the number one problem with striped DIY projects. For a vase, thin stripes in a contrasting color on a solid base coat create the most graphic, intentional result.
Apply your base coat color first and let it cure fully ,at least two hours for craft paint, preferably overnight. Then apply your tape stripes in the desired width and spacing, pressing the edges down firmly with a fingertip or a credit card edge to ensure complete contact with the cured base coat. Paint your stripe color over the tape with a small flat brush, using paint that’s slightly thicker rather than thin and runny. Thin paint is more likely to bleed. Apply in light, controlled coats and always peel the tape while the paint is still slightly wet ,never after it’s fully dry, as this causes the stripe edges to chip.
For a modern Scandinavian inspired result, paint thin black stripes on a white base with generous spacing between each band. For a warm, artisan feel, apply wide clay toned stripes on a cream base with irregular spacing , some stripes close together, others widely spaced. For a bold, maximalist statement, use multiple colors in varied widths on a deep navy base. The stripe direction doesn’t need to be only horizontal , diagonal stripes on a tall cylindrical vase look unexpectedly dynamic and contemporary, and the taping technique for diagonals is identical to horizontal application.
12. Wine Bottle Vase Makeover With Tinted Resin
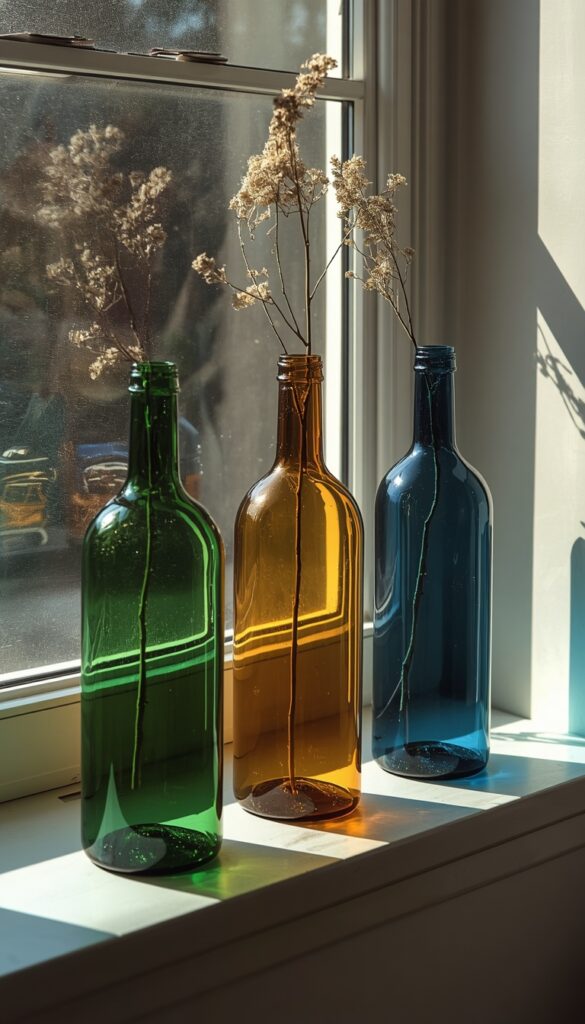
Transforming an empty wine bottle into a beautiful colored glass vase using tinted resin is one of the most satisfying makeovers in this collection , partly because the results are genuinely stunning, and partly because the material cost is so low given the outcome. Casting resin tinted with alcohol ink in jewel toned colors , deep amber, sapphire blue, emerald green, smoky violet , is poured into the bottle in a small amount, then rolled slowly around the interior until every surface is coated. When cured, it creates the look of genuine colored glass from the inside, which is remarkably beautiful when light passes through it.
Use a two part epoxy resin rated for interior use. Mix small amounts , you need roughly 60 to 90ml for a standard wine bottle interior coating. Add two to four drops of alcohol ink per 30ml of mixed resin and stir until the color is completely even with no streaks. Pour the tinted resin into the clean, dry bottle and roll it slowly in your hands for three to five minutes, ensuring the resin coats the entire interior surface including the shoulder and neck. Then set the bottle upside down in a cup over parchment paper to allow excess resin to drain while the main coat cures. This prevents pooling at the bottom.
After 24 hours, the interior coat will be fully cured and the bottle becomes a genuinely beautiful colored glass vase. The color depth changes depending on the light source behind it , placed near a window, the tinted interior catches natural light and glows in a way that flat painted bottles never achieve. For even richer color, repeat the pour with a second coat after the first has cured. A trio of wine bottles tinted in amber, emerald, and smoky blue on a windowsill in afternoon sunlight creates one of the most effortlessly beautiful vignettes you can make from something that would otherwise go directly into recycling.
13. Limewash Effect Vase Makeover for a Mediterranean Feel
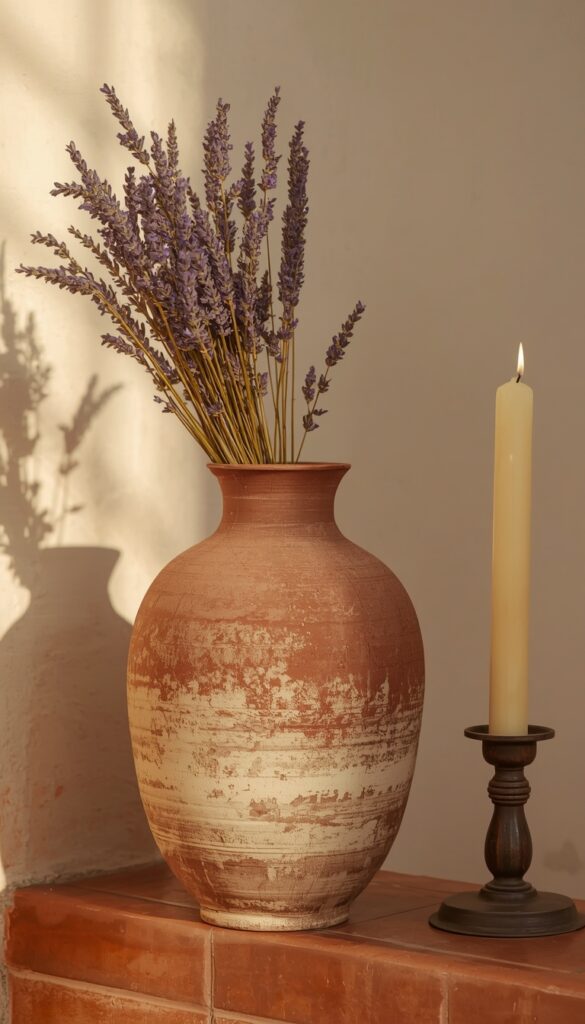
Limewash paint has become one of the most sought after wall finishes in interior design, and the same beautiful, layered, slightly translucent effect works magnificently on vases. A limewash effect vase has a depth and movement that flat paint simply cannot replicate , the finish appears to shift subtly in different lighting, showing variations of color and tone that feel genuinely aged and handmade. It’s the technique that most closely mimics the walls of an Italian or Greek farmhouse, and it suits both Mediterranean and modern earthy interiors extraordinarily well.
To create a limewash effect on a vase, start with a base coat of matte chalk paint in your chosen tone. Let it dry fully. For the limewash layer, water down a slightly lighter version of the same color to a thin, milky consistency ,roughly one part paint to one part water. Apply this thin wash over the dried base coat using a wide, flat brush in irregular, multi directional strokes. Work in small sections and immediately wipe back some of the wet wash with a damp cloth in random areas, revealing the base coat below. This lifting technique is what creates the characteristic variation of the limewash effect.
The color combinations that work best for this technique are warm terracotta under a sandy cream wash, deep olive green under a sage green wash, and dusty charcoal under a warm grey wash. Each combination produces a result that looks aged, layered, and genuinely beautiful. After completing the limewash layer, seal with a spray of matte varnish , just one light coat, as heavy sealing can flatten the effect you’ve worked to create. A limewash vase paired with dried botanical stems and placed on a terracotta tiled surface or a worn wooden shelf looks like it belongs in a coastal Italian home.
14. Mirror Mosaic Vase Makeover for a Glamorous Statement Piece
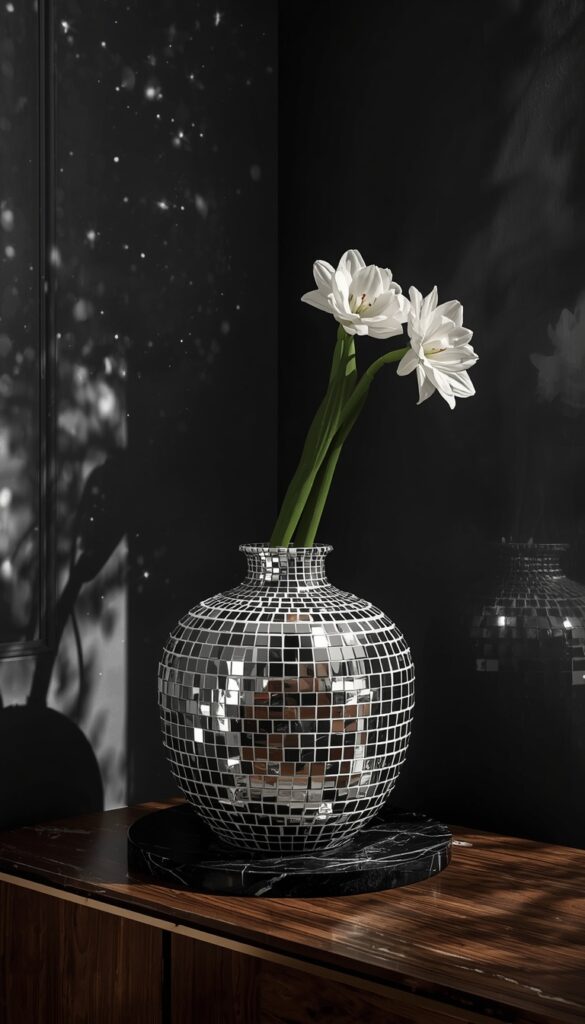
A mirror mosaic vase is the most glamorous transformation in this collection , and it’s also one of the most therapeutic to make. The process involves adhering small pieces of broken mirror or mirror mosaic tiles to a vase surface with tile adhesive, then grouting between the pieces with a contrasting or tonal grout. The finished piece catches light from every angle and creates a constantly shifting, glittering surface that no paint technique can replicate. It’s a bold choice , this vase demands attention and earns it completely when done well.
Mosaic mirror tiles are available in craft stores as pre-cut squares (typically 1cm or 2cm), which saves the work of cutting and eliminates the safety concern of breaking full mirror sheets. Use tile adhesive , not regular craft glue , applied with a small palette knife or wooden stick to the back of each tile before pressing it firmly onto the vase. Work in sections, allowing each section to set for an hour before moving to the adjacent area, which prevents tiles from sliding on the curved surface before the adhesive cures. Leave small, even gaps between tiles for the grout , roughly 2mm is ideal.
After the adhesive has cured for 24 hours, mix unsanded tile grout to a smooth, peanut butter consistency. Press it into the gaps between tiles with a damp sponge, working in circular motions. Wipe the excess off the tile faces with a clean damp sponge before it dries , dried grout on mirror faces is genuinely difficult to remove cleanly. For a refined finish, use white or ivory grout to keep the focus on the mirror sparkle. For drama, use charcoal or black grout, which makes the mirror facets appear even more brilliant by contrast. This vase needs nothing more than a single stem of white amaryllis or a dried allium to be completely unforgettable.
Final Thoughts on DIY Vase Makeovers
What this collection of ideas proves, more than anything, is that a vase’s potential isn’t fixed at purchase. The plain glass cylinder you’ve been ignoring, the thrift store ceramic you grabbed for fifty cents, the wine bottle you were about to recycle ,every one of them is a few hours away from becoming something genuinely beautiful. The techniques here range from beginner friendly to slightly more involved, but none of them require professional skills or expensive equipment. DIY vase makeovers are one of the most rewarding home décor projects precisely because the materials are cheap, the skill ceiling is low, and the results are immediate. Pick one idea that excites you today and make it happen.
FAQS
Q: What paint works best for DIY vase makeovers? A: Chalk paint is the most versatile option for vase makeovers , it adheres to glass, ceramic, and plastic without primer, dries to a beautiful matte finish, and is available in a wide range of earthy, sophisticated tones. For a shinier finish, acrylic craft paint sealed with a spray varnish works equally well. Always seal any painted vase with matte or satin varnish to protect the finish from water marks.
Q: How do I make a plain glass vase look expensive? A: Gold leaf application, tinted resin interior coating, or a limewash paint effect are the three techniques that produce the most expensive looking results on a plain glass vase. Gold leaf in a partial gilding application reads as the most luxurious. Tinted resin creates genuine colored glass from the inside, which is beautiful in natural light. Both techniques cost under fifteen dollars in materials and take less than an afternoon.
Q: Can I paint a ceramic vase that will hold water? A: Yes, but proper sealing is essential. Paint the exterior only, allow it to cure fully for at least 48 hours, then seal with two to three coats of waterproof spray varnish. The interior of the vase holds water without any treatment as long as the ceramic itself is glazed. If the ceramic is unglazed terracotta, use a waterproof interior sealant before using it as a water holding vase to prevent moisture from penetrating the walls.
Q: What is the easiest DIY vase makeover for beginners? A: Washi tape geometric designs require zero painting skill, zero drying time, and are fully reversible , making them the most beginner friendly option in this article. Chalk paint is the second easiest, as it requires no priming, dries quickly, and forgives uneven brushwork naturally. Both techniques produce results that look intentional and styled even on a first attempt, which makes them genuinely satisfying starting points for anyone new to DIY home décor.
Q: How do I make a rope wrapped vase stay in place? A: A hot glue gun is the most reliable method for rope wrapped vases. Apply small beads of glue every few inches along the rope as you wrap, keeping consistent tension throughout. Starting and finishing the rope with a generous amount of glue and holding it in place for ten seconds each ensures secure anchoring at the most vulnerable points. Avoid using PVA or craft glue for rope wrapping , it takes too long to set and the rope slides before it cures.
Q: Can I use air dry clay on a glass vase? A: Yes, and it adheres well if you prepare the surface correctly first. Clean the glass with rubbing alcohol, then apply a thin coat of PVA glue to the area where the clay will go and allow it to become tacky before pressing the clay on. This improves adhesion significantly. Blend the clay edges into the glass surface with a damp fingertip to prevent lifting. Allow 48 hours of full drying before painting , rushing this step causes cracking.
Q: What’s the best way to seal a DIY vase makeover? A: Matte spray varnish in two light coats is the most reliable sealing method for most DIY vase finishes, including chalk paint, ombre, concrete effect, sand texture, and limewash techniques. Apply each coat from 10 to 12 inches away in smooth sweeping passes. For gold leaf vases, use a specific gold leaf sealer or a gentle matte spray , harsh solvents can tarnish composition gold leaf. Decoupaged vases seal well with three coats of matte Mod Podge applied with a soft brush.
Q: How do I fix mistakes on a painted vase? A: For chalk paint and acrylic finishes, simply let the mistake dry completely and paint over it , chalk paint’s opacity means two fresh coats will cover almost any error cleanly. For gold leaf mistakes, gently peel away loose sections with tweezers and re apply fresh leaf with size. For washi tape misalignment, peel the tape carefully within 30 seconds of application while it’s still repositionable. The beauty of most vase makeover techniques is that every mistake is fixable before the final seal coat goes on.