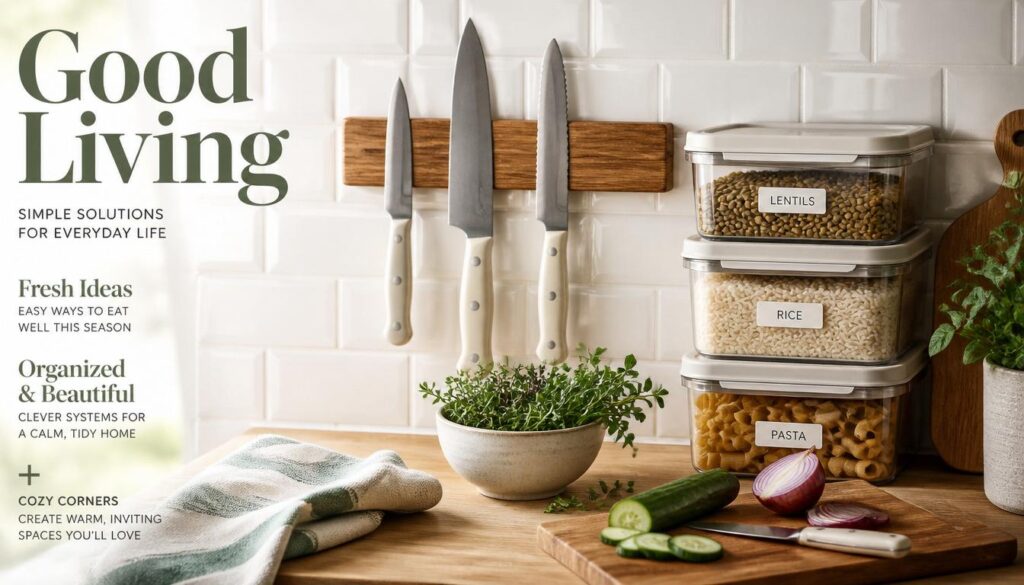
Small kitchens get a bad reputation they really don’t deserve. I’ve worked in galley kitchens so narrow I could touch both counters at once, and some of the smartest, most beautiful kitchen styling I’ve ever seen came from exactly those tight footprints. Limited space forces real decisions instead of just filling room for the sake of it. That constraint, weirdly enough, is what makes small kitchens so satisfying to get right.
The ideas here aren’t about pretending your kitchen is bigger than it is. They’re about working with what you actually have, smartly, so every inch earns its place. Some of these are quick weekend projects. Others are small habit shifts that change how the whole space feels day to day. All of them come from real kitchens, not a generic checklist.
1. Mount a Magnetic Knife Strip to Free Up Counter Space
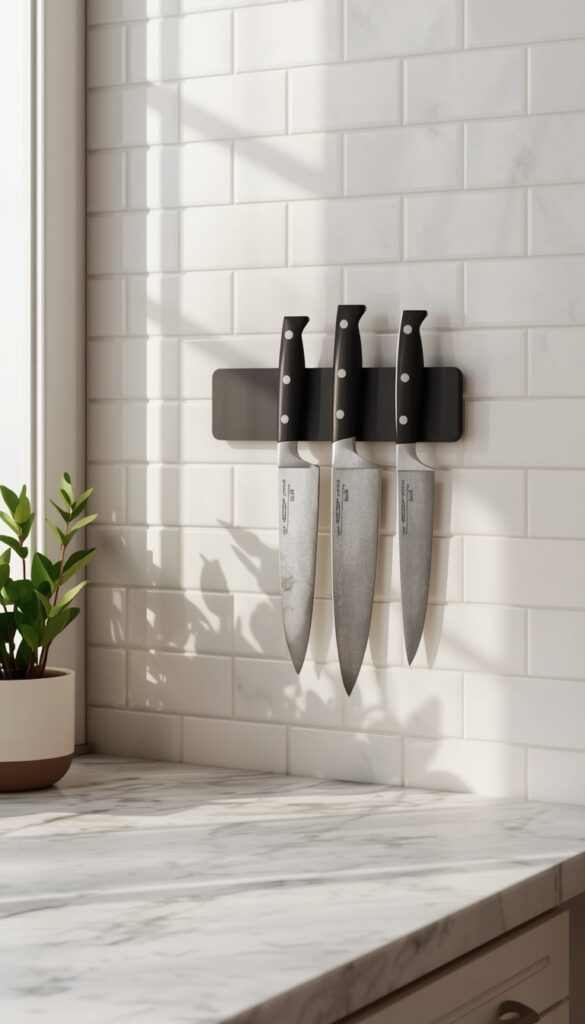
A bulky knife block eats valuable counter real estate that a small kitchen genuinely can’t spare. A magnetic knife strip, mounted to the backsplash or the underside of an upper cabinet, holds your knives vertically against the wall instead. I’ve installed these in kitchens with barely two feet of counter space, and reclaiming that footprint alone changes how the whole prep area functions.
Mounting height matters for both safety and looks. I install mine roughly five to six inches above the counter surface, high enough that reaching for a knife doesn’t put your hand near the blade edge accidentally, but low enough that taller knives don’t stick out awkwardly above the cabinet line. A stud finder helps locate solid mounting points if you’re drilling into drywall rather than tile.
Knife strips also double as quiet kitchen decor once your blades are arranged by size, largest to smallest, left to right. I’ve found this small visual order, rather than knives jumbled at random angles, makes an already tight kitchen feel more intentional. Wipe the strip down occasionally since magnetic dust and grease buildup happens faster than people expect in daily cooking spaces.
2. Install Under Cabinet Lighting to Brighten Prep Areas
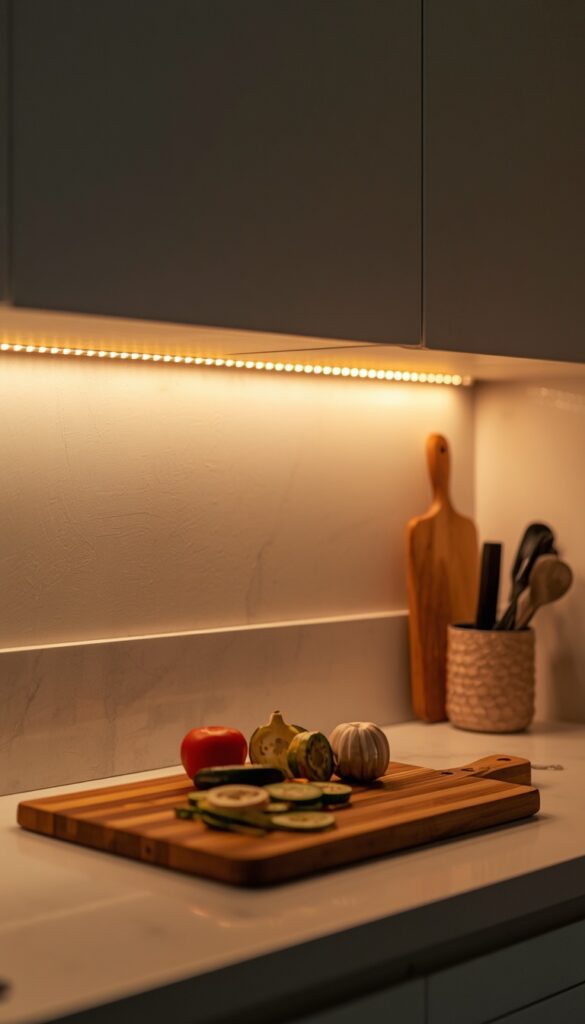
Small kitchens often suffer from poor lighting because the upper cabinets cast shadows directly onto the counter where you actually need to see. Under cabinet LED strip lighting solves this directly, illuminating your cutting board and stovetop without relying on a single overhead fixture to do all the work. I’ve retrofitted dozens of rental kitchens this way, since most strip kits stick on with adhesive backing and plug into a nearby outlet.
Color temperature changes how food actually looks while you’re prepping it, which matters more than people realize until they’ve cooked under the wrong light. A warm 3000K light keeps colors looking natural and appetizing, while a cooler 4000K or above gives better visibility for detailed knife work but can make produce look slightly washed out. I generally split the difference and use 3500K for most home kitchen prep zones.
Placement should follow your actual workflow, not just run the full cabinet length out of habit. I focus strips directly above the stove, the main cutting board zone, and the sink, since those three spots get the heaviest daily use. A kitchen with limited counter space benefits more from targeted, bright task lighting in these zones than from one even wash across the whole room.
3. Use a Rolling Cart as Flexible Extra Counter Space
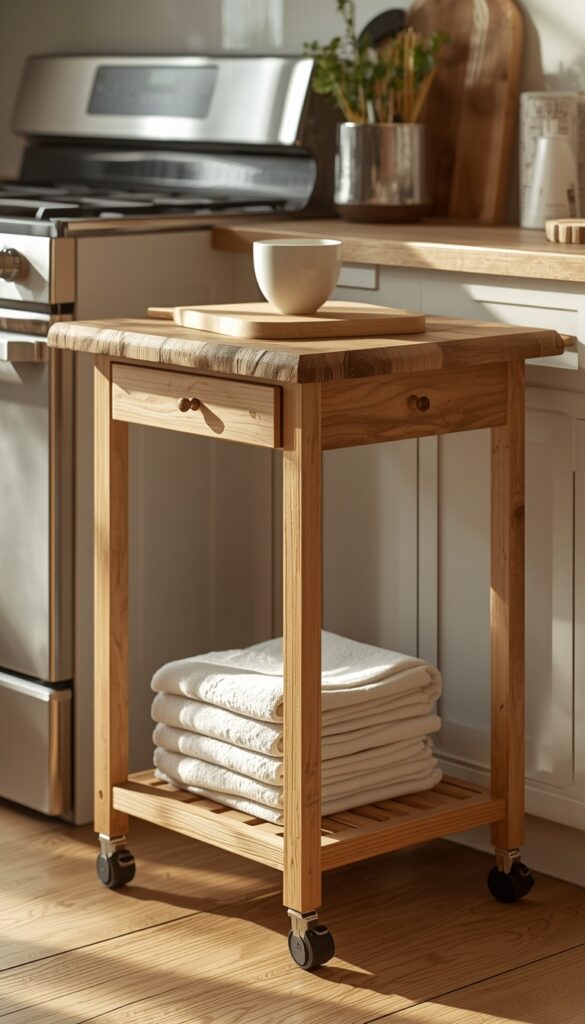
A small kitchen rarely has enough counter space for both prep work and finished dishes sitting out at the same time. A rolling kitchen cart with a butcher block or marble top solves this without permanent construction. I keep mine tucked against an open wall when not in use, then roll it directly beside the stove during actual cooking for instant extra workspace exactly where I need it.
Look for a cart with at least one shelf below the top surface, since that lower storage is what makes this piece genuinely functional rather than just a pretty side table. I store cutting boards, a small appliance, or pantry staples on the lower shelf, keeping the top surface completely clear and ready for actual prep work whenever I need to roll it into action.
Locking caster wheels matter more than people think before buying. A cart that drifts while you’re chopping vegetables on it is genuinely frustrating and slightly dangerous. I always test the wheel lock mechanism in the store, or read reviews carefully online, since cheap caster wheels are the single most common complaint with these otherwise excellent small kitchen tools.
4. Add a Pot Rail Above the Stove for Vertical Storage
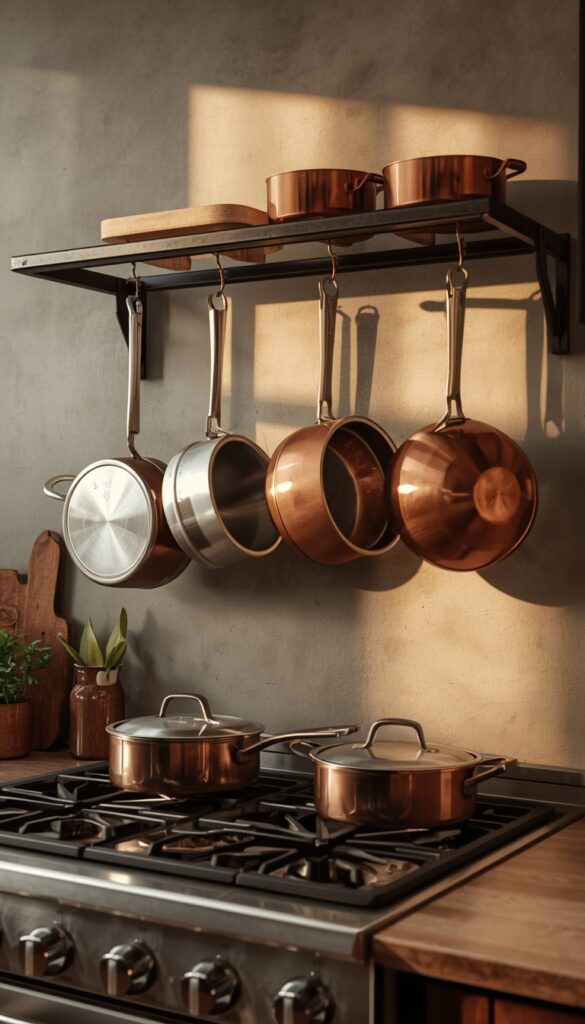
Cookware takes up enormous cabinet space, and a small kitchen often doesn’t have room to spare for stacking pots and pans below the counter. A wall mounted pot rail above the stove solves this by moving your most used cookware into vertical, visible storage instead. I’ve installed these directly into wall studs above ranges in kitchens where lower cabinet space was simply too tight to dedicate to bulky pots.
Hook spacing should match your actual cookware collection rather than the generic spacing many rails come with out of the box. I space mine roughly four to six inches apart, close enough to fit a full set of pots without overcrowding, but spaced enough that handles don’t bang into each other every time you grab one. S hooks let you adjust spacing easily if your collection changes over time.
Heat clearance is the detail people overlook most often here. I always mount pot rails at least eighteen inches above the actual stovetop surface, higher if your range runs hot or you cook with high flames regularly. This clearance protects both the rail finish and the pot handles from heat damage, and it keeps everything safely out of the way of rising steam and splatter.
5. Choose a Pedestal or Drop Leaf Table for Flexible Seating
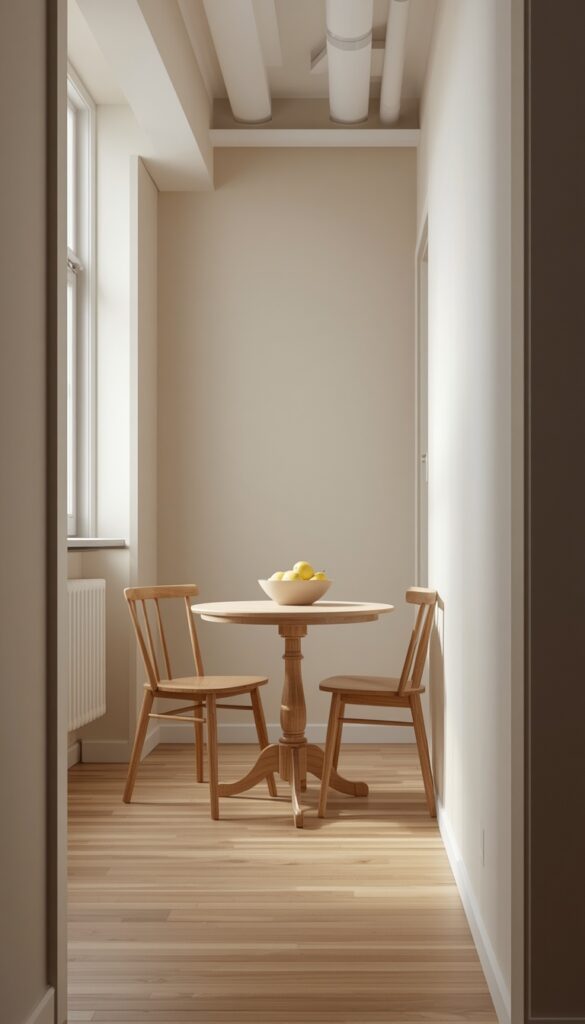
A small kitchen with an eat in area needs furniture that can shrink when you don’t need full seating and expand when guests come over. A pedestal table with a single central leg, rather than four corner legs, genuinely allows more knee room in a tight footprint since there’s nothing blocking the sides. A drop leaf table takes this further, folding down to a slim profile against a wall when not fully extended.
I always measure the walking path around the table before buying, not just the table’s footprint alone. A small kitchen needs at least 36 inches of clearance on at least one side for comfortable movement, and a drop leaf table folded down often recovers exactly that clearance during regular daily use, only expanding when you actually need the extra seats.
Material choice affects how the table reads visually in a tight space. A lighter wood tone or a table with thin, tapered legs feels less visually heavy than a chunky farmhouse style table, which genuinely matters when floor space is already limited. I’ve found light oak or a simple white painted pedestal table consistently make small eats in kitchens feel more open rather than crowded.
6. Add a Tension Rod Under the Sink for Bottle Storage
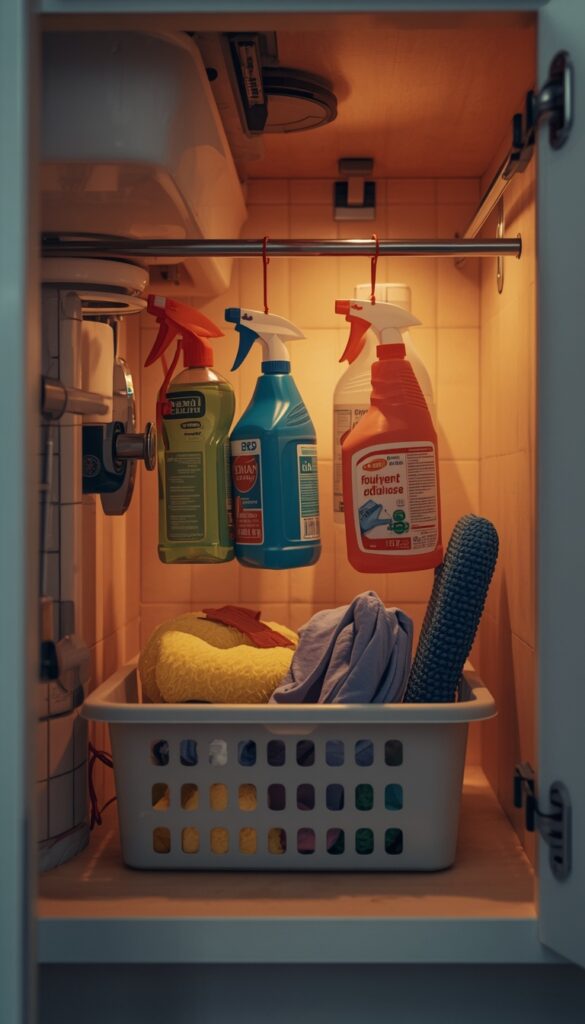
The cabinet under a kitchen sink is almost always wasted space, cluttered with bottles lying on their sides or tipped over every time you open the door. A simple tension rod installed horizontally, just a few inches below the cabinet’s top shelf, lets you hang spray bottles by their trigger handles instead. This single trick has reorganized more under sink cabinets for me than almost any other small kitchen fix.
Measure the cabinet width carefully before buying a rod, since most under sink cabinets are narrower than standard closet spaces and a rod that’s too long will bow under the weight of multiple hanging bottles. I generally recommend a rod rated for at least five pounds if you’re planning to hang several full spray bottles at once along its length.
This trick frees up the cabinet floor for stackable bins or a small lazy Susan, which handles loose items like sponges, gloves, or extra trash bags far better than letting them roll around loose. I always pair the tension rod with one bin below it specifically for these small loose items, since that combination uses the entire cabinet height efficiently instead of wasting the bottom half.
7. Use Stackable Bins to Maximize Pantry Cabinet Space
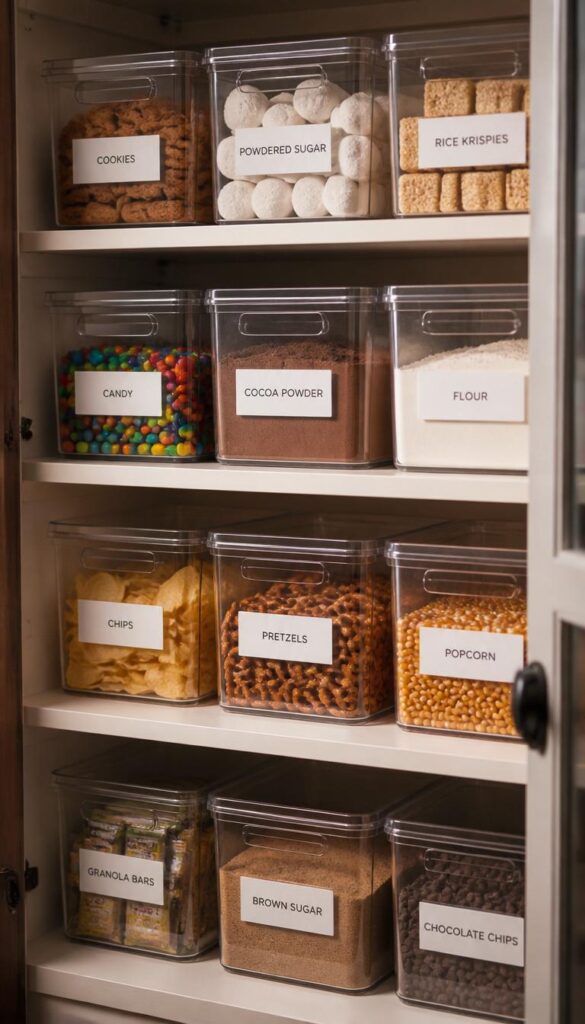
A small kitchen often means a small pantry, sometimes just one or two cabinets doing all the food storage work an entire pantry closet would handle in a bigger home. Stackable, uniform bins solve this by using vertical space efficiently instead of letting boxes and bags pile up in a jumbled, hard to see mess. I always measure cabinet height first, since stacking two bins requires enough clearance that the top bin doesn’t hit the shelf above it.
Clear bins beat opaque ones here, since visibility matters enormously in a small pantry where you can’t just glance at a full shelf to see what you have. I use clear bins specifically for snacks, baking supplies, and grains, labeling each one so nothing gets forgotten and expired in the back of a cabinet you rarely dig through completely.
Uniform bin sizing, rather than a mismatched collection from different brands, makes stacking actually work without wasted gaps between bins of different shapes. I buy one bin system in two or three sizes max, and that consistency lets me rearrange the whole pantry cabinet as my grocery habits change without constantly reshuffling odd shaped containers that don’t stack cleanly.
8. Hang Floating Shelves to Replace Bulky Upper Cabinets
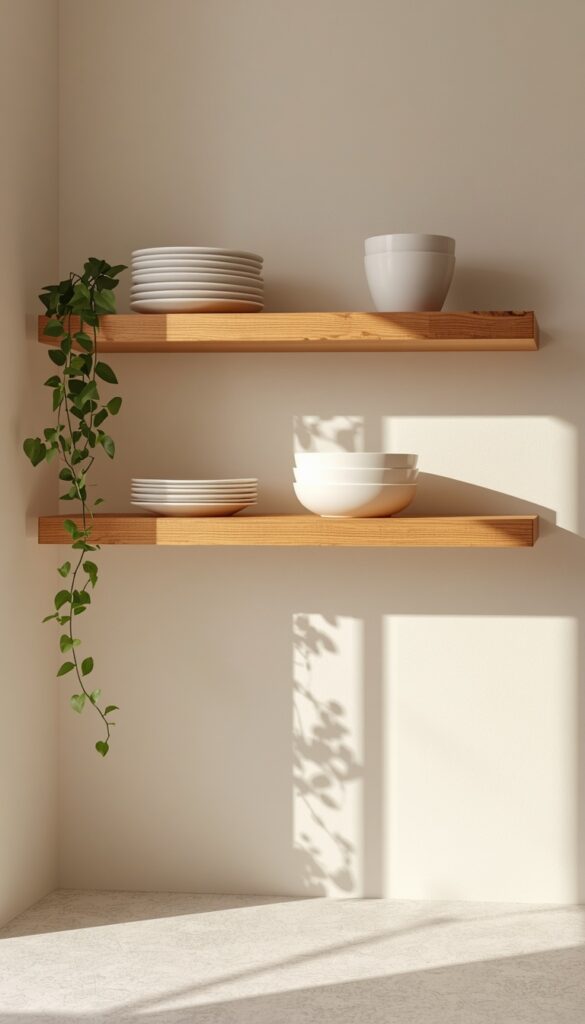
Upper cabinets can feel heavy and closed off in a small kitchen, visually shrinking a room that’s already tight on space. Floating shelves, even just replacing one cabinet section, open up sightlines and make a small kitchen feel noticeably more spacious. I’ve done partial swaps like this in several rental kitchens, keeping cabinets where closed storage matters most and opening up just one wall section to shelves.
Bracket strength matters enormously here, since kitchen shelves hold genuinely heavy items like stacked plates or ceramic bowls. I always choose brackets rated for at least twenty five pounds per shelf, anchored directly into wall studs rather than drywall alone. A shelf that sags or pulls away from the wall under normal kitchen use isn’t just annoying, it’s a real safety problem with breakable dishware sitting on top.
Styling open shelves in a working kitchen means balancing function with visual calm. I keep daily use plates and bowls on these shelves, stacked neatly by size, with maybe one small plant or a single piece of pottery breaking up the practical items. Overly decorative open shelving in an actual cooking space tends to look impractical fast, since kitchen shelves need to earn their keep daily.
9. Install a Fold Down Wall Table for Occasional Extra Surface
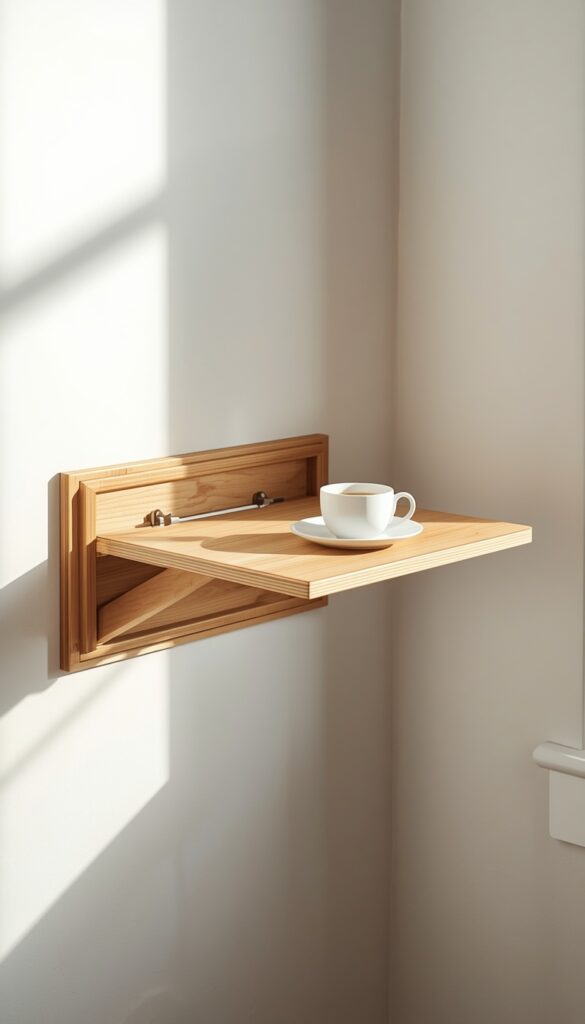
When a small kitchen genuinely can’t fit a permanent table or even a rolling cart, a fold down wall mounted table solves the occasional need for extra surface area. Mounted directly to the wall with sturdy folding brackets, it drops down flat against the wall when not in use and folds up to a full usable surface for quick meals or extra prep space exactly when you need it.
Bracket quality determines whether this piece feels sturdy or wobbly during actual use, and I always recommend spending slightly more here than the cheapest option available. A table that wobbles while you’re chopping vegetables or eating a meal undercuts the entire point of adding it. Look for brackets rated to hold at least fifty pounds if you plan to use this surface for anything beyond light snacking.
Placement should consider clearance both above and below the folded position, since you’ll want room to fully fold it flat without hitting an outlet, switch plate, or nearby trim. I generally install these on a wall adjacent to the main cooking zone rather than directly behind the stove, keeping heat and splatter away from the folding mechanism and surface finish over time.
10. Add a Backsplash with a Light, Reflective Finish
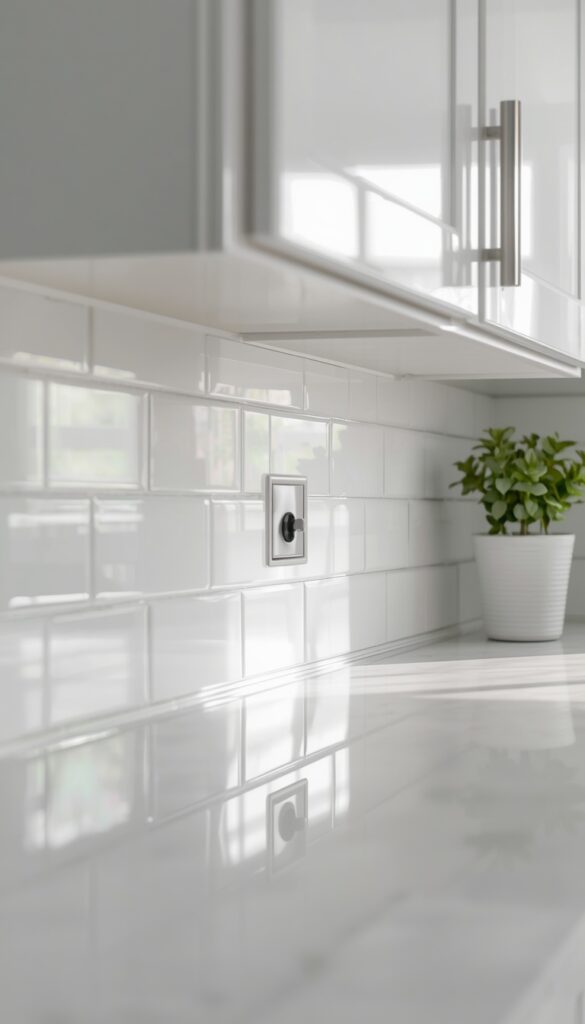
A glossy or reflective backsplash finish bounces available light around a small kitchen far more effectively than a matte or textured surface absorbing it instead. Glass subway tile, polished marble look porcelain, or even a simple white ceramic tile in a glossy finish all genuinely brighten a tight cooking space, especially one without much natural window light reaching the actual work zones.
Grout color matters more in small spaces than people initially expect. A grout color that closely matches your tile keeps the whole backsplash reading as one continuous light surface, while a stark contrasting grout breaks the wall into a busier, more fragmented pattern. I generally recommend matching grout within one or two shades of the tile itself for the cleanest, most light amplifying effect.
Extending the backsplash slightly higher than standard, closer to the bottom of upper cabinets rather than stopping at a typical four inch height, increases the reflective surface area without adding any actual floor footprint. I’ve done this in several small kitchens specifically because that extra vertical reflective space genuinely changes how bright the whole room feels, especially under warm task lighting.
11. Use Drawer Dividers to Organize Utensils and Tools
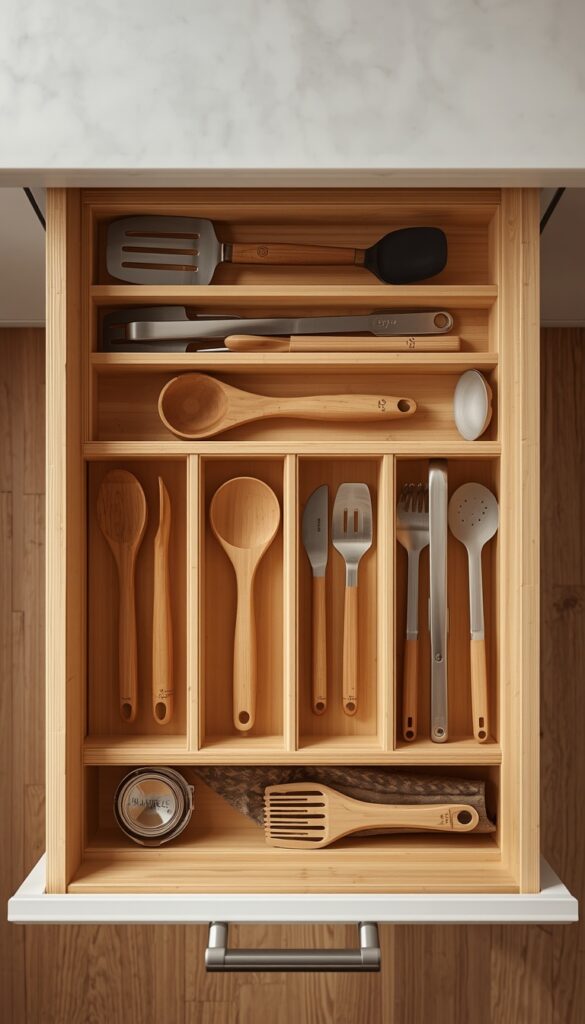
Loose utensils sliding around a drawer waste space and make daily cooking frustrating, especially in a small kitchen where you likely have fewer drawers total to work with. Adjustable drawer dividers, rather than a fixed plastic tray that may not match your drawer’s exact dimensions, let you customize compartment sizes based on what you actually own and use daily in your specific kitchen.
I measure the drawer’s interior dimensions carefully before buying dividers, since a system that’s even slightly too large won’t sit flat and a system too small leaves frustrating gaps where utensils slide underneath anyway. Bamboo or wood dividers tend to hold their shape better over time than thin plastic versions, which can warp slightly with repeated drawer slamming in a busy kitchen.
Grouping utensils by function rather than by size makes daily cooking noticeably faster once the drawer is organized. I keep cooking tools, spatulas, tongs, a wooden spoon, in one section, and measuring tools in another, rather than organizing purely by length. This functional grouping matters more in a small kitchen specifically, since you’re likely reaching into this single drawer constantly throughout meal prep.
12. Add Hooks Inside Cabinet Doors for Hidden Storage
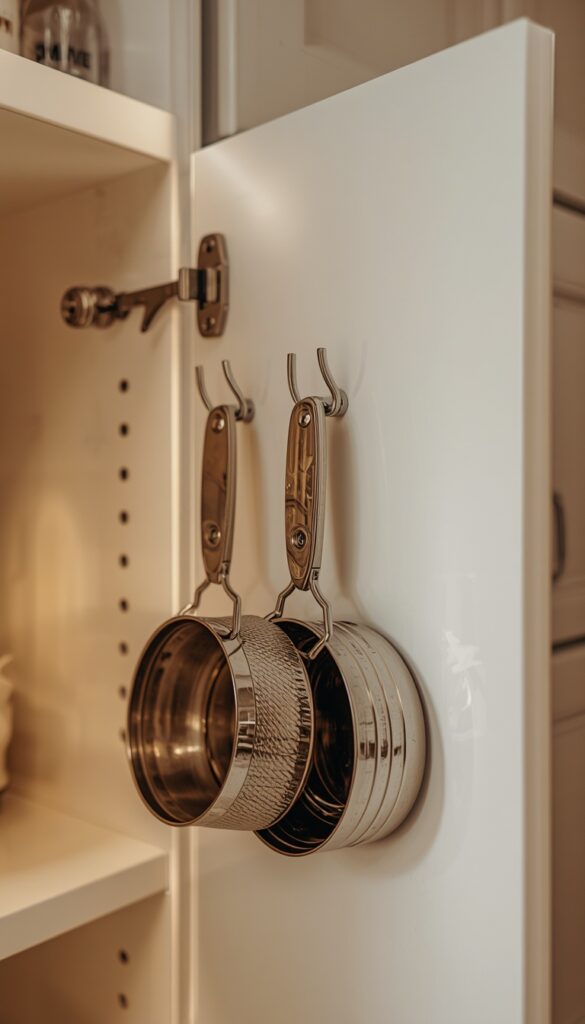
The inside of a cabinet door is genuinely wasted space in most small kitchens, and small adhesive or screw in hooks recover it instantly for lightweight items. I use this space specifically for measuring cups, small pot lids, or even a roll of foil and plastic wrap hung by their box’s built-in hanging slot, keeping these items handy but completely out of sight when the door closes.
Weight limits matter here, since most adhesive hooks rated for cabinet door use only hold one to three pounds reliably. I stick to genuinely lightweight items on adhesive hooks and switch to small screw in hooks for anything heavier, like a set of metal measuring cups that add up in weight faster than people expect once they’re all hanging together on one hook.
This trick works especially well on the cabinet directly above or below your stove, where lid storage solves a problem nearly every small kitchen struggles with. I’ve eliminated entire drawers of loose, mismatched lids this way, hanging them instead by size inside one cabinet door where they’re easy to find and don’t take up a single inch of usable shelf space.
13. Choose Open Wire Shelving for Visual Lightness
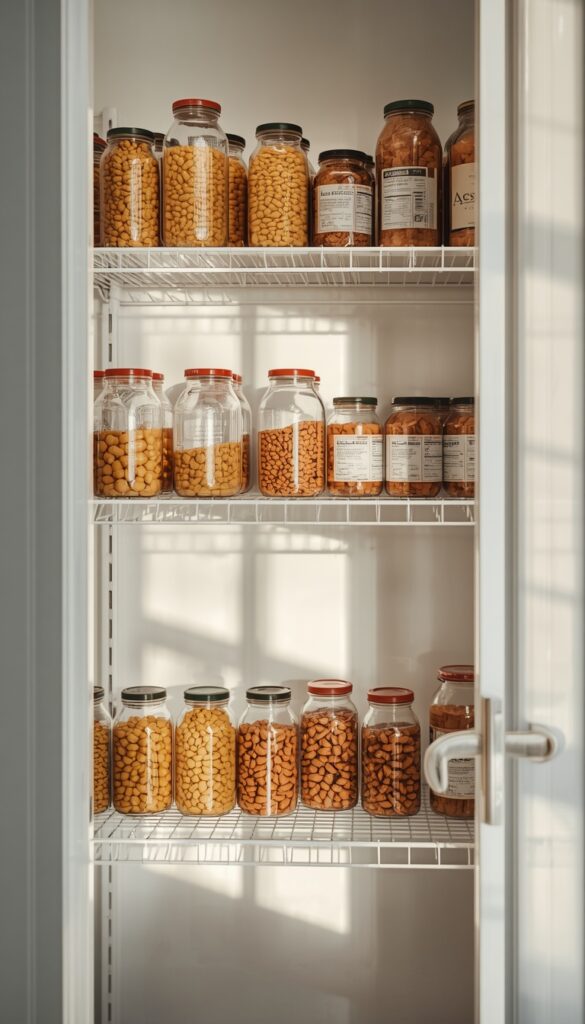
Wire shelving, whether wall mounted or as part of a small standalone unit, reads as visually lighter than solid wood or laminate shelving in a tight kitchen footprint. The open structure lets light and sightlines pass through rather than blocking them, which genuinely matters when every visual choice in a small space either makes the room feel bigger or noticeably smaller depending on what you pick.
I use wire shelving specifically for pantry overflow, extra small appliances, or canned goods, since the open slats make contents visible at a glance without needing to pull bins forward to check what’s there. This visibility matters enormously in a small kitchen where you genuinely can’t afford to forget what’s tucked into the back of a deep, solid shelf.
Weight distribution across wire shelving needs slightly more attention than solid shelving, since heavier items can shift or tip on the open slats if not placed thoughtfully. I keep heavier canned goods and jars toward the back and center of each shelf, with lighter boxed items toward the front edge, which keeps the whole unit stable even when fully loaded.
14. Add a Magnetic Spice Rack to the Side of the Fridge
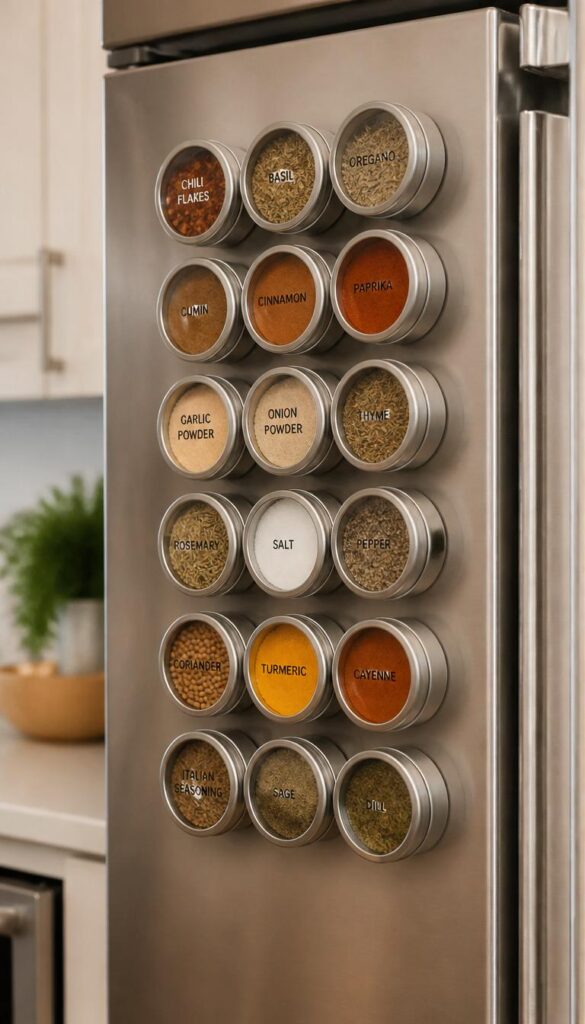
The side of a refrigerator is genuinely unused real estate in most small kitchens, and a magnetic spice rack turns that flat metal surface into functional, visible storage. Small magnetic tins, individually labeled, stick directly to the fridge side and free up an entire cabinet shelf that spices would otherwise occupy. I’ve used this trick specifically in galley kitchens where cabinet space was at an absolute premium.
Tin size matters for how much spice you can actually fit before needing a refill, and I generally recommend tins at least two inches in diameter rather than the tiniest decorative versions, which empty out frustratingly fast with regular cooking. Clear lids let you see spice levels at a glance, which matters since you can’t easily shake a magnetic tin to check remaining contents the way you might a standard jar.
This trick only works if your refrigerator’s side panel is actually magnetic, which isn’t universal across all models, so I always test with a single magnet before buying a full rack system. Stainless steel fridges, in particular, sometimes use a non magnetic stainless layer, so confirm this detail first rather than discovering it after your spice tins arrive and won’t stick at all.
15. Use a Stovetop Cover to Create Instant Extra Counter
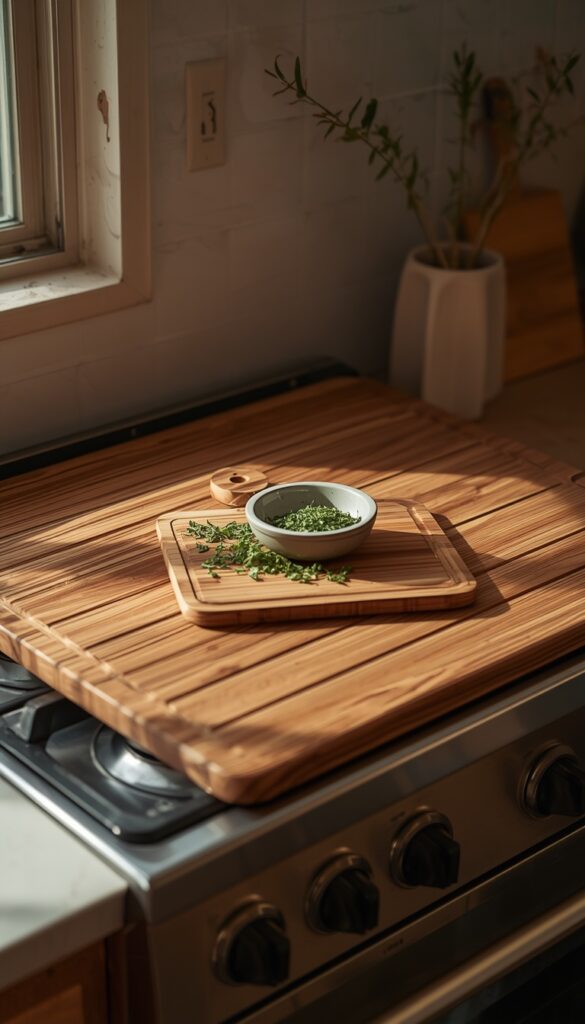
A stovetop cover, a flat board or tray sized to fit directly over your burners, instantly creates extra counter space in a kitchen too small to spare an inch otherwise. I use mine constantly when I need a landing spot for a cutting board, a stack of dishes, or ingredients waiting their turn, especially on gas ranges where the burner grates already provide a stable, mostly flat surface to build on.
Material choice affects both safety and function here. A wood or bamboo cover works beautifully for cold storage use, holding produce or dishes, but should never sit directly over a burner that’s still warm from recent use. I always let burners cool completely before placing a wood cover down, since residual heat can scorch or warp the wood surface over repeated use.
Sizing the cover to your specific stovetop matters more than buying a generic one size option. I measure my own range carefully before purchasing, since covers that don’t sit flat and stable across all burners shift around during use and undercut the very stability you’re trying to create. A properly fitted cover feels like genuine permanent counter space, not a wobbly add on.
Bringing It All Together
A small kitchen works hard, and the best small kitchen ideas respect that by solving real, daily problems instead of just looking nice in photos. Vertical storage, smart lighting, and a few flexible furniture pieces consistently do more for a tight cooking space than any single expensive renovation ever could. I’ve watched cramped, frustrating kitchens transform into genuinely functional spaces through exactly the kind of small, intentional changes covered here. You don’t need more square footage to cook and live well. Pick one or two ideas from this list, start there, and watch how much smoother your daily routine in the kitchen becomes.
Frequently Asked Questions
Q: How do I make a small kitchen feel bigger without renovating? A: Light, reflective surfaces and open shelving do more than people expect, since both bounce available light and keep sightlines open across the room. Removing visual clutter from counters, adding under cabinet lighting, and choosing lighter wood tones for any new furniture all contribute without a single wall coming down.
Q: What’s the best way to store pots and pans in a small kitchen? A: A wall mounted pot rail above the stove moves your most used cookware into vertical, visible storage instead of crowding lower cabinets. Nesting pots and pans by size inside cabinets also helps significantly. Reserve lower cabinet space for items you use less often, keeping daily cookware within easy reach.
Q: How can I get more counter space in a tiny kitchen? A: A rolling cart with locking caster wheels gives you flexible extra workspace exactly when you need it, then tucks away against a wall afterward. A stovetop cover also creates instant surface area over unused burners. Both solutions add function without requiring any permanent construction or renovation work.
Q: Is open shelving a good idea in a small kitchen? A: Open shelving genuinely works well in small kitchens since it keeps the room feeling airy rather than closed in by bulky upper cabinets. The tradeoff is that everything stays visible, so daily dishes need to stay reasonably tidy. Reserving one or two cabinets for closed storage balances this nicely.
Q: How do I organize a small pantry cabinet efficiently? A: Stackable, uniform bins use vertical cabinet space far better than loose boxes and bags piled randomly. Clear bins with labels let you see contents at a glance, which matters enormously when shelf depth makes items toward the back easy to forget. Group similar items together for faster daily access.
Q: What lighting works best for a small kitchen with no natural light? A: Under cabinet LED strips placed directly above prep zones solve poor lighting more effectively than one overhead fixture alone. A warm 3000K to 3500K bulb keeps food looking appetizing while you cook. Layering this task lighting with a glossy backsplash finish helps bounce available light further around the room.
Q: Can a small kitchen still have an eat in dining area? A: Yes, with the right furniture choices. A pedestal table or a drop leaf table folds down or offers more knee room than traditional four legged designs, fitting comfortably into tight footprints. Measuring your actual walking clearance before buying ensures the table works daily rather than becoming an obstacle.