
A kitchen remodel does not run on a universal calendar. It runs on dependencies: approved information, available and acceptable materials, local confirmations where required, suitable site conditions, completed prior work, and a clear owner for the next action. A date on a calendar cannot make an unreceived cabinet shipment, unresolved rough-in question, or missing decision ready.
This kitchen remodel timeline checklist is designed as a release system. Use it to decide whether the next phase can begin, what evidence supports that decision, who is responsible, and what must happen when something blocks the handoff. It makes uncertainty from dust, noise, deliveries, and utility interruptions easier to manage.
What this checklist covers, and what it does not
This kitchen remodel timeline checklist owns execution readiness: procurement control, local permit and inspection questions, temporary-kitchen preparation, demolition release, concealed-condition review, rough-work handoffs, cabinet-to-countertop coordination, final testing, punch-list verification, and closeout documents.
It assumes your layout and major design decisions are chosen or nearly chosen. If the layout is unsettled, map the kitchen work zones and compare layouts before releasing cabinet orders. It does not replace a layout planner, a field-measure record, an island-fit review, a budget ledger, or a broad style guide. If style, finishes, or upgrade decisions are still open, use the Complete Kitchen Design Guide before treating an order or trade handoff as final. Keep the approved plan, current appliance information, and written scope available to everyone who needs them.
The central habit is simple: do not release a phase because a previous phase is usually finished by then. Release it when the required evidence exists. For every row in the tracker below, record a status such as Not started, In progress, Ready, Needs local confirmation, Blocked, or Complete. If a row is Blocked or Needs local confirmation, name the next action instead of silently moving ahead.
Start with one accountable handoff
Every open dependency needs one named owner. That person obtains the answer, document, delivery, correction, or decision and communicates it to the next person.
At the project start, list the homeowner, project manager, designer if involved, suppliers, fabricator, appliance contact, and specialty trades. Assign these questions:
- Which plan and appliance information are current?
- Who orders, receives, and inspects materials?
- Who asks about permits and inspections?
- Who records concealed conditions and releases covered work?
- Who schedules final testing and collects closeout records?
The written scope should identify exclusions, allowances, material responsibility, change-order procedure, site protection, and closeout expectations. Record and approve design or product changes before changed work proceeds.
Before work begins, compare the written scope and payment terms, record how applicable licensing and insurance were checked for your location, and keep the signed contract and change procedure with the project file. An informal promise is not a substitute for the project-specific agreement or local requirements.
Phase 1: Confirm the local approval path
There is no single national permit or inspection checklist for every kitchen remodel. Scope, property, jurisdiction, building type, and age change the questions. Identify the authority having jurisdiction and ask what applies. The contractor should confirm contractual responsibility for applications and inspections.
If you are unsure which office handles the property, start with the city or county building department and ask them to identify the responsible permit and inspection authority. Record the office, person, date and answer. A general article cannot decide whether this kitchen project needs approval.
Record these answers in the project file:
- Which local authority has responsibility?
- Could the work involve building, electrical, plumbing, gas, ventilation, structural, zoning, historic-district, exterior, or other review?
- Who submits and tracks each item under the contract?
- What plans or product information are requested?
- Which inspections, if any, apply, who schedules them, and what must remain visible before rough work is covered?
- Who handles corrections and rechecks if work is not released?
- Is a final local record required, and are there special questions for an older home, painted surfaces, hazardous materials, historic property, multifamily building, or utility shutoffs?
The gate is Permit path confirmed only when the responsible person has recorded the applicable local answer for this scope and who will carry it out. “The contractor usually does this” is not evidence of project-specific confirmation. If a required approval or inspection question is still open, mark the row Needs local confirmation and do not treat that step as released.
Phase 2: Control procurement before disruption
Procurement means making sure material for the next dependency is correct, present, inspected, acceptable, and stored without creating a new site problem. One person can maintain the tracker even when different parties place orders.
For each item, record the specification or model number, approval status, ordering owner, supplier or fabricator, order confirmation, delivery status, staging location, receiving inspector, and next dependency. Do not treat an expected delivery as complete. Match arrivals to the order and packing information, inspect promptly, and photograph damage or shortages.
Use the delivery tracker for cabinets, appliances, fixtures, lighting, flooring, tile, countertop material, hardware, trim, and other items that could stop a release.
| Item or package | Required specification or model | Delivery or pickup status | Condition on arrival | Receiving owner | Next dependency | Blocker and next action |
|---|---|---|---|---|---|---|
| Not started / In progress / Received | Accepted / Damage documented / Short / Wrong item / Pending review | |||||
| Not started / In progress / Received | Accepted / Damage documented / Short / Wrong item / Pending review | |||||
| Not started / In progress / Received | Accepted / Damage documented / Short / Wrong item / Pending review | |||||
| Not started / In progress / Received | Accepted / Damage documented / Short / Wrong item / Pending review |
Before demolition, confirm materials through the next release, written approval for any substitution, and a workable delivery route and staging area. Keep materials dry, protected, identifiable, and out of household or work routes.
The gate is Procurement release confirmed when the next phase’s critical items are present and acceptable, or when the responsible owner has approved a documented replan. Every item for the entire remodel does not have to be on site. The practical question is whether the next dependency can be completed without creating a stalled, damaged, inaccessible, or unsafe condition.
Phase 3: Prepare the temporary kitchen and site
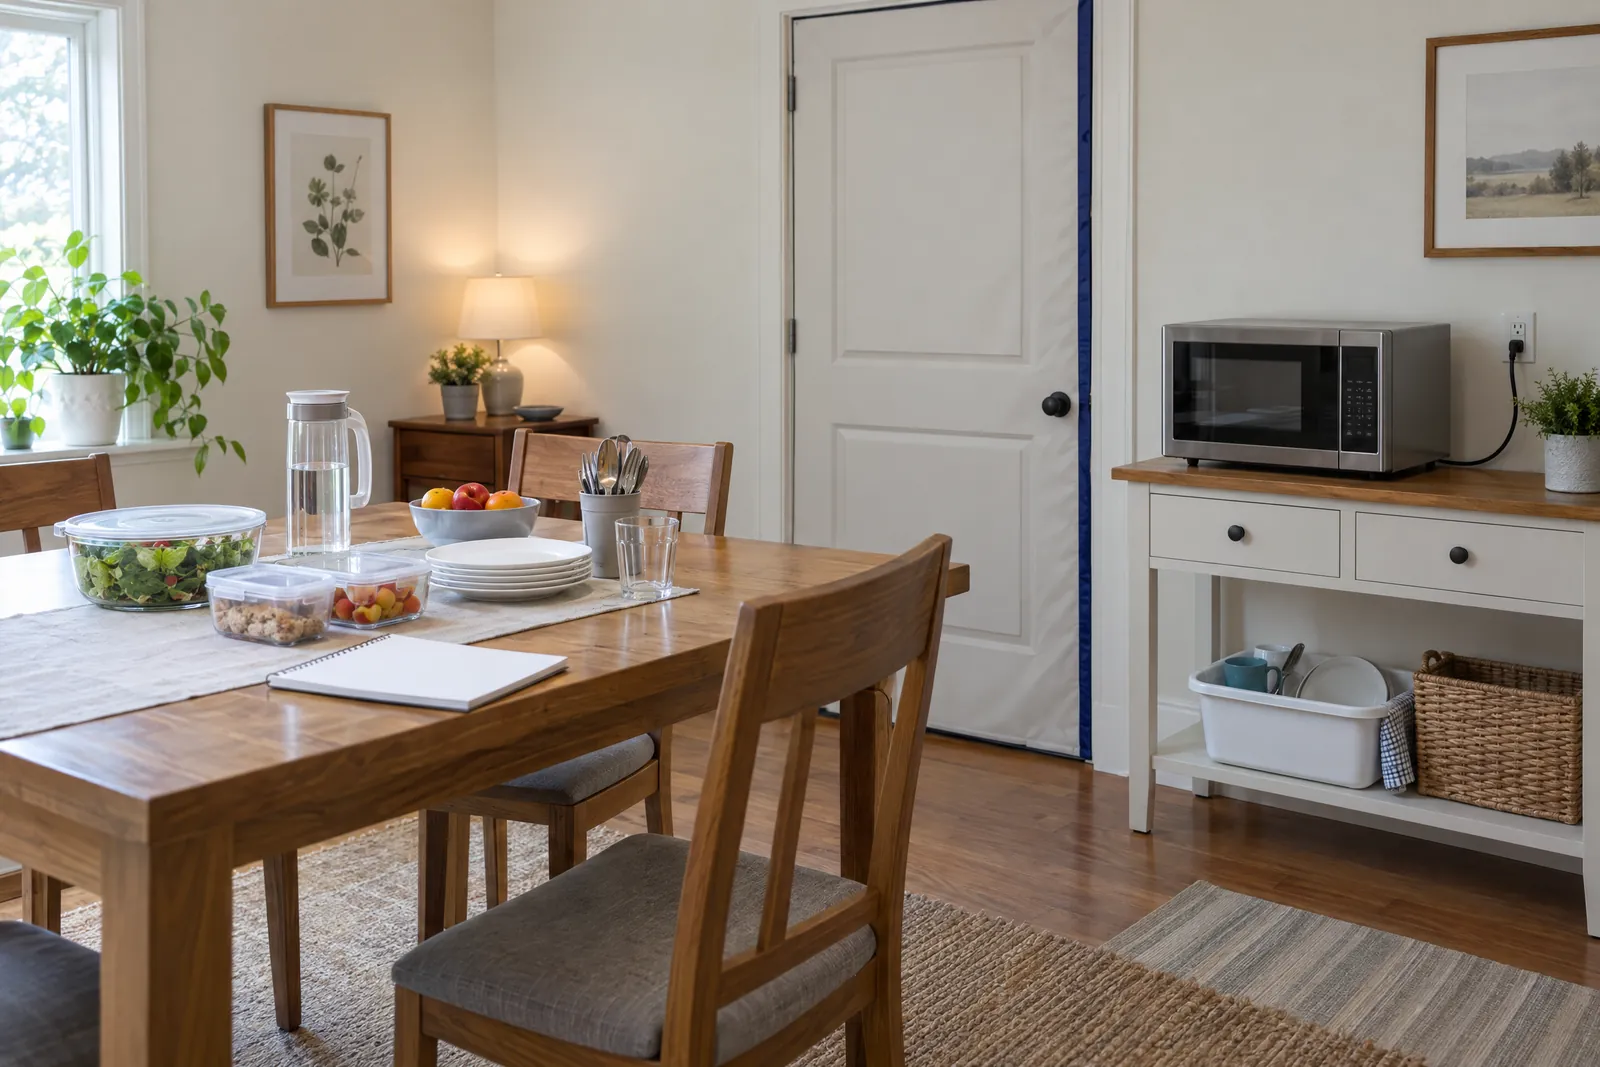
Demolition should not begin merely because a calendar opening appears. The household needs a workable temporary kitchen for food, water, cleanup, storage, access, and daily needs before normal access disappears.
Temporary-kitchen readiness
Confirm the following with the people who will use the setup:
- A refrigerator or safe cold-food plan is available.
- A selected cooking method sits on a stable surface with the utility access its instructions require.
- Drinking water, wash-up, food storage, trash, recycling, and sanitation are addressed.
- Dishes, medications, pet supplies, children’s food, work items, and accessibility essentials remain reachable.
- Meals include low-preparation options and a backup for outages or an unusable area.
- Routes are clear, children and pets are separated as needed, and dust, noise, ventilation, work hours, bathroom access, and communication are understood.
- The team explains possible water, gas, electrical, cooking, or refrigerator interruptions.
- Kitchen items are packed and labeled without hiding temporary-kitchen supplies.
Site readiness
Before removal, confirm the approval path, utility shutoff and restart plan, floor and adjacent-room protection, dust and debris handling, delivery access, and a communication contact. The homeowner should not perform technical utility work outside their competence. Store photos of existing conditions as a baseline.
If your home was built before 1978 and painted surfaces may be disturbed, ask the renovation firm how any applicable lead-safe work and certification requirements will be handled before demolition, sanding or cutting. Requirements and exceptions depend on the property, work, contractor and jurisdiction. Do not assume a surface is lead-free or that this checklist establishes an exemption.
The gate is Demolition ready only when the temporary kitchen, site protection, utility responsibility, procurement release, access plan, and applicable local path are addressed. If one is unresolved, record the blocker and owner rather than asking the household to absorb the risk through improvisation.
Phase 4: Demolition and concealed-condition review
Demolition can reveal outdated wiring, plumbing or water damage, uneven framing, unexpected backing, mold-like conditions, structural questions, or another condition that changes the plan. Do not diagnose it yourself or silently hide it.
At the reveal point, stop the affected work and make a short record:
- What was found, where it was found, and what photographs show.
- Which area or task is paused.
- Which qualified trade or appropriate professional evaluates the condition.
- Whether the scope, drawings, materials, approval path, or written change record may need revision.
- Who can approve the revised work under the contract.
- Which unrelated work can continue without covering, damaging, or depending on the unresolved area.
- What evidence is needed before the next trade is released.
A concealed-condition stop need not halt every activity. Safe, unrelated document review or cleanup may continue, but do not close the wall or make evaluation harder. The gate is Conditions assessed when the discovery and decision are documented and the next release is clear.
Phase 5: Rough work and the wall-closing hold
Rough work may include plumbing, electrical, gas, ventilation, structural, framing, blocking, and other work that becomes difficult to inspect after concealment. The key handoff is evidence that installed work was checked against current information and released before it is hidden.
A dependable handoff looks like this:
- Exposure is sufficient for rough work, and responsible trades install the current scope.
- The team compares locations and requirements with the approved plan and field conditions.
- Applicable local inspections are addressed; corrections have owners and rechecks.
- The project manager records wall-close readiness and stores concealed-work photos.
Before covering, confirm outlet, switch, lighting, hood or vent, plumbing, gas, and appliance locations, plus required access, backing, blocking, clearances, and service provisions. Resolve questions while work remains visible.
The gate is Ready to close walls only after any required inspection or approval has been completed and its result recorded, and the responsible professionals confirm the work is ready to cover. If the local authority confirms that no inspection is required for this scope, record that project-specific answer and the professional handoff instead. An assumed inspection, an unreturned message, or a verbal “it should be fine” is not a release record.
If an inspection or trade review does not release the work, mark the phase Blocked. Record the correction, responsible owner, evidence needed, and recheck path. Do not cover the problem to keep the calendar moving.
Phase 6: Close-in work, floors, and cabinets
After rough work is released, close-in and finish sequencing follows the product, scope, and contractor plan. Drywall and paint may need release before cabinetry. Flooring varies: tile or hardwood may precede cabinets, while floating floors or project-specific plans may follow them. Record the selected sequence and why it will not damage or trap prior work.
The cabinet handoff deserves special care because it controls the countertop template. Before installation, reconcile the cabinet shipment to the approved order and identify any missing, wrong, or damaged components. Confirm that the room and substrate are ready, access is available, and appliance openings and current field conditions match the information being used. If the operating space is uncertain, check appliance openings and operating clearances with the actual product information before authorizing installation.
After installation, verify that the base cabinets are secure, level, aligned, and sufficiently complete for the fabricator’s requirements. Relevant fillers, panels, support details, sink and cooktop decisions, edge and overhang information, seam preferences, and faucet or accessory inputs should be available. An unresolved cabinet defect should remain visible in the open-item log. A cabinet installation date is not the same as countertop-template readiness.
The gate is Countertop template ready only when the cabinets meet the fabricator’s actual requirements and the template inputs have been confirmed. This protects the next handoff from carrying a small unresolved cabinet error into a cutout, edge, seam, or appliance problem.
Phase 7: Template, fabricate, install, and connect
The countertop chain usually depends on verified cabinets:
- Install and review cabinets.
- Field measure or template according to the fabricator’s process.
- Confirm sink, cooktop, faucet, edge, seam, overhang, and cutout information.
- Fabricate and inspect the resulting component when received.
- Install the countertop.
- Complete backsplash and other finish work according to the chosen product sequence.
- Connect the sink, faucet, dishwasher, disposal, plumbing, lighting, hood, and appliances through the responsible qualified trades.
- Test the installed systems and record concerns for correction.
A full-height backsplash, surface product, or other condition may change this order. Confirm the handoff with the fabricator and contractor rather than asking a later trade to compensate for an unverified surface.
At connection, match appliances to approved models and openings. Have qualified trades complete electrical, water, gas, drain, ventilation, and other connections. Operate faucets and fixtures, inspect accessible under-sink and dishwasher areas for moisture, and test hood or vent, lights, dimmers, and outlets as applicable. Review doors, drawers, hardware, panels, trim, caulk, grout, paint, edges, seams, and cutouts.
Phase 8: Punch list, verification, and closeout
Closeout is a sequence, not a single walk around. The project team first corrects its own incomplete work. The homeowner then reviews visible work and operation against the scope. Each item is corrected and verified, deferred in writing with an owner and condition, or escalated.
Use one line per issue. Record location, the incomplete work, and evidence of correction. “Fix cabinet” is weak; “left base door rubs at the hinge side; operate fully and photograph the even reveal after adjustment” gives the responsible person a test.
| Item ID and location | Issue or verification test | Responsible party | Status | Correction evidence or recheck result | Effect on use or closeout | Next action |
|---|---|---|---|---|---|---|
| Open / In correction / Ready to recheck / Verified / Deferred in writing | ||||||
| Open / In correction / Ready to recheck / Verified / Deferred in writing | ||||||
| Open / In correction / Ready to recheck / Verified / Deferred in writing | ||||||
| Open / In correction / Ready to recheck / Verified / Deferred in writing | ||||||
| Open / In correction / Ready to recheck / Verified / Deferred in writing |
Hypothetical scenario: a damaged countertop sink cutout
This is a hypothetical illustration, not a real client case and not a default remedy.
Imagine that the countertop arrives with a damaged sink cutout discovered during receiving or before installation. The precise safe replan is:
- Mark the countertop dependency Blocked. Do not install the damaged component, alter the cutout, or ask the plumber to make the sink fit around it.
- Photograph the condition from useful angles, record the item identity and location, and preserve the delivery and inspection record.
- Notify the fabricator and project manager. Assign each a named action owner and a response record.
- Ask the responsible parties whether the damage affects the sink, faucet, cabinet, backsplash, appliance, access, or any local approval condition.
- Have the fabricator and project owner decide among a remake, an approved replacement, or a documented scope change. The homeowner should not invent a substitute or waive a needed review.
- Keep only genuinely unaffected work moving, such as document review, cabinet adjustments unrelated to the cutout, or cleanup planning that does not risk the countertop or block access.
- Reconfirm sink, faucet, edge, seam, appliance, and cutout inputs before a replacement or revised component is templated, fabricated, or installed.
- Update the procurement tracker, open-item log, and next dependency. If a local approval or permit condition is implicated, ask the authority having jurisdiction or permitted professional what must be done.
This replan preserves evidence and prevents a damaged part from being turned into a hidden downstream defect. It does not promise a replacement method or a schedule. The same dependency logic applies to a missing cabinet part, an incorrect appliance, or an unresolved rough-in: isolate the blocked handoff, document it, assign the decision, and release only confirmed unaffected work.
Owner closeout review
Before owner acceptance, review where safe and appropriate:
- Operate appliances, open cabinets and drawers, and check alignment, hardware, rubbing, and movement.
- Run faucets and inspect accessible connections for moisture. Test dishwasher, disposal, lights, dimmers, outlets, hood or vent, and other applicable systems.
- Inspect grout, caulk, paint, panels, toe kicks, seams, edges, hardware, touch-ups, debris, cleaning, access panels, manuals, and controls.
Collect warranties, manuals, care and maintenance instructions, paint codes, spare tile or other agreed materials, product records, and applicable permit or inspection documentation. Keep a written owner for every outstanding item and a clear completion or recheck condition. Final approval or permit closeout, when applicable, follows the local authority and project conditions. Owner acceptance is a record of what was reviewed and what remains open; it is not created by this article.
Your master phase gate tracker
Copy this worksheet into your project notes and add rows if one phase has several independent releases. The evidence column should point to a photo, order record, inspection result, written decision, test record, or other project-specific confirmation. A blank owner is itself a blocker.
| Phase | Required evidence | Responsible owner | Status | Blocker | Next action |
|---|---|---|---|---|---|
| Permit path | Local confirmation, permit record, or documented contract responsibility | Not started / In progress / Ready / Needs local confirmation / Blocked / Complete | |||
| Procurement | Order confirmation, packing list, receiving check, and condition photos if needed | Not started / In progress / Ready / Blocked / Complete | |||
| Temporary kitchen | Food, water, wash-up, access, storage, and household agreement | Not started / In progress / Ready / Blocked / Complete | |||
| Demolition ready | Pre-demo checklist, site protection, utility plan, and existing-condition photos | Not started / In progress / Ready / Blocked / Complete | |||
| Hidden conditions | Photos, evaluation, written decision, and changed-scope record if needed | Not started / In progress / Ready / Blocked / Complete | |||
| Rough-in release | Trade review, applicable local release evidence, correction record, and concealed-work photos | Not started / In progress / Ready / Blocked / Complete | |||
| Cabinet release | Receiving record, installation check, level and alignment review, and open-item log | Not started / In progress / Ready / Blocked / Complete | |||
| Countertop release | Template confirmation and sink, cooktop, edge, seam, and cutout inputs | Not started / In progress / Ready / Blocked / Complete | |||
| Final connections | Trade confirmation and functional test record | Not started / In progress / Ready / Blocked / Complete | |||
| Closeout | Verified punch items, documents, applicable final records, and owner review | Not started / In progress / Ready / Blocked / Complete |
The tracker separates “waiting for a date” from “waiting for readiness.” A delivery can be expected but not received, or a trade can be available while the prior substrate is incomplete. Status and evidence keep those distinctions visible.
Kitchen remodel timeline FAQs
Can two trades work on the kitchen at the same time?
They can work in parallel only when the project lead confirms that the tasks are independent, access and site protection work for both, and neither task covers or damages work awaiting a required review. Record each handoff separately. If the second trade needs an unfinished connection, surface or inspection result, leave that dependency Blocked rather than overlapping it on the calendar.
What if the appliance model changes after cabinets are ordered?
Pause the affected cabinet or connection handoff. Replace the old model information in the project file and have the cabinet supplier and responsible trades check the new opening, door swing, utility, ventilation and installation requirements. Record any changed materials or written scope before proceeding; the new model name alone does not prove fit.
Can I close out the project with an unfinished punch-list item?
Do not silently mark the whole project Complete. Record what remains, who will correct it, the access needed, the recheck condition and any effect on normal use or the contract. Check the actual agreement and any local final-approval requirements with the responsible parties. A homeowner walkthrough does not replace an applicable local release.
How to use the checklist in real life
At each meeting, call, or site visit, ask: What is the next dependency? Who owns it? What evidence proves readiness? What is the blocker and next action? Update the record immediately.
Keep the household informed about access and utility changes without assigning technical decisions to the homeowner. If an item is unavailable, document whether to wait, substitute, resequence, or pause and who approved it. Protect the evaluation path when concealed conditions appear.
A useful kitchen remodel timeline is not a promise of identical weeks. It explains why a phase can begin and what would prevent it, turning a blocked dependency into a managed decision.
Decision rule: Release the next phase only when its owner, evidence, materials, site conditions, and required local confirmations are documented as ready; otherwise pause or replan.