
A kitchen can look spacious on a sketch and still feel blocked when a dishwasher door is open, a refrigerator drawer is pulled out, or someone is seated at the island. There is no single kitchen clearance number that settles every plan. A useful room check starts by measuring the finished room, labeling each route by its function, subtracting the projections that occupy the room, and testing the open envelopes of appliances and drawers.
Those familiar kitchen numbers answer different questions. A walkway is not a cooking aisle, and an accessibility clearance for a covered kitchen is not automatically a rule for every private home. Decide what each route must do, measure the finished space, and test the doors and people who will actually use it.
Use the checks below to see whether your sketch still works when cabinets, appliance doors, stools, and people occupy the room. A sketch cannot approve a permit or certify accessibility, so confirm the requirements for your project before construction. For finishes and other design decisions after the layout works, see the complete kitchen design guide.
If your room shell and work zones are still undecided, start with the kitchen layout planning worksheet. Bring your shortlisted plan back here to test its finished clearances and open appliance doors.
Start with the finished room, not the cabinet boxes
A cabinet plan often begins with neat box dimensions. Your body, doors, handles, and appliance fronts experience the finished projections instead. Measure the room as it exists or as it will exist after construction, then use those measurements consistently in the plan.
Measure the finished wall envelope
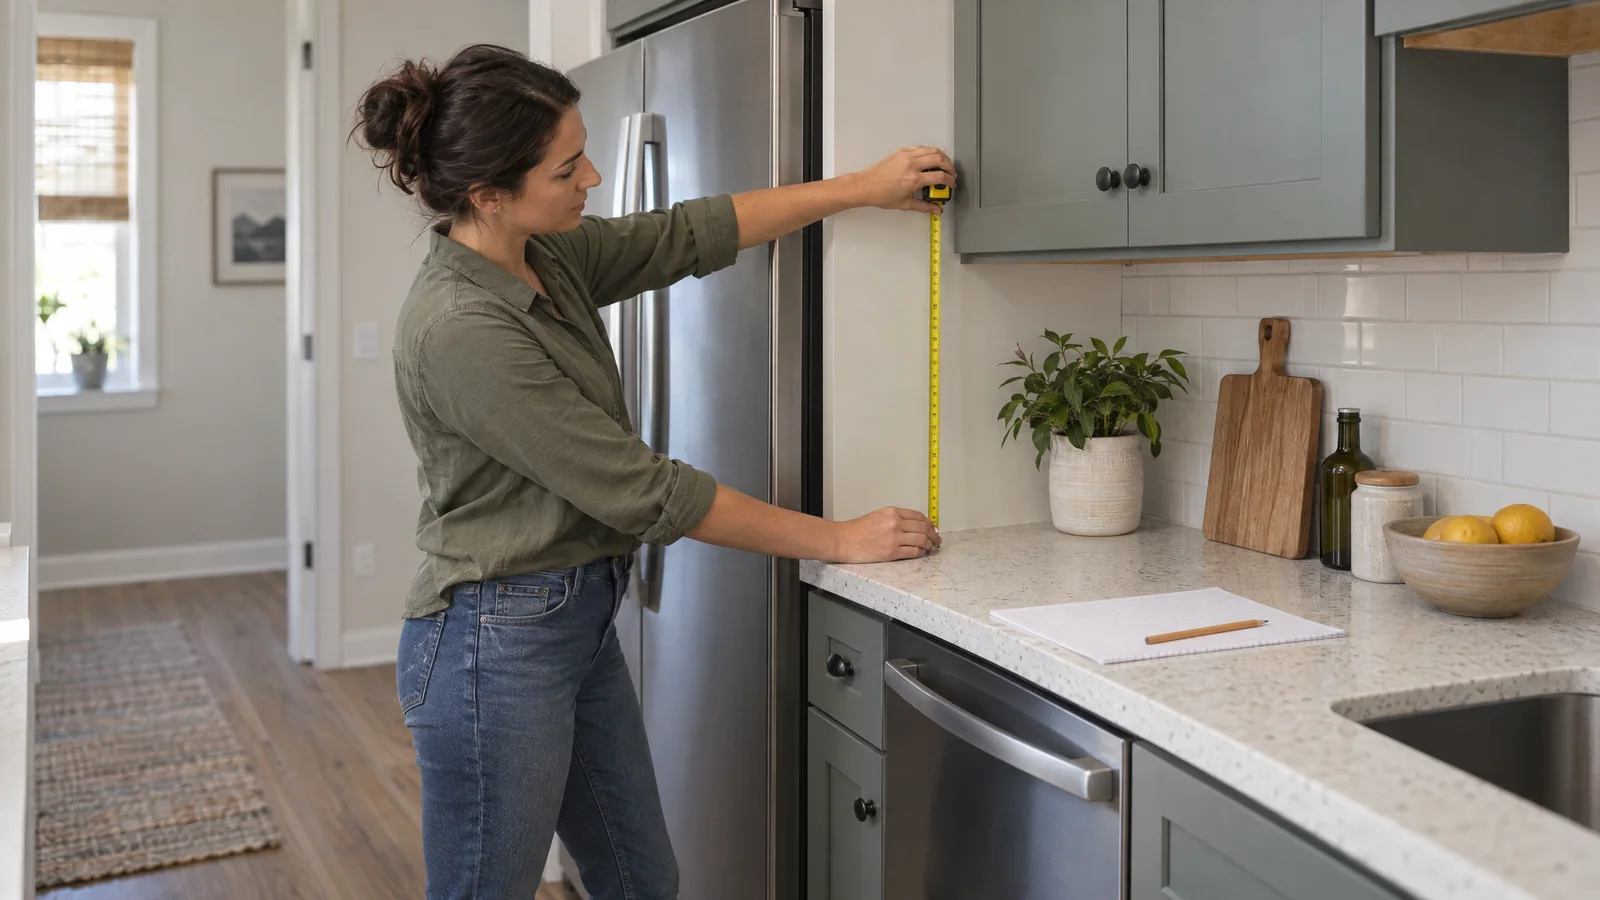
Measure from finished wall surface to finished wall surface. Include drywall, tile, trim, baseboards, columns, and any other permanent projection that narrows the route. A wall that is slightly out of square can produce a generous number at one end and a failing number at the other, so take at least two width measurements and record the narrowest finished dimension.
Do the same for length. Note where a wall return, boxed pipe, radiator, chase, or structural post interrupts the room. A few inches lost at a pinch point can matter more than a larger open area elsewhere.
Use a tape measure for an existing room. For a proposed room, use the dimensions that include the planned finish layers, not just the framing dimensions. Mark which measurements are confirmed and which are assumptions that still need field verification.
Mark doors, windows, and swing arcs
Record the clear opening of every doorway, the door leaf, the hinge side, the swing arc, and the route to adjacent rooms. A door can consume a route even when its closed position appears outside the kitchen work area. Check whether an open door meets a cabinet corner, appliance handle, island end, or another door.
For a doorway, the NKBA kitchen planning guide gives a 32 inch clear-opening recommendation in its earlier public edition. That is a planning figure, not a blanket legal minimum; the guide also discusses a different access recommendation. Measure the usable opening and check the rules that apply to your project.
A clear opening is not the same as the nominal size printed on a door order. Measure the usable opening with the door positioned as the relevant standard describes, and ask the local authority having jurisdiction which rule applies to the project.
Record every fixed projection
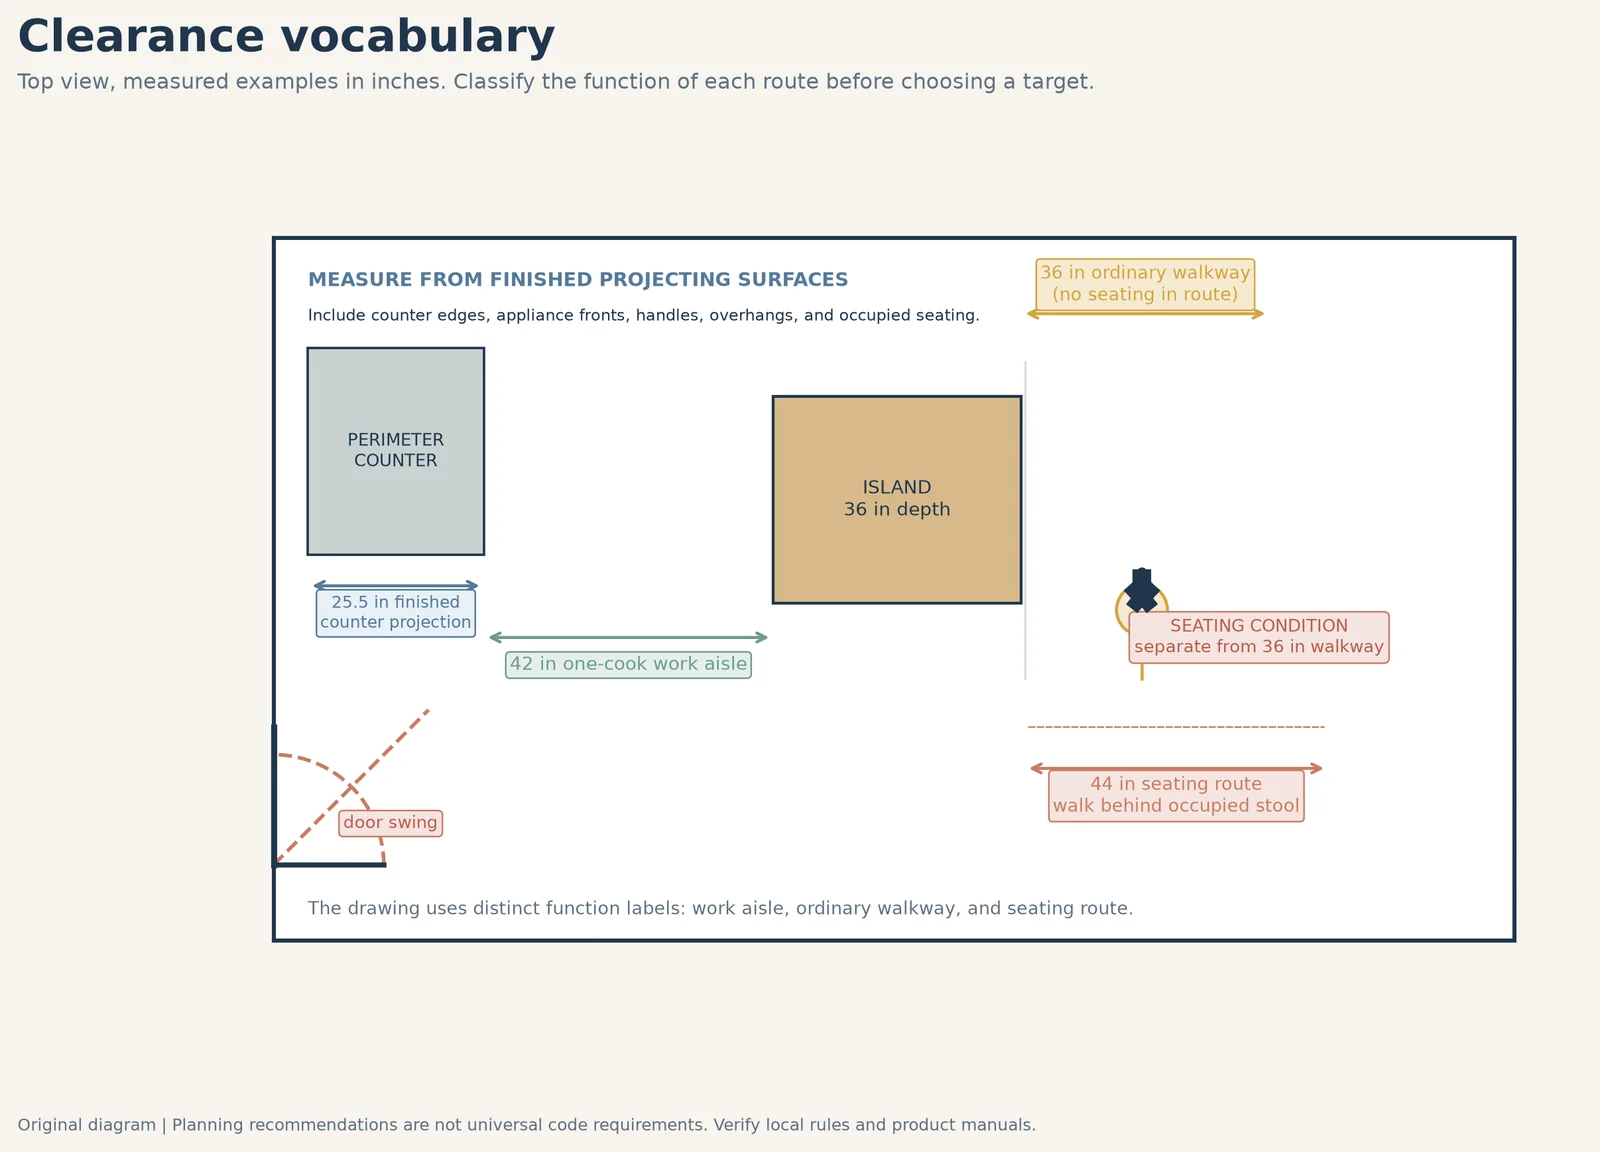
List the projection of each perimeter cabinet, countertop edge, appliance front, handle, filler panel, overhang, radiused corner, and trim piece. If stools or chairs occupy a route, record their occupied depth rather than the depth of the counter alone.
A 25.5 inch counter projection is common in planning examples, but it is not a promise that every cabinet and countertop combination finishes at that dimension. Use the actual cabinet, counter, handle, and appliance information when ordering. A counter overhang may be visually small but still reduce a route at the point where a person turns or an appliance door opens.
Label the space before choosing a clearance
The first question is not “How many inches do I need?” It is “What is this space expected to do?” Label each segment as a walkway, work aisle, seating route, or accessibility route. Then choose a relevant target and test the operating conditions.
| Space function | Planning starting point | What to test before deciding |
|---|---|---|
| General walkway | At least 36 inches | Traffic, doors, egress, corners, and local rules |
| Work aisle for one cook | At least 42 inches | Counter frontage, tall cabinets, appliances, and open doors |
| Work aisle for multiple cooks | At least 48 inches | Two people working, open drawers, appliance access, and turning |
| Seating with no traffic behind | At least 32 inches | Wall or obstruction behind the seated diner |
| Traffic behind seated diner, edge past | At least 36 inches to edge past | Pulled out stool, seated person, and the person passing |
| Traffic behind seated diner, walk past | At least 44 inches to walk past | The occupied stool, traffic pattern, and turning points |
The table uses figures from the linked earlier NKBA guide as starting points, not universal code minimums. Measure between finished counter fronts, tall cabinets, and appliances. Then check each route with doors, stools, drawers, and people in use. If accessible seating or wheelchair passage is part of the plan, check its separate requirements instead of using the general seating rows as proof of access.
Walkway
A walkway primarily carries people through the room. The table starts at 36 inches for a general walkway, not for active cooking. Test a busy route with an open dishwasher, a seated diner, or two people passing, and keep required exits and local requirements in the decision.
Draw the path from the kitchen entrance to the next room. Ask whether someone carrying a hot pan, a grocery bag, or a child can use it without stepping into an active work zone. A route that is technically wide enough at its center may still be awkward at a corner or beside an open dishwasher.
Work aisle
A work aisle is where someone stands to prep, cook, or use an appliance. The table starts at 42 inches for one cook and 48 inches for multiple cooks. Measure between finished counter fronts, tall cabinets, and appliances, then test those widths with people, doors, and drawers in their working positions.
Do not relabel a work aisle as a general walkway just to make an island fit. If people will stand there to prep, load a dishwasher, open a range, or work side by side, the function of the space remains active even when it also carries traffic.
Seating route
Seating changes the footprint of an island or peninsula. Start with 32 inches from the counter edge to the obstruction if no one passes behind a diner, 36 inches if someone occasionally edges past, or 44 inches for a regular walking route. Then pull out the actual stool and test the path. Choose the route based on how the room is used, not only on an empty-floor sketch.
Measure to the occupied stool, not simply to the counter edge. A pulled out stool, knees, a person leaning back, and the depth of a knee space can all reduce the usable route. If a seating side is also a regular path between rooms, use the walking function for the check rather than treating the stools as decorative objects that disappear from the plan.
Accessibility route
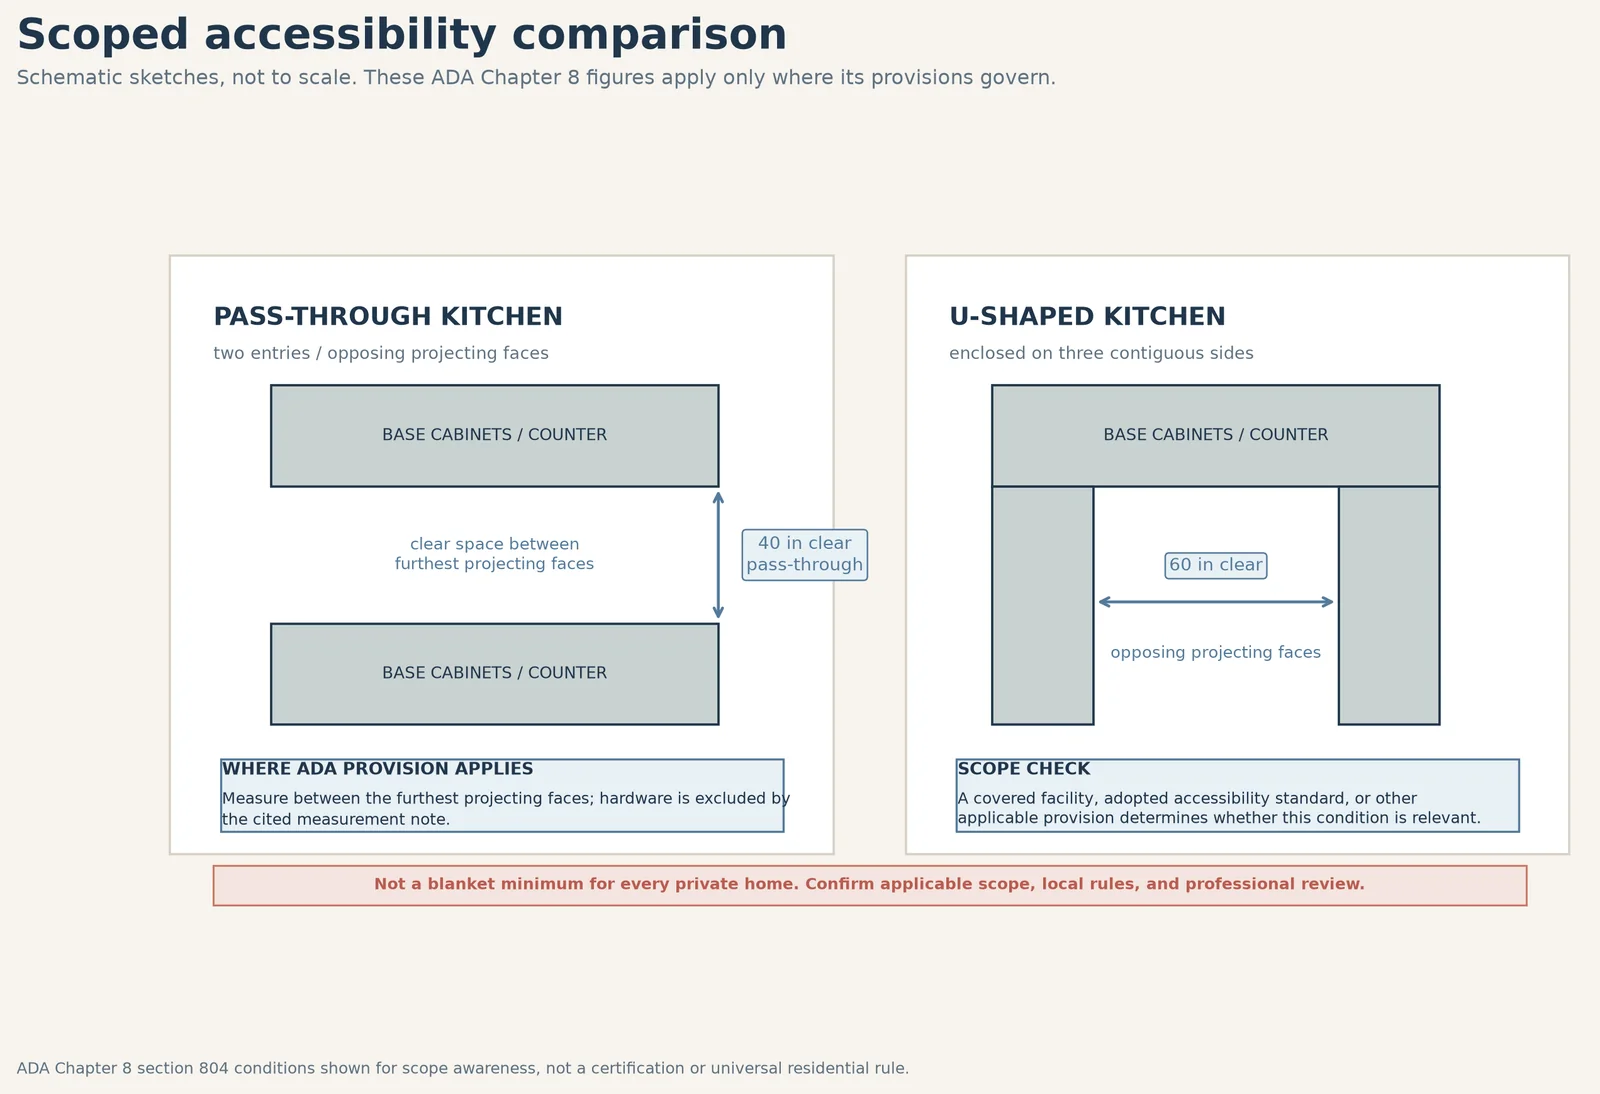
If your project is covered by ADA kitchen provisions, the layout needs a separate check. The U.S. Access Board’s kitchen requirements specify at least 40 inches between opposing base cabinets, counters, appliances, or walls in a pass through kitchen with two entries where section 804.2.1 applies. First confirm the project and kitchen fall within that scope; do not treat this as a rule for every home.
Under that covered scope, section 804.2.2 calls for at least 60 inches between opposing base cabinets, counters, appliances, or walls in a U shaped kitchen enclosed on three contiguous sides. The Access Board measures from the furthest projecting faces, excluding hardware. Check the full set of applicable provisions, not just one aisle measurement.
Most private homes are not automatically covered by these ADA provisions, but local rules or a housing program may set other obligations. Section 804.2 also excepts a space without a cooktop or conventional range from these particular clearance rules. Ask the relevant authority and a qualified designer which rules apply. A single width cannot establish accessibility: turning space, clear floor area, reachable controls, the sink, and the full route may also matter.
Use one room width formula
Choose the function of each side before doing the arithmetic. Then use finished projections and the target route widths in a simple planning calculation.
Usable room width = finished wall to wall width minus all fixed opposing projections
Maximum island depth under these assumptions = usable room width minus target work aisle minus target opposite route
For two opposing perimeter runs with no island, use this version:
Clear center width = room width minus first finished projection minus second finished projection
Subtract fixed projections on both sides before calculating space for an island. Count an opposite projection as zero only if the route ends at a finished wall without a counter, appliance, or other projection. This is a fit check, not a code calculation or a substitute for open door, utility, structural, ventilation, and product installation checks.
For an island between a perimeter run and an opposite route, label each side separately. One side may be a 42 inch one cook work aisle. The other may be a 36 inch walkway or a 44 inch route behind occupied seating. If a dishwasher or oven opens into either side, draw that operating envelope and recalculate the narrowest condition.
Test appliance and drawer operation
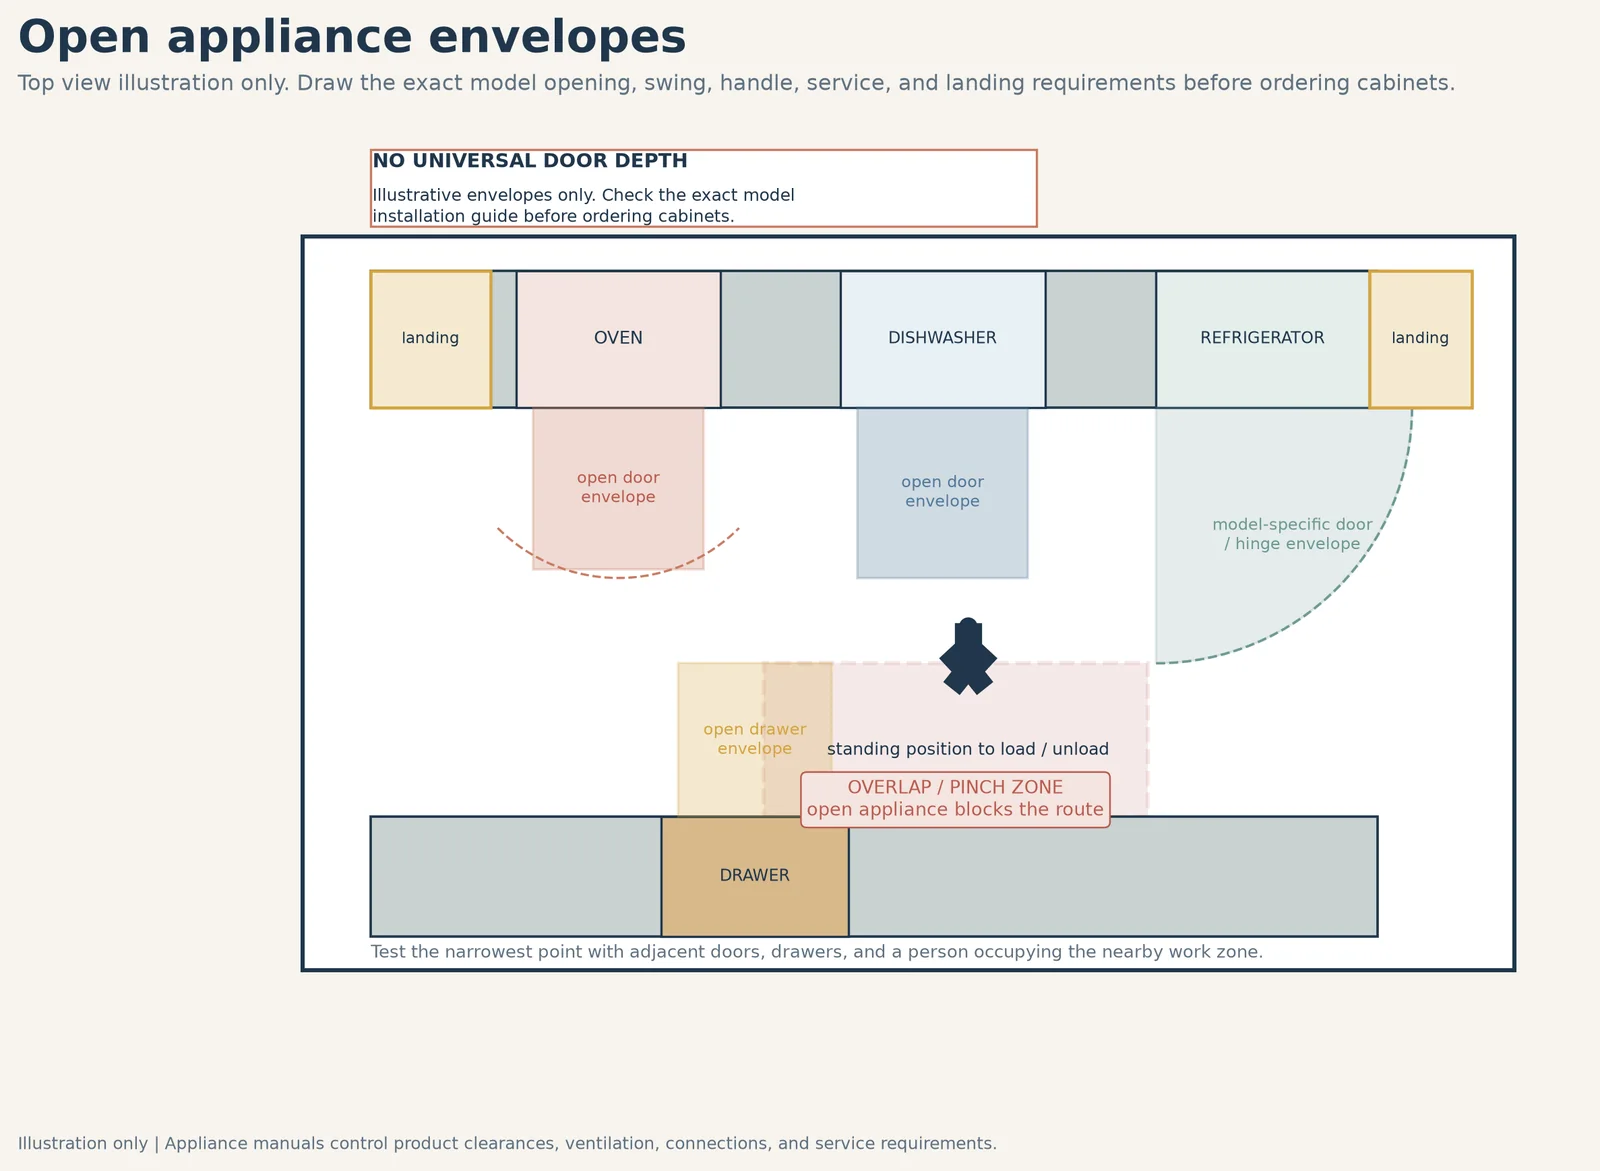
A static plan can pass while the kitchen fails in use. Save the exact appliance installation guide before final cabinet orders. Appliance manuals control the model specific opening, hinge, side, rear, top, service, ventilation, connection, and clearance requirements.
Refrigerator
Record the model opening, hinge side, handle projection, door swing, drawer pullout, adjacent wall return, and landing surface. A generic refrigerator width is not an installation dimension. Some doors need room to open past a wall or filler, and a drawer may extend farther than the cabinet face.
Draw the door at the angle needed to reach shelves and drawers. If the refrigerator is beside an island, mark the open door envelope and the standing position needed to load it. Then check whether that position blocks the principal work aisle or a route to another room.
Dishwasher
Draw the open dishwasher door and the standing position needed to load and unload it. Check whether the door blocks the sink, a drawer, a walkway, or another appliance. A 42 inch empty work aisle may become a much tighter operating space when the door is down and a person is standing in front of it.
The useful question is not only whether the door can open. It is whether a person can use the appliance without closing off the sink, the only route through the room, or the next task.
Oven and range
Use the exact installation guide for the range or wall oven. Check the open door against the opposite counter and the main traffic path. Also check the required landing arrangement, ventilation, backsplash, nearby materials, utilities, and service access in the model instructions and applicable local rules.
For a freestanding range, check that the correct anti tip bracket is securely installed and that the range is held by it. Follow the model’s instructions and the CPSC range tipover guidance before using the appliance.
Drawers, pantry pullouts, and corner doors
Open the widest drawer and the tallest pantry pullout. Then open the adjacent appliance door in the same drawing. Mark the narrowest pinch point, not the average aisle width. Corner doors can sweep across a route, and a drawer that opens into a handle or stool can make an otherwise attractive plan frustrating.
If more than one person will cook, show both people in the drawing. Place one person at the sink or prep surface and another at the range or refrigerator. The clear space needed to move behind a person is different from the clear space needed to pass an empty counter.
Check landing space and work zones
Landing space is usable counter surface beside an activity. It is not a decorative stretch of counter across the room. A landing surface should remain available when the adjacent appliance is opened and should not be blocked by a corner, handle, or traffic route.
Sink and preparation surface
Mark where ingredients are set down before washing, cutting, or cooking. Check the relationship between the sink, the preparation surface, the cooking surface, and the refrigerator. If the only preparation surface is across a traffic lane, the plan may feel inconvenient even when the aisle arithmetic works.
Refrigerator landing
A landing surface beside a refrigerator is useful only if the door can open as intended and the handle is reachable. Check the wall return, hinge side, and door swing before counting the adjacent counter as available landing space. A landing area that disappears behind an open door is not available at the moment groceries need to be set down.
Cooking landing
Check where a hot pan can be set down beside the cooktop, range, or wall oven. Then compare the proposed setup with the exact appliance instructions for nearby materials, ventilation, utility connections, and service access before ordering.
Work triangle or work zones
The work triangle can help you see the relationship between refrigeration, cleanup and preparation, and cooking. It is one planning lens, not a legal rule and not the only way to organize a modern kitchen.
Use a triangle as a sketch check
Draw the routes from the refrigerator to the sink and preparation surface to the cooking area. In a simple one cook plan, see whether a door, island, or busy passage interrupts those trips. This is a quick way to spot a detour, not a pass or fail measurement for every kitchen.
Switch to zones when the triangle is misleading
Use zones when several people or several routines share the room. A prep zone can include the sink, knives, mixing space, and waste sorting. A cooking zone can include the range, oven, pans, and heat safe landing surface. A refrigeration zone can include the refrigerator, freezer, and grocery landing area. A pantry or beverage zone may need its own route so that people making coffee do not cross the main cooking path.
Draw the routes between zones and note where they cross. A zone plan succeeds when each task has a place to stand, a place to set something down, and a route that does not cut through another person’s active work.
Worked example one: a one cook island check
This is an illustrative calculation, not a measured project. Assume a finished room width of 144 inches, one perimeter counter projecting 25.5 inches, and a finished wall opposite it with no other projection. Test a 36 inch deep island, a 42 inch work aisle for one cook, and a 36 inch walkway between the island and that finished wall.
The total used width is:
25.5 + 36 + 42 + 36 = 139.5 inches
The unallocated width under these assumptions is:
144 - 139.5 = 4.5 inches
Under those assumptions, 4.5 inches remains unallocated. That is not a guaranteed installation margin. Before ordering, draw the countertop overhangs, handles, open drawers, refrigerator and dishwasher doors, door swings, and any seating. If an opposite counter or a stool route is added, include that projection or replace the walkway target with the appropriate seating route, then calculate again.
A small remaining tolerance is also a reason to verify the room at several points. A wall that is out of square, a trim return, or an appliance handle can consume those inches before the plan reaches the operating test.
Worked example two: a multiple cook island that does not fit
This is also an illustrative calculation, not a measured project. Assume a finished room width of 168 inches, a perimeter counter projecting 25.5 inches on each side, a 36 inch deep island, and a 48 inch work aisle for multiple cooks. On the seating side, test a 44 inch route from the island counter edge to the opposing counter front with a diner seated.
The total used width is:
25.5 + 36 + 48 + 44 + 25.5 = 179 inches
The shortfall is:
179 - 168 = 11 inches
The fixed island fails this width test by 11 inches before open appliance doors are drawn. Options include removing the fixed island, using a shallower worktable only when its function and stability are appropriate, relocating seating, changing the room plan, or consulting a kitchen designer. Do not simply relabel the 48 inch work aisle as a 36 inch walkway if people still cook there.
The printable kitchen clearance worksheet
Use the worksheet below with a tape measure, a scaled drawing, or a floor plan marked with finished dimensions. Fill it in using finished projections. Then retest the narrowest point with doors, drawers, and seating in their operating positions.
| Field | Reader entry |
|---|---|
| Narrowest finished room width | ________ |
| Narrowest finished room length | ________ |
| Door clear opening and swing | ________ |
| Window and trim projections | ________ |
| Perimeter cabinet and counter projection | ________ |
| Island or peninsula projection | ________ |
| Appliance model and installation guide saved | ________ |
| Work aisle target and reason | ________ |
| Walkway target and reason | ________ |
| Seating route target and reason | ________ |
| Accessibility scope to verify | ________ |
| Refrigerator open envelope | ________ |
| Dishwasher open envelope | ________ |
| Oven or range open envelope | ________ |
| Largest drawer and pantry envelope | ________ |
| Sink landing surface | ________ |
| Refrigerator landing surface | ________ |
| Cooking landing surface | ________ |
| Narrowest measured pinch point | ________ |
| Local code question for official or professional | ________ |
| Final appliance and cabinet sign off | ________ |
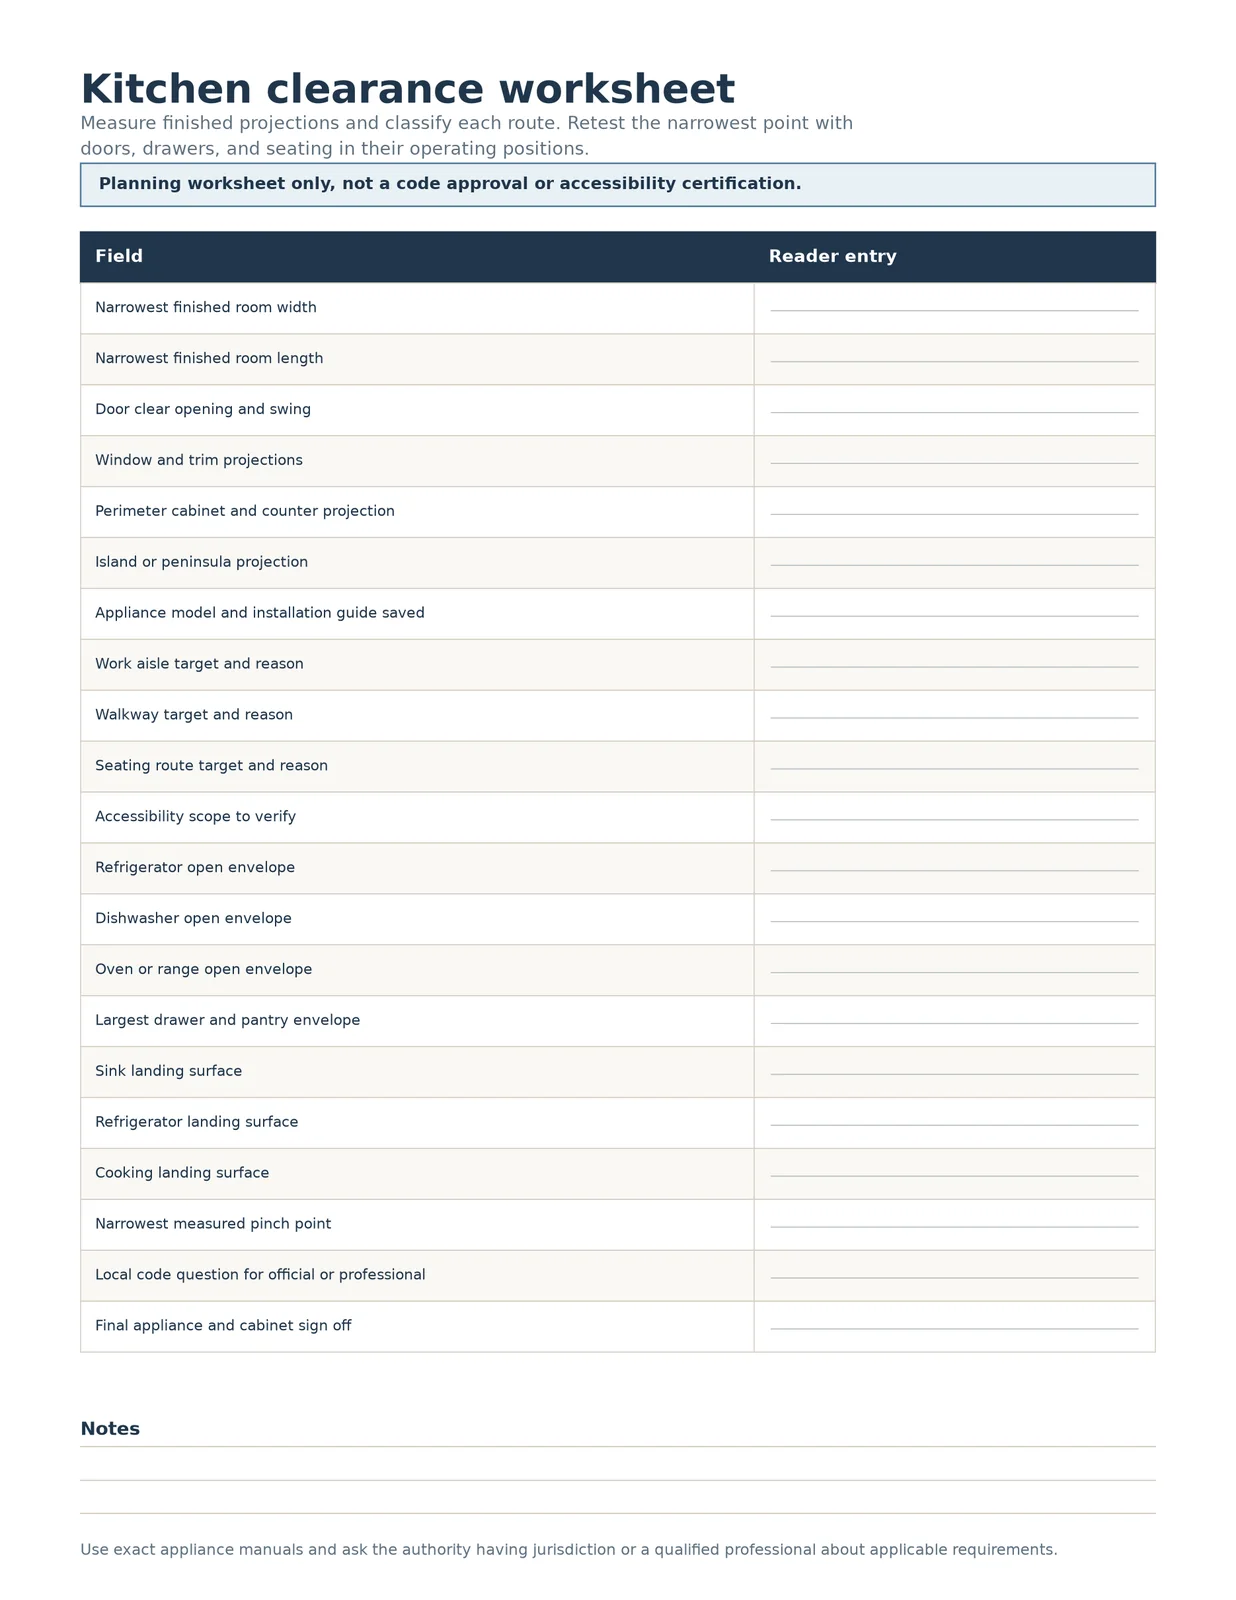
Download the kitchen clearance worksheet as a printable PDF
What to verify before construction
Before ordering cabinets, confirm the narrowest finished dimensions, the exact appliance models, and the requirements for your project. The figures used here come from the linked earlier public guide; if you are working from a newer edition, check the current NKBA planning guidelines overview rather than assuming those figures are unchanged. Ask your local authority or qualified kitchen professional what applies before changing walls, services, or fixed cabinetry.
Keep these distinctions visible in the plan:
- Keep a dated sketch of confirmed field measurements and mark any assumption that still needs checking.
- Save the installation sheet for each selected appliance and check its actual opening, ventilation, connection, and service needs.
- If accessibility requirements apply, check the entire route, turning area, controls, and sink, not just the kitchen aisle.
- Ask the responsible local office which permits or reviews are needed before construction or utility work.
- For a freestanding range, make sure the correct anti tip bracket is secured and engaged as the product instructions require.
- Arrange qualified review if the plan changes walls, utilities, gas, ventilation, structural elements, or accessibility obligations.
If the plan passes the finished width calculation and the open door test, save the appliance manuals and have the applicable local requirements reviewed before ordering. If it fails, reduce the island, remove seating, relocate the traffic route, use a peninsula or worktable, or redesign the work zones. A smaller plan that operates cleanly is more useful than a larger plan that works only on paper.