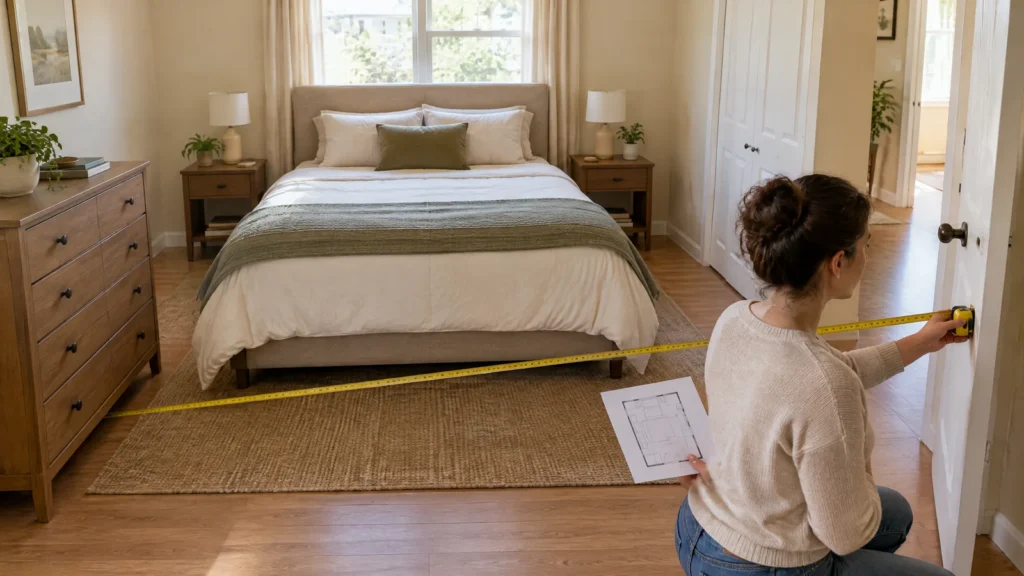
A workable bedroom layout starts with measurements, not a furniture category or a room label. You do not need one universal “standard bedroom” number. You need the finished room dimensions, the actual assembled furniture footprint, and enough open space for the actions the room must support.
Use this guide as a bedroom furniture layout dimensions worksheet. Measure the room and fixed obstacles, record the full furniture envelope, choose a planning tier for each route, and test the narrowest point. The result should be one of three honest decisions:
- Fits: the planned furniture and required routes work under the assumptions you recorded.
- Fits with trade-offs: the furniture fits, but a side is tight, a nightstand must shrink, or a use such as two-sided bed making is less convenient.
- Revise the plan: a required route, door, closet, drawer, window, vent, alarm, or exit path is blocked, or the chosen use cannot happen comfortably enough for the household.
Use the spacing values below as planning starting points, not guaranteed minimums. Check your products and local requirements before changing a room, and use the needs of the people who sleep there as the final test.
Start here: the three measurements that determine whether a layout works
Measure the finished room, not the listing or plan label
Measure between finished surfaces at more than one point. A room described as 10 by 11 feet may be narrower near baseboards, casing, a bump-out, or a built-in. Record the smallest usable length and width, then note where the reduction occurs.
Write measurements in inches for the arithmetic. Ten feet becomes 120 inches, and 11 feet becomes 132 inches. Record the date, tool, and uncertainty such as “about 1/2 inch because trim blocks the tape.”
Also record ceiling height, sloped sections, beams, soffits, fans, and low areas. A bed can fit on the floor plan but fail when a tall headboard meets a low window.
Record fixed features before moving the bed
Mark every opening and projection on a quick room sketch:
- bedroom door opening, leaf width, hinge side, swing arc, and latch-side space;
- closet opening, case depth, door type, track, shelves, and the zone needed to stand and reach;
- windows, sill height, trim, curtains or blinds, heat sources, and cleaning access;
- radiators, registers, returns, pipes, columns, built-ins, and wainscoting;
- outlets, switches, charging points, smoke and carbon monoxide alarms, and other controls;
- any lease restriction, landlord instruction, or manufacturer-required service space.
A door leaf or open drawer is not an invisible line. It occupies space while someone uses it. Draw the swing or projection on the plan and subtract it from the route at the pinch point.
Separate a furniture footprint from its operating clearance
A dresser that is 18 inches deep does not need only an 18-inch strip of floor. If its drawer extends 22 inches beyond the front and the person needs an assumed 24 inches to stand, the full zone is 18 + 22 + 24 = 64 inches from the wall behind the dresser, or 46 inches beyond its front. Measure the actual item and user; these are example values, not a universal requirement.
Use the same distinction for a bed. The mattress label is only one input. A frame, headboard, footboard, adjustable base, feet, bedding, pillows, handles, nightstand, and wall trim can change the real envelope. Measure the assembled item whenever possible.
Quick result box
After each candidate layout, write the following before you style the room:
| Check | Your result |
|---|---|
| Finished room length and width | ______ in by ______ in |
| Bed or largest furniture envelope | ______ in wide by ______ in long |
| Narrowest used-side route | ______ in |
| Narrowest primary route | ______ in |
| Foot or storage operating zone | ______ in |
| Decision | Fits / Fits with trade-offs / Revise the plan |
| Main assumption to verify | ______ |
If a required opening or route fails, do not hide the problem by averaging the measurements. Revise the orientation, furniture, access expectation, or room assignment.
What to measure in a U.S. bedroom
Room shell and ceiling conditions
Measure finished length and width along the floor, then check near the ceiling if the walls taper or the room is irregular. Note baseboards, casing, chair rails, radiators, and any trim that prevents furniture from sitting flush. Measure alcoves separately instead of folding them into a larger wall length.
For tall furniture, record finished floor to ceiling and the height below beams, soffits, or sloped portions. Leave the clearance required by the item’s instructions around vents, heaters, and service points. A generic furniture spacing rule cannot replace equipment or manufacturer instructions.
Doors, windows, closets, and fixed services
Measure the actual door opening, not just the slab. Record leaf width, hinge side, swing direction, handle projection, and open position. Do the same for closet doors. A walk-in closet needs both the opening and a place to stand inside or at the threshold.
For windows, record the opening, sill height, trim depth, curtain or blind projection, and whether the window serves as an emergency escape and rescue opening under local requirements. Do not use a general layout rule to resolve a blocked opening.
Mark outlets, switches, alarms, vents, radiators, and HVAC equipment. Preserve access and airflow according to the applicable instructions. If the plan requires electrical, structural, heating, or anchoring changes, refer the work to the appropriate qualified professional rather than solving it with a floor-plan assumption.
Furniture and the “made” bed
Create an inventory with width, depth, and height for every item you intend to keep, including the mattress, frame, headboard, footboard, bedding, nightstands, lamps, storage, desk, chair, crib, bunk, and rug.
Add these columns to the inventory:
| Item | Closed W x D x H | Open projection | Standing or pull-back zone | Required clearance | Product details and date measured |
|---|---|---|---|---|---|
| Bed and frame | ______ | ______ | ______ | ______ | ______ |
| Nightstand | ______ | ______ | ______ | ______ | ______ |
| Dresser | ______ | ______ | ______ | ______ | ______ |
| Wardrobe or closet unit | ______ | ______ | ______ | ______ | ______ |
| Desk and chair | ______ | ______ | ______ | ______ | ______ |
| Other | ______ | ______ | ______ | ______ | ______ |
Measure the bed in the condition in which it is used. A topper and bedding can affect nightstand reach, a low sill relationship, or sitting and transfer. Mark made-mattress height separately from frame height.
U.S. mattress footprints: useful starting inputs, not complete bed sizes
Typical U.S. mattress labels are approximately twin 38 by 75 inches, twin XL 38 by 80, full 53 by 75, queen 60 by 80, king 76 by 80 and California king 72 by 84. These are nominal mattress inputs, not finished bed footprints. Check the manufacturer’s current dimensions, then measure the assembled frame.
| Mattress label | Approximate mattress size | Approximate feet and inches | Add before planning the room |
|---|---|---|---|
| Twin | 38 x 75 in | 3 ft 2 in x 6 ft 3 in | Frame, headboard, bedding, and access on used sides |
| Twin XL | 38 x 80 in | 3 ft 2 in x 6 ft 8 in | Frame and the extra length at the foot |
| Full | 53 x 75 in | 4 ft 5 in x 6 ft 3 in | Frame, whether two sleepers need two-sided access |
| Queen | 60 x 80 in | 5 ft x 6 ft 8 in | Frame, headboard, and desired side and foot zones |
| King | 76 x 80 in | 6 ft 4 in x 6 ft 8 in | Frame, headboard, and wider side zones |
| California king | 72 x 84 in | 6 ft x 7 ft | Frame, headboard, and extra length at the foot |
A label can also hide a longer variant, a nonstandard product, or a different frame design. Verify the current mattress specification and then measure the assembled frame. For illustrative arithmetic only, a frame might measure 41 by 78 inches for a twin, 57 by 78 for a full, 63 by 83 for a queen, 79 by 83 for a king, or 75 by 87 for a California king. Those frame dimensions are planning inputs, not universal product dimensions.
Clearance tiers: choose the job before choosing the number
Different gaps perform different jobs. Do not assign the same target to the decorative space behind a headboard, a daily route to the closet, and the open zone in front of a dresser.
| Planning job | Starting point to test | What it means | Important limit |
|---|---|---|---|
| Constrained used-side access | About 24 in | A tight ordinary walking route that may work when use is limited | Not a universal minimum, and may not support mobility devices, caregivers, or easy bed making |
| Everyday bed-side access | About 30 in | A more practical comfort target for a side used regularly | Measure the narrowest point, including trim, bedding, nightstands, and hardware |
| Primary route or generous access | About 36 in or more | A useful first target for a main door-to-bed or door-to-closet route | Not automatically an accessibility or egress standard |
| Foot or storage operation | Often 36 in as a first test | A starting point for walking at the foot or standing at storage | Deep drawers, handles, doors, benches, and user needs can require more |
| Mobility, transfer, or caregiver use | Individualized | Plan from the actual device, transfer method, turning needs, reach, and applicable standards | Do not reduce an individual need to one universal bedroom number |
The 24, 30 and 36-inch figures are starting points for different household tasks, not legal bedroom minimums or proof of accessibility. If someone uses a mobility device or needs help transferring, measure the actual person and device and get qualified advice for that situation.
The bedroom measurement worksheet
Step 1: choose the access sides
Label each bed side used, occasional, or wall side/no route. Ask who sleeps on each side, who gets up first, how the bed is made, and whether a partner, child, pet, caregiver, walker, wheelchair, or transfer method needs that side.
A bed against a wall may fit on paper, but the wall side is not available for routine access. Treat it honestly as no route instead of counting the wall gap as spare walking width. If that side might become needed later, record the future use as a constraint now.
Step 2: choose a tier for each route
Write the reason beside the target. For example, “about 30 inches for daily solo access,” “about 36 inches for the main entry route,” or “individualized for walker transfer.” A target without a use assumption can look more authoritative than it is.
Step 3: subtract actual envelopes
Use the narrowest point. Include baseboards, casing, handles, bedding, rug edges, open doors, open drawers, and furniture that shifts when used. Do not use the average distance between walls when one corner creates a pinch point.
Step 4: run the fully open test
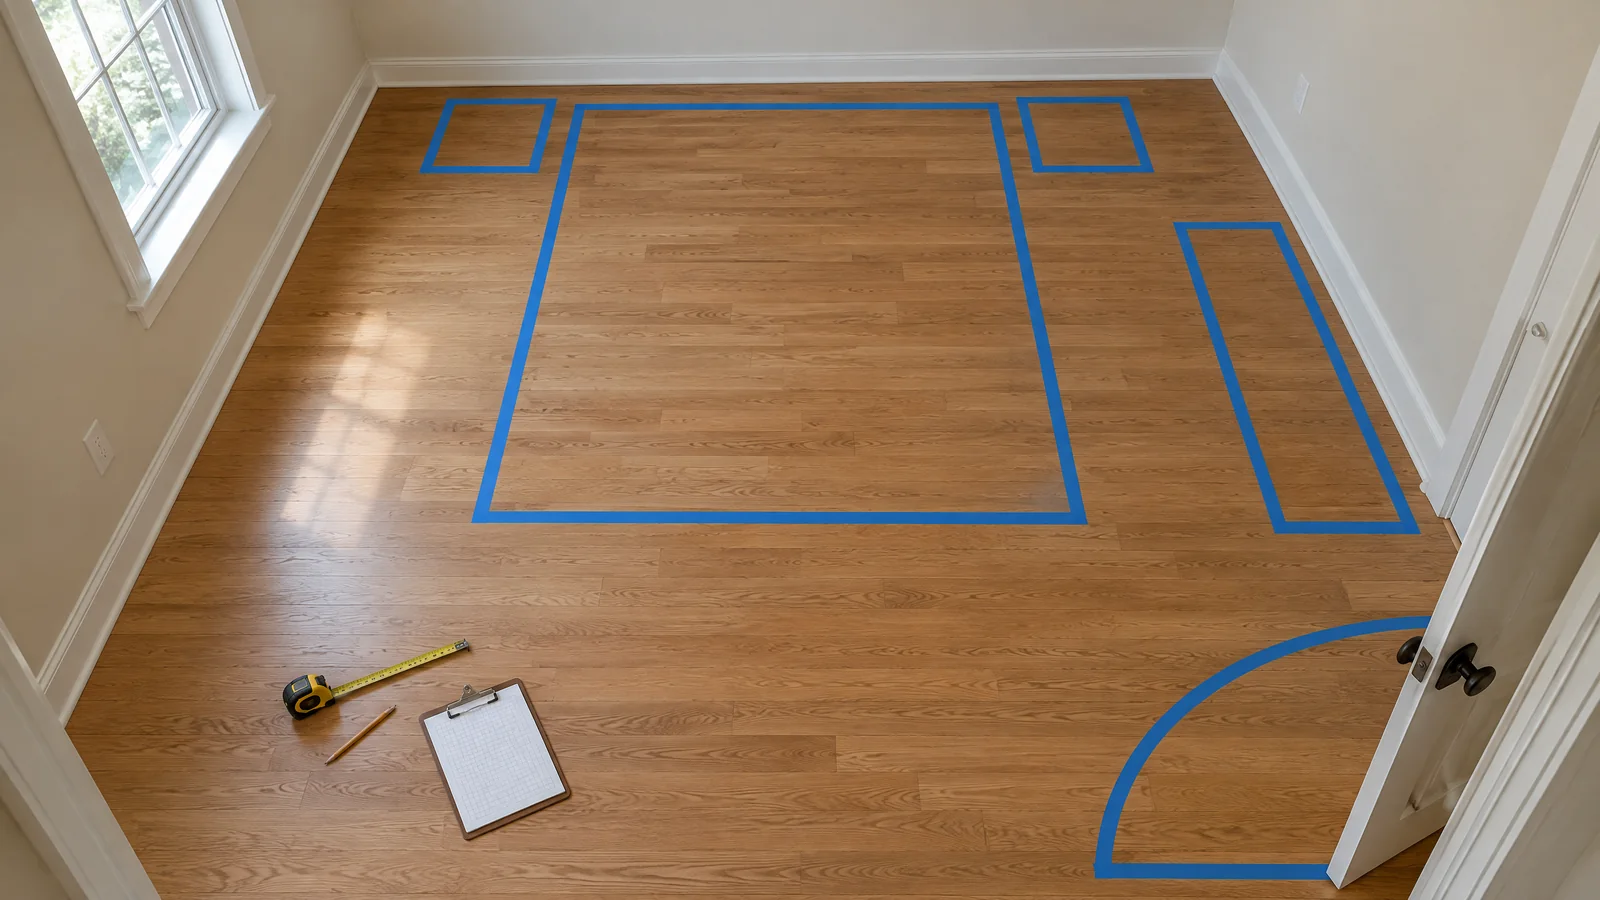
On the drawing, show the bedroom door open, closet door or curtain in use, dresser drawers extended, wardrobe doors open, desk chair pulled back, and any storage pull-out extended. Then trace the route between the entrance, bed, closet, window, bathroom, and other essential destination.
If you can safely do so, mark the floor with removable tape and walk the arrangement in daylight and low light. Test entering, bed exit, sheet changing, storage, desk seating, switches, cleaning, and window use. The tape test reveals assumptions but does not replace local code or product instructions.
Record each candidate layout
| Candidate | Bed orientation and frame size | Used sides | Narrowest side route | Foot or storage zone | Result | Revision to test |
|---|---|---|---|---|---|---|
| A | ______ | ______ | ______ in | ______ in | Fits / trade-offs / revise | ______ |
| B | ______ | ______ | ______ in | ______ in | Fits / trade-offs / revise | ______ |
| C | ______ | ______ | ______ in | ______ in | Fits / trade-offs / revise | ______ |
Core formulas
Remaining side clearance
room width − frame width − fixed obstructions = total side space
If the bed is centered and both sides are used:
total side space / 2 = side clearance per side
If a nightstand occupies the side zone, measure the route beyond the nightstand, not just the wall-to-bed gap. Include its drawer or door projection.
Remaining foot clearance
room length − actual assembled bed length − other projections not included in that length − fixed obstructions = available foot space
Do not call the result clear if a bench, dresser, rug edge, radiator, or door swing occupies the same zone.
Storage operating clearance
furniture depth + open door or drawer projection + standing space = total zone measured from the wall behind the furniture
Use the manufacturer’s open dimension when available. Otherwise measure the actual door or drawer and label your standing-space value as an assumption.
Narrowest route
usable route = wall-to-wall distance − fixed features − furniture projection − open door or drawer projection
A layout passes the planning test only when the route meets the selected tier and does not block a required window, alarm, vent, or exit path.
Worked bedroom furniture layout dimensions examples
The examples below use illustrative frame dimensions so the arithmetic is visible. Replace them with your assembled furniture measurements.
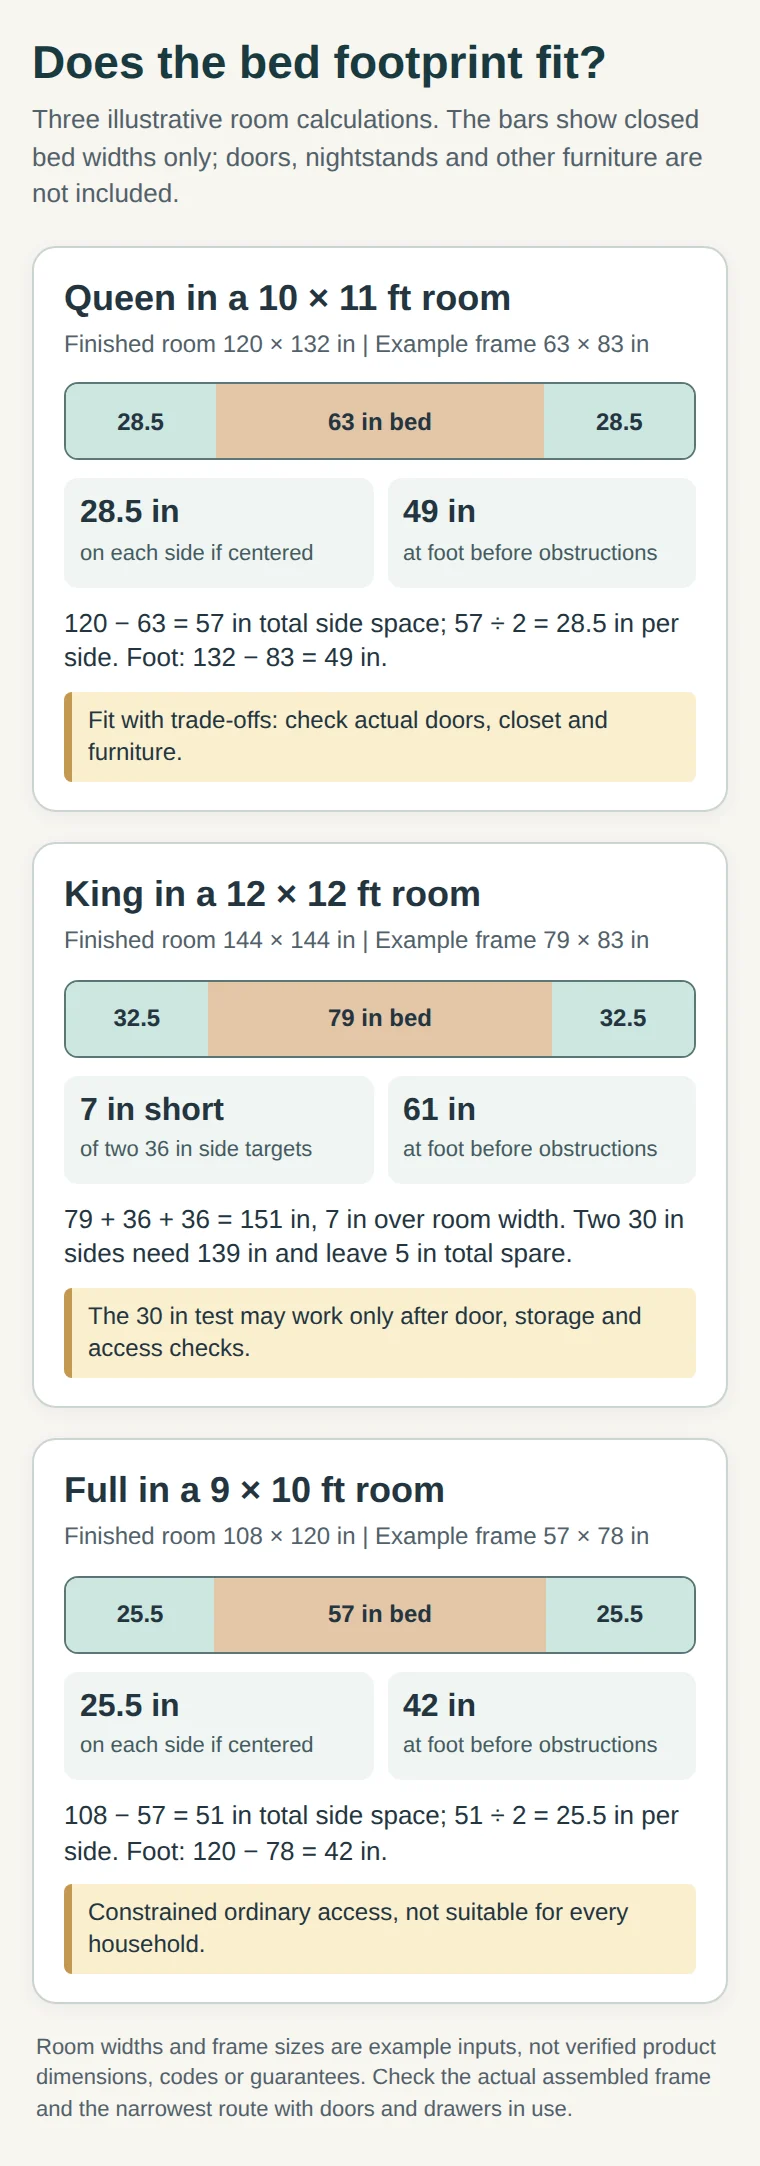
Example 1: Queen in a 10 by 11 foot room
Room: 120 by 132 inches.
Illustrative frame: 63 by 83 inches.
Orientation: the 63-inch frame width runs across the 120-inch wall, and the 83-inch frame length runs along the 132-inch wall.
- Side space:
120 − 63 = 57 inches total. - If centered:
57 / 2 = 28.5 inches per side. - Foot space:
132 − 83 = 49 inchesbefore a dresser, bench, door swing, rug, or other obstruction.
Result: Fits with trade-offs. The centered side routes are close to the about 30-inch everyday starting point, but they do not provide a generous 36-inch route. A nightstand, thick bedding, baseboard, or door conflict could make one side tighter. Test the actual frame, door opening, closet operation, and storage envelope.
A revision might be a narrower nightstand, bedside shelf, narrower frame, or small shift that preserves the route. Do not sacrifice an exit, closet opening, alarm, or vent for symmetry.
Example 2: King in a 12 by 12 foot room
Room: 144 by 144 inches.
Illustrative frame: 79 by 83 inches.
With a 36-inch target on both used sides:
- Required width:
79 + 36 + 36 = 151 inches. - Available width:
144 inches. - Difference:
151 − 144 = 7 inches shortbefore nightstands, trim, or other furniture.
Result at the generous target: it does not meet that side target.
With an about 30-inch starting point on both sides:
- Required width:
79 + 30 + 30 = 139 inches. - Remaining total:
144 − 139 = 5 inchesfor measurement variation and asymmetry. - Foot space before other furniture:
144 − 83 = 61 inches.
Result at the everyday starting point: potentially workable only if the doors, closets, nightstands, dresser, and routes cooperate. Five inches of total spare width is not a comfort guarantee. A door casing or a nightstand can consume it quickly. The room may need smaller bedside pieces, one-sided access, a different orientation, or a different bed size.
Example 3: Full bed in a 9 by 10 foot room
Room: 108 by 120 inches.
Illustrative frame: 57 by 78 inches.
Orientation: the 57-inch frame width runs across the 108-inch wall, and the 78-inch frame length runs along the 120-inch wall.
- Side space:
108 − 57 = 51 inches total. - If centered:
51 / 2 = 25.5 inches per side. - Foot space:
120 − 78 = 42 inchesbefore obstructions.
Result: a constrained but plausible layout for ordinary access. The side routes fall below the about 30-inch everyday starting point. The arrangement may not suit two sleepers, a caregiver, a walker, or a pair of large nightstands. One-sided access could create a wider open route, but it makes bed making and shared use less convenient.
Example 4: Dresser operating envelope
Use a dresser that is 18 inches deep, has a measured open drawer projection of 22 inches, and uses a 24-inch standing value for this illustration.
- Required zone:
18 + 22 + 24 = 64 inchesfrom the wall behind the dresser.
A bed foot, bench, chair, rug, or open door that intrudes into those 64 inches can prevent the drawer from opening fully or prevent the user from standing in the intended position. A simple 36-inch gap can look adequate on a plan while failing for a deep drawer, large handle, pull-out hamper, or mobility device.
Draw the closed footprint and the open envelope. Repeat the test for every drawer if their depths differ. For a wardrobe, draw the open door leaves. For a desk, draw the occupied chair position rather than the pushed-in chair.
Example 5: One-sided access is a use decision
A full or queen bed can sometimes sit against a wall in a small room. Mark that wall side as wall side/no route. Then ask:
- Can the person sleeping against the wall get out without climbing over another person?
- Can both people make the bed?
- Is the wall side needed for a transfer, caregiver, child, or pet?
- Does the placement block a window, register, outlet, alarm, or emergency escape opening?
- Is the no-route choice temporary, or might the household need the side later?
The result may be physically possible but functionally wrong for the household. Name the trade-off instead of presenting a wall-side bed as a universal small-room solution.
Judge the gap by what happens there
Bed-side clearance
A 24-inch used-side gap may feel tight, while about 30 inches is a more comfortable everyday starting point and about 36 inches gives a larger primary route to test. Which one works depends on who walks there, what opens into the space and the narrowest usable point. None is a universal bedroom minimum.
Clearance at the foot of the bed
Start by testing about 36 inches when someone must walk, stand or operate storage at the foot of the bed. A deep drawer, bench, door or mobility device may need a larger operating zone. Measure the full envelope instead of treating the starting number as a guarantee.
“Minimum room size” by bed
Room examples such as a 10 by 11 foot queen room or a 12 by 12 foot king room are scenarios, not nationwide minimums. Frame size, access sides, doors, closets, storage, and the household change the result. Show the arithmetic and check local requirements rather than calling a room-size example a standard.
Bed under a window
A bed under a window needs checks for sill height, opening, headboard depth, coverings, heat, cleaning and any emergency escape requirement. If young children use the room, choose cordless window coverings and keep beds and climbable furniture away from window cords. Moving furniture is a precaution, not a substitute for removing the cord hazard.
Furniture safety and wall mounting
A floor plan cannot prove that a dresser, television, shelf or wardrobe is stable. Secure top-heavy furniture and televisions according to their instructions, install supplied anti-tip devices and get qualified help if the mounting surface or installation is uncertain. Do not treat a safe-looking position on a sketch as proof against tip-over.
HVAC, radiators, rugs, lamps, and cords
Do not infer heater or register clearance from a generic rule. Follow equipment instructions, preserve airflow, and keep service access. Measure rug edges, lamp footprints, cord paths, and wall-mount locations so they do not block routes.
Delivery and assembly fit
A room-fit result is not a delivery result. Measure the entry door, hallway, turns, stairs or elevator, ceiling height, and the position where the item will be assembled. Check whether a tall headboard or dresser can be carried upright and whether packaging or assembly parts need additional space.
People-first scenarios
Two adults sharing a bed
Test both sides, bedside routines, charging, sheet changing, and whether one person can leave without crossing the other. Record any deliberately occasional side and who accepts it.
Solo sleeper in a small room
Prioritize the door route, one usable bedside surface, and storage that does not require a deep open zone. A smaller bed or one-sided arrangement can preserve movement, but record the trade-off.
Child or guest room
Guest use may be occasional, but the room still needs a route to the door and space to open storage. For a crib, bunk bed, toddler bed, or other child product, follow current product and consumer-safety guidance. Do not turn a generic gap into a child-safety guarantee.
Mobility device, older adult, or caregiver
Ask the person who uses the room about transfer side, device footprint, turning, reach, door operation, lighting and caregiver position. Draw the device both occupied and parked. A 36-inch planning route alone does not prove accessibility; check applicable requirements and get qualified help for a specific need.
Renter or shared room
Record lease rules, wall-mount permissions, anchoring limits, reversible storage, roommates’ routines, and likely changes. Freestanding furniture still needs an operating envelope. Test one orientation and storage change before a larger purchase; separate item fit does not prove set fit.
Bedroom with a desk
Measure desk depth, knee and leg space, chair pull-back, screen position, outlets, and the closet route. A desk can fit as a rectangle and fail when the chair is occupied, so test it pulled out and seated. Keep the work zone from consuming the only usable bed-side or door route.
Make a scale test before buying
For a paper test, draw a grid where one square represents 6 inches. A 10 by 11 foot room needs a 20 by 22-square grid at that scale. Draw the door swing, cut out the furniture at the same scale and replace every generic shape with the assembled item’s measurements.
A sketch makes trade-offs visible, but it does not test reach, transfer, door force or the feel of a route. Keep those limits in your notes and check the occupied room before buying.
Fill-in room worksheet
Use the fill-in tables below as your room worksheet. Record measurements and assumptions, then print the page or copy the tables if you prefer to work on paper.
Complete the survey and remeasure any uncertain value before moving or ordering furniture.
Room survey
| Field | Record |
|---|---|
| Room ID and date | ______ |
| Measurement tool and date | ______ |
| Finished length, smallest point | ______ in |
| Finished width, smallest point | ______ in |
| Ceiling height and low areas | ______ |
| Measurement confidence or uncertainty | ______ |
| Baseboards, casing, built-ins, radiators | ______ |
Openings and fixed features
| Feature | Opening or size | Location and projection | Swing or operating zone | Verify |
|---|---|---|---|---|
| Bedroom door | ______ | ______ | ______ | Yes / No |
| Closet | ______ | ______ | ______ | Yes / No |
| Window | ______ | ______ | ______ | Yes / No |
| Outlet or switch | ______ | ______ | ______ | Yes / No |
| Alarm, vent, radiator, HVAC | ______ | ______ | ______ | Yes / No |
Furniture inventory
| Item | Actual W x D x H | Open projection | Standing or chair zone | Product, date and instructions |
|---|---|---|---|---|
| Mattress and frame | ______ | ______ | ______ | ______ |
| Headboard or footboard | ______ | ______ | ______ | ______ |
| Nightstand or lamp | ______ | ______ | ______ | ______ |
| Dresser or chest | ______ | ______ | ______ | ______ |
| Wardrobe or closet unit | ______ | ______ | ______ | ______ |
| Desk and chair | ______ | ______ | ______ | ______ |
| Other | ______ | ______ | ______ | ______ |
Route decisions
- [ ] Bed side 1: used
- [ ] Bed side 1: occasional
- [ ] Bed side 1: wall side/no route
- [ ] Bed side 2: used
- [ ] Bed side 2: occasional
- [ ] Bed side 2: wall side/no route
- [ ] About 24 inches tested for constrained used-side access
- [ ] About 30 inches tested for everyday access
- [ ] About 36 inches or more tested for a primary route or generous access
- [ ] About 36 inches tested first for foot or storage operation
- [ ] Mobility, transfer, or caregiver needs planned individually
Final verification checklist
- [ ] Actual assembled bed and furniture dimensions replaced nominal labels.
- [ ] Narrowest side and foot routes were measured, not averaged.
- [ ] Door swings, closet doors, drawers, wardrobe doors, and desk chair were opened on the plan.
- [ ] Window operation, sill, cords, curtains, heaters, and any emergency escape requirement were checked.
- [ ] Outlets, switches, alarms, vents, radiators, and service access remain usable.
- [ ] Manufacturer instructions and any landlord restrictions were reviewed.
- [ ] Delivery path and assembly position were checked separately from room fit.
- [ ] The result is labeled fits, fits with trade-offs, or revise the plan.
- [ ] Assumptions are written down and the room will be remeasured before buying.
FAQs about bedroom furniture layout dimensions
Is 30 inches enough space beside a bed?
About 30 inches is an everyday planning starting point, not a universal minimum. Nightstands, handles, bedding, trim, doors, caregivers, mobility devices, and shared routines can require more. Measure the route and name its use.
How much space should be at the foot of a bed?
Use about 36 inches as a first test when the foot is a walking or storage route. Subtract the bed frame, footboard, bench, dresser, door swing, rug, and other projections. If drawers or doors open there, calculate the full operating envelope.
Can a queen bed fit in a 10 by 11 foot room?
It can be workable under the illustrative assumptions in this guide. A 63 by 83-inch frame in a 120 by 132-inch room leaves 28.5 inches per side when centered and 49 inches at the foot before other obstructions. That is a fits-with-trade-offs result, not a guarantee. Your frame, door, closet, trim, nightstands, dresser, and required routes decide the final result.
Can a king bed fit in a 12 by 12 foot room?
A 79 by 83-inch illustrative frame leaves 144 inches minus 79 inches, or 65 inches, across the width. Two 36-inch side targets would need 151 inches, so that generous target is short by 7 inches. Two about 30-inch targets need 139 inches, leaving 5 inches before other furniture. The result is potentially workable only when the room’s openings and furniture envelopes cooperate.
Should I plan from mattress size or frame size?
Plan from the assembled frame and add headboard, footboard, feet, bedding, handles, and operating zones where they affect the route. Mattress dimensions do not establish the installed footprint.
Conclusion: measure, test, revise
Take one concrete next step: measure the finished room at its narrowest points, measure the assembled bed and every item that opens, then draw one candidate layout on the worksheet. Subtract the frame from the room, calculate each side and foot route, extend every drawer and door, and walk the narrowest path. If the result fits, record the assumptions. If it fits with trade-offs, write down who accepts each trade-off. If it fails, revise the orientation, access side, furniture size, storage plan, or room assignment before buying.
If the measured layout works and you want visual orientation ideas, compare the bedroom arrangement examples. For a cosmetic refresh after you have settled the furniture positions, use the budget bedroom makeover plan. Neither replaces the measured route and open-drawer checks above.