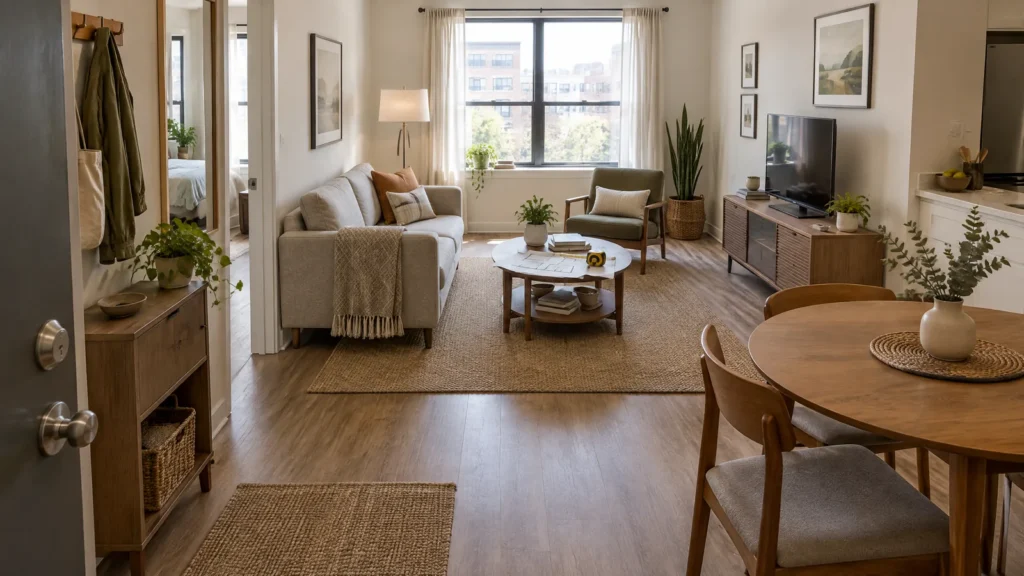
A small apartment can hold furniture on paper and still fail in daily life. A door may hit a chair, a dining seat may block the kitchen route, or a cord may force a trip-prone shortcut. Ask whether the room works when doors open, people sit, storage is used, windows operate, and furniture arrives through the building.
This measure-first method makes an apartment furniture layout inspectable: measure the shell, map fixed features, record resting and in-use footprints, test options, then run path, opening, activity, sightline, power, delivery, and safety checks. The concepts are original illustrations, not photographed projects, universal code rules, or fit guarantees.
What a small apartment furniture layout needs to solve
Rank needs in this order:
- Required exits and everyday routes.
- Fixed features such as doors, windows, radiators, vents, columns, and built-ins.
- Access to the sleeping area, kitchen, bathroom, closets, and entry.
- Required activities such as living, dining, work, storage, guests, or play.
- Furniture fit and operating space.
- Light, privacy, sightlines, and glare.
- Rugs, accessories, plants, and other finishing choices.
Name tradeoffs. A floating sofa may improve television orientation but narrow a balcony route, while a divider may block light, heat, or a path.
Use five tests for every option:
- Path test: Can people reach the entry, bathroom, kitchen, sleeping zone, windows, and exits without weaving through furniture?
- Opening test: Can doors, drawers, cabinets, appliances, recliners, sleeper mechanisms, and chairs operate?
- Activity test: Can the room support its must-have functions without constant resetting?
- Sightline and light test: Are conversation, television, work, daylight, privacy, and glare reasonably balanced?
- Power and safety test: Are outlets, cords, rugs, windows, exits, and tall furniture handled responsibly?
Measure the apartment shell before choosing a layout
Record the room envelope
Measure at finished surfaces. Record irregular dimensions and whether trim or projections are included.
| Item to measure | Your measurement or note |
|---|---|
| Interior length and width | ______ |
| Ceiling height | ______ |
| Entry door opening, trim, threshold, swing | ______ |
| Interior door openings and swings | ______ |
| Window width, sill height, operation direction | ______ |
| Balcony or fire-escape access, if relevant | ______ |
| Radiators, baseboard heat, vents, thermostats | ______ |
| Columns, pipes, built-ins, and no-place zones | ______ |
| Kitchen, bathroom, closet, and entry edges | ______ |
| Outlets, switches, cable jacks, and light locations | ______ |
| Hallway width and tight turns | ______ |
| Elevator, stair, landing, and building entry conditions | ______ |
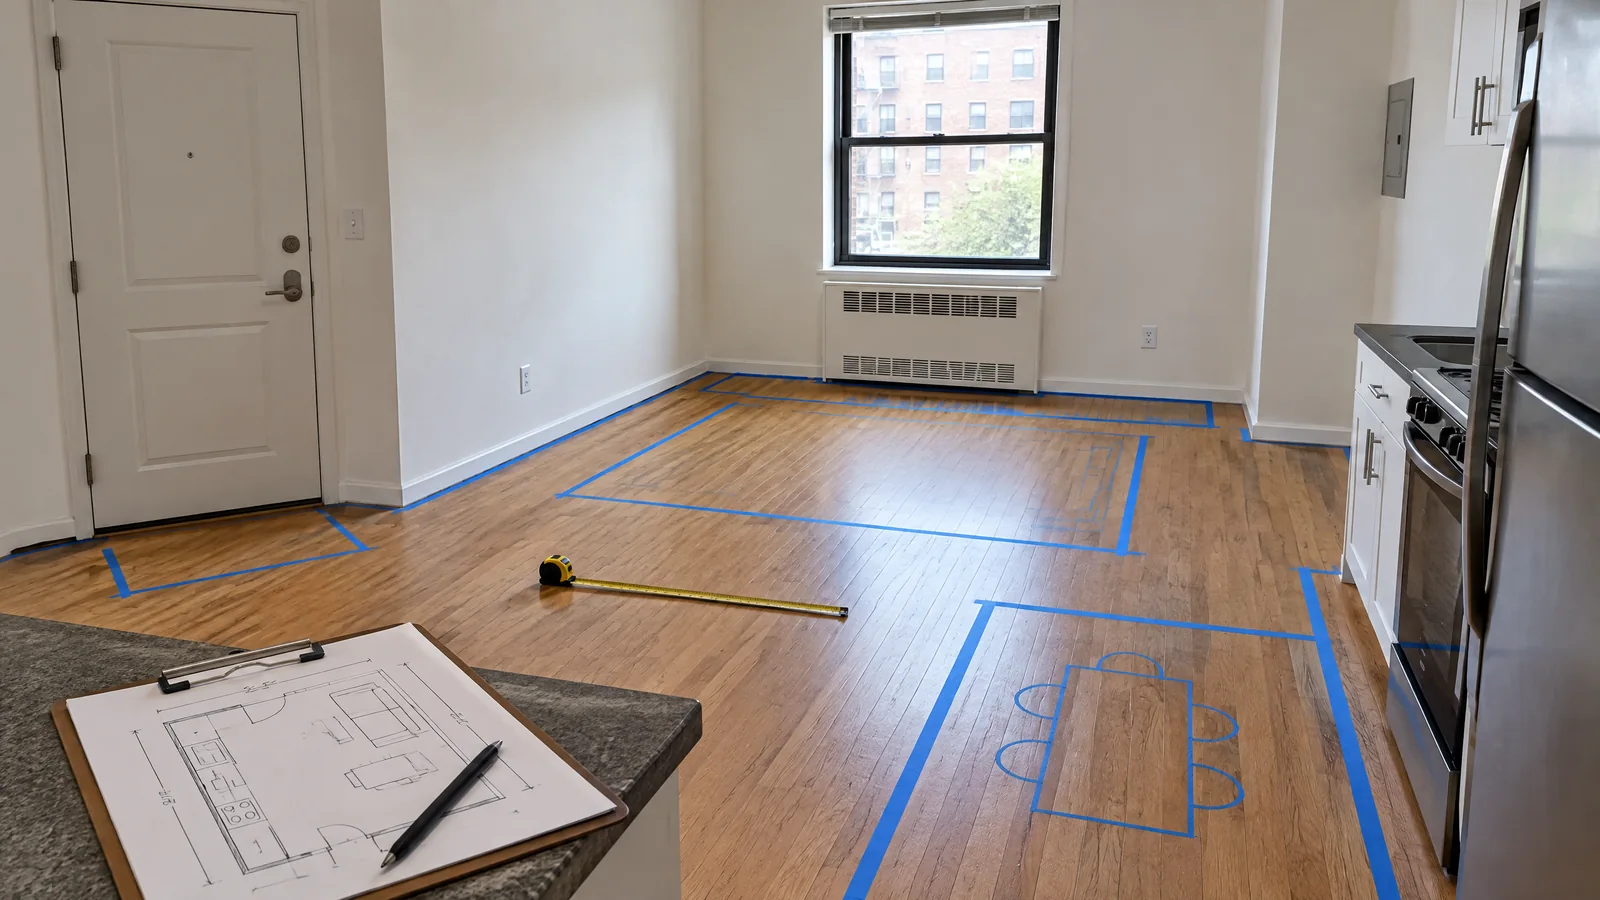
Draw the fixed-feature map first. A practical scale is 1 square equals 6 inches. Mark door swings, window operation, heat sources, controls, and routes to the entry, bathroom, kitchen, sleeping zone, and operable windows.
For fire escape planning, the U.S. Fire Administration recommends mapping doors and windows, finding two ways out of every room, and keeping them unblocked. In a high-rise, learn the exit stairs and follow building instructions. See its home fire escape plan guidance.
For visual follow-up after the shell map, browse these studio layout ideas after measuring the room. This article remains the measurement and comparison tool.
Build a furniture inventory with two footprints
Labels such as compact or apartment size do not describe behavior in your room. Measure owned pieces and check proposed pieces against actual specifications.
Record the closed footprint
Record maximum width, depth, and height, including arms, legs, handles, backs, hardware, and overhangs. Note the heaviest section, disassembly, and anchoring or wall-surface needs.
Add the operating footprint
The resting footprint is the space occupied when the item is closed and parked. The in-use footprint is the space needed for the activity around it. Record both.
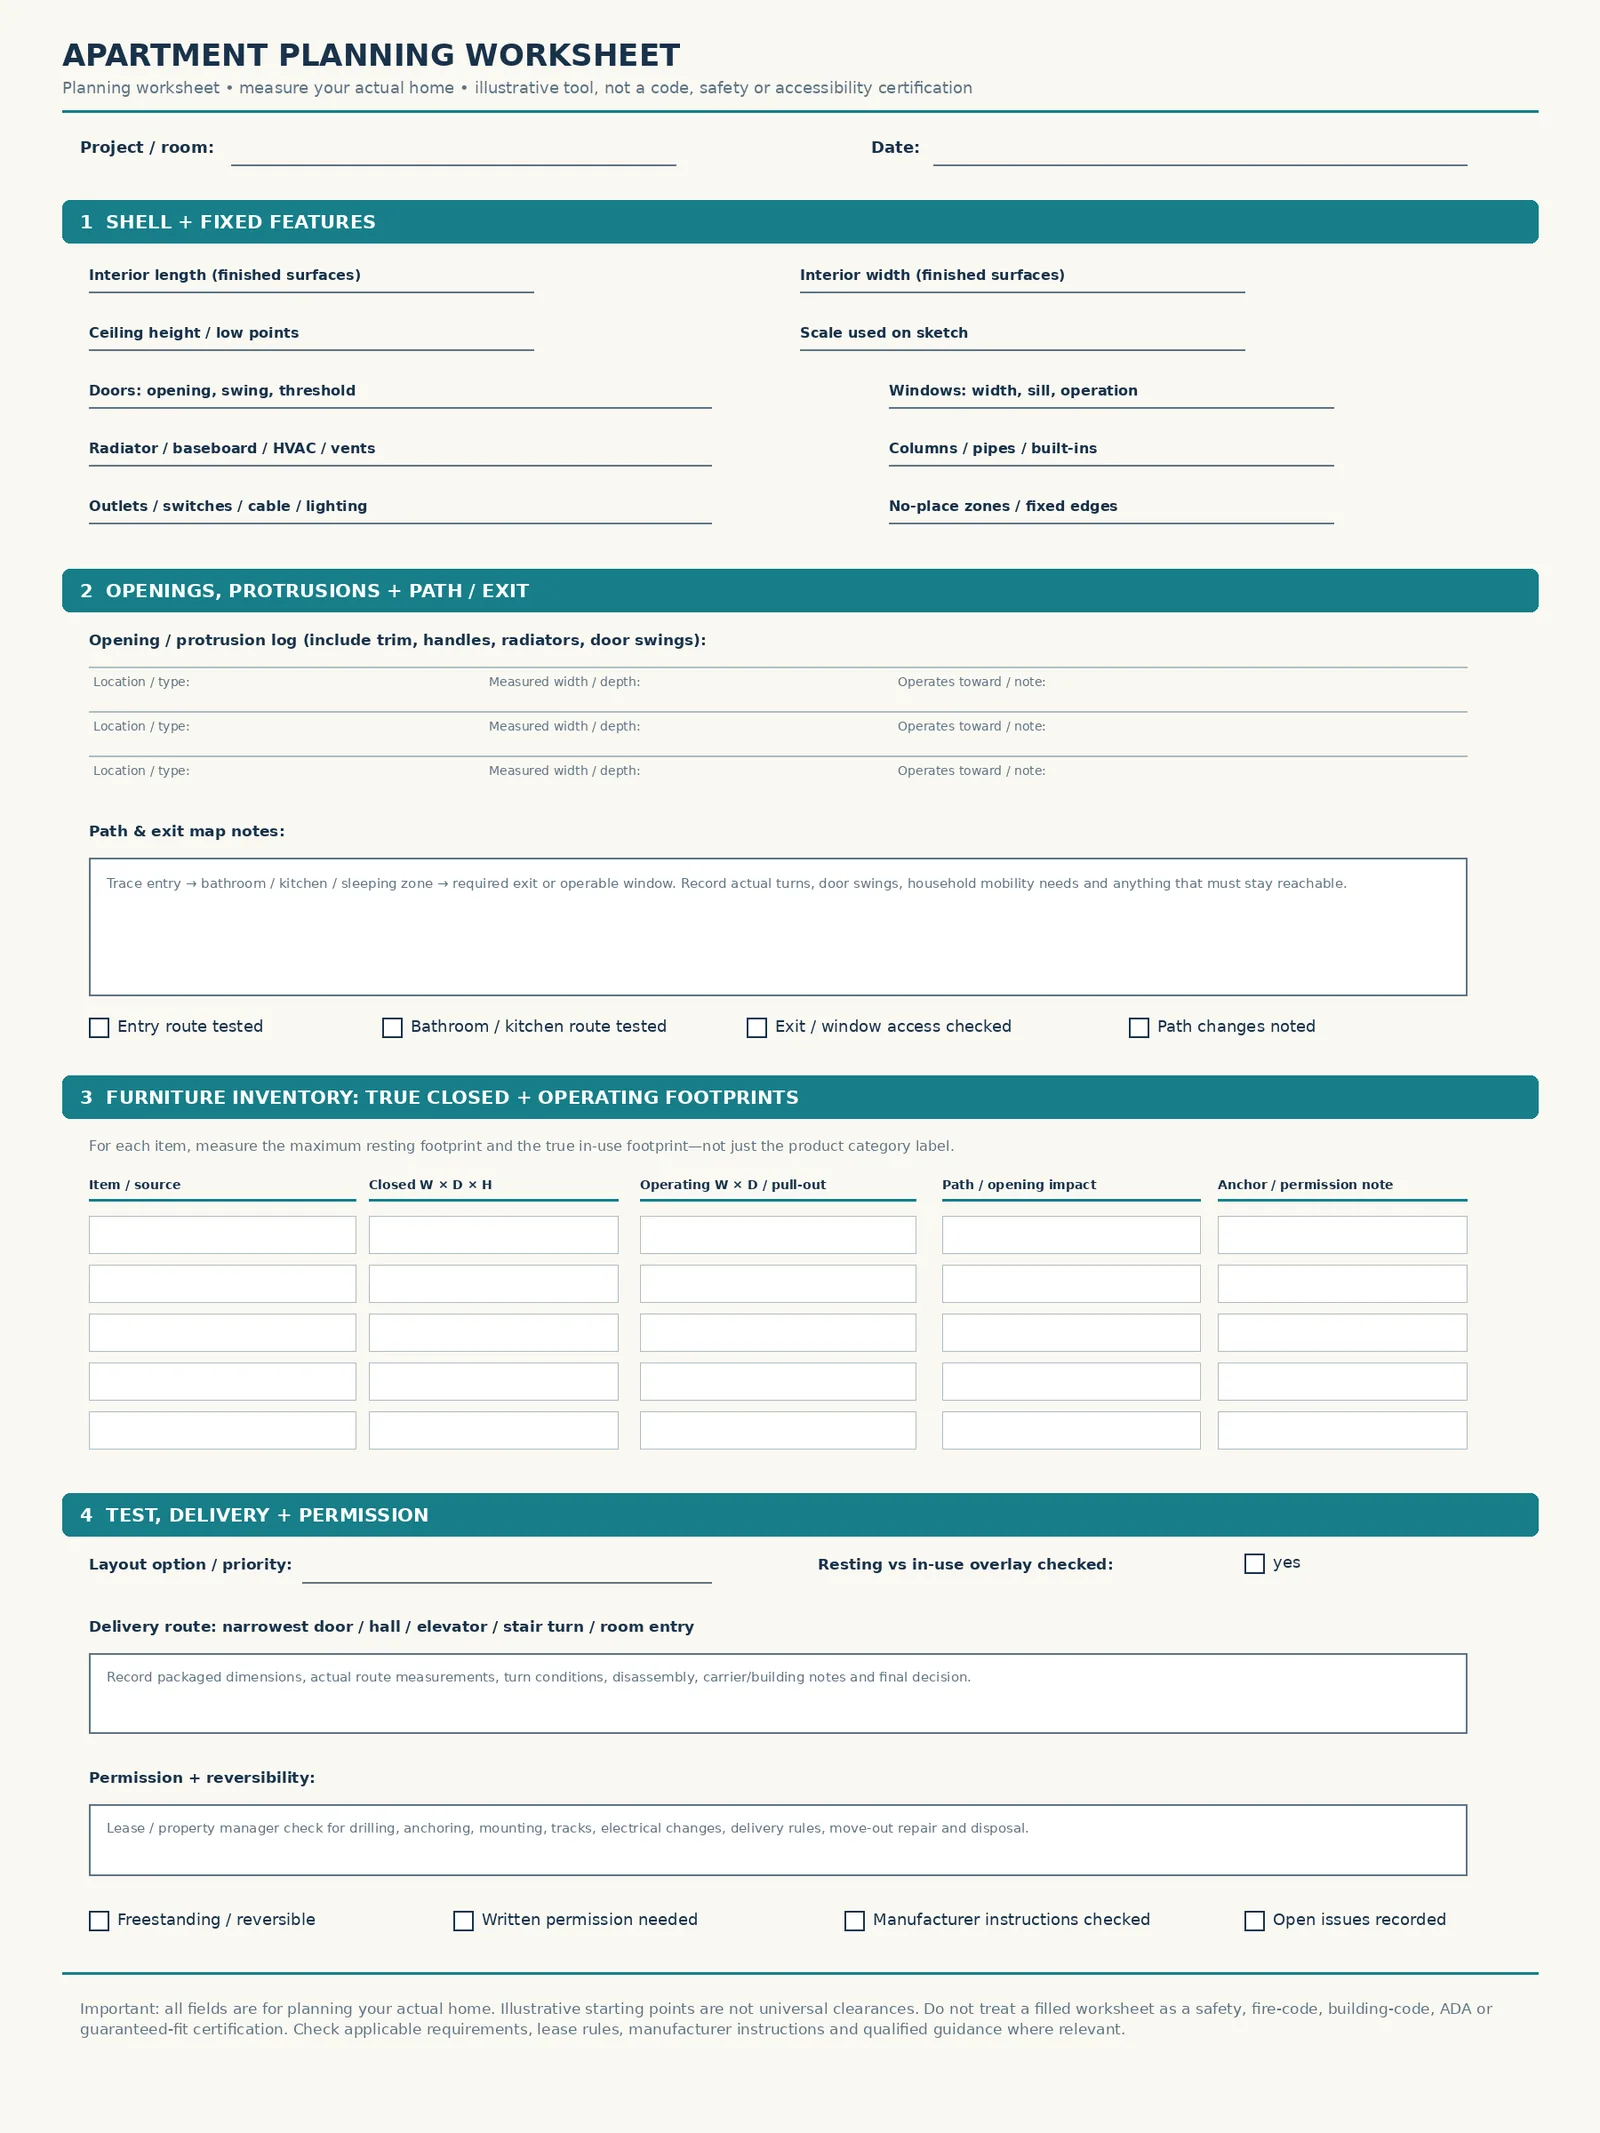
Download the printable apartment furniture planning worksheet (PDF) and record your actual measurements before moving or ordering furniture.
| Item | Resting footprint, W x D | Height | In-use footprint or action | Access and safety note |
|---|---|---|---|---|
| Sofa or loveseat | ______ | ______ | Seated passage, table reach | ______ |
| Coffee table | ______ | ______ | Walking and leg space | ______ |
| Dining table | ______ | ______ | Chairs pulled out, serving | ______ |
| Desk or work surface | ______ | ______ | Chair movement, power access | ______ |
| Bed, daybed, or sleeper | ______ | ______ | Making bed, opening mechanism | ______ |
| Storage or media piece | ______ | ______ | Doors, drawers, anti-tip plan | ______ |
| Rug | ______ | n/a | Edge, vent, and door interaction | ______ |
| Folding or mobile item | ______ | ______ | Stored and deployed positions | ______ |
Operating space includes drawers, appliances, chair pull-out, seated passage, extensions, sleeper mechanisms, controls, and both positions for folding items.
Choose zones by activity, not furniture category
Mark sleeping, conversation, media, dining, work, guests, storage, cleaning, hobbies, and child or pet play as required, useful, or optional. One surface or flexible seat may serve several functions.
Assign functions around fixed features only when practical. Keep access-heavy tasks near the relevant feature when that improves daily use, but do not treat any placement as universal. A low or movable piece near a window can work only if the window operates, heat circulates, required access remains open, and household safety conditions are addressed. A sofa, shelf, console, rug, or curtain can suggest a visual boundary, but it is not a wall or a guaranteed privacy solution.
With a separate bedroom, use this method for the shared area and the site’s broader one-bedroom decorating ideas only after the route works.
Draw two or three test layouts before moving anything
Use graph paper, a digital plan, or paper blocks at the shell scale. Add a second outline for chair pull-out, drawers, or sleeper extension. Painter’s tape can mark closed and in-use footprints in two colors.
Label each plan by its priority, then sketch it from the entry and main seat. The purpose is comparison, not rendering.
Score each plan
Use 0, 1, or 2 for each category. A score helps compare options; it is not an engineering review, safety certification, accessibility certification, or guarantee.
| Category | 0 | 1 | 2 |
|---|---|---|---|
| Main path | Blocked or awkward | Works with a compromise | Clear and direct |
| Required openings | One or more fail | Operates with adjustment | All required openings work |
| Daily activities | A must-have is missing | A must-have needs conversion | Must-have functions work as planned |
| Furniture access | Storage or seating is hard to reach | Some access tradeoff | Everyday access is practical |
| Light and sightlines | Major glare, blocked light, or privacy issue | Manageable compromise | Priorities are balanced |
| Power and safety | Cord, anchoring, window, or exit concern | Documented fix is needed | Fix is identified and feasible |
| Reversibility | Unapproved installation is required | Permission or extra work is needed | Freestanding or approved solution |
| Total | ____ / 14 |
Do not choose the highest total if it fails an essential exit, opening, or safety check. A plan with a lower score can be the better decision when it preserves a required route and gives up an optional function.
Apply circulation and clearance checks carefully
Illustrative planning starting points, not universal rules
Reviewed editorial guidance commonly uses examples such as a main passage target around 28 to 36 inches, a sofa-to-coffee-table relationship around 15 to 18 inches, or a small wall gap around 3 to 5 inches for outlet access. These are planning starting points, not one national rule. Furniture depth, arm shape, door swing, trim, radiator heat, chair pull-out, household mobility, and the actual path change the result.
Use those figures only to start a tape test. Measure your own path and consult applicable building, housing, accessibility, fire, or manufacturer requirements.
Accessibility scope note
For a mobility need or applicable accessible route, get guidance for the actual home. The U.S. Access Board’s accessible routes guidance describes a 36-inch continuous clear width in ADA-covered contexts, with 32-inch minimum widths at specified short points such as some doorways, plus additional space for turns and passing. This does not make a private apartment plan ADA compliant or establish a universal furniture rule.
Run the opening and turning check
With the taped plan in place, ask:
- Can the entry door open as needed?
- Can a person reach the bathroom and kitchen without moving a chair?
- Can closets, cabinets, appliances, and dressers open fully enough for daily use?
- Can dining chairs pull out while a route remains usable?
- Can a sleeper, Murphy bed, lift-top, or extendable table operate fully?
- Can someone reach the window, thermostat, radiator, and outlets?
- Does a wheelchair, walker, stroller, or other mobility aid require a wider route for this household?
A path that works only when empty is not workable.
Original measured concepts for common apartment problems
The following are illustrative measured concepts created for this article. Their shells, furniture sizes, openings, and routes are stated assumptions for comparison. They are not typical apartment claims, photographed homes, final accessibility decisions, or guaranteed fits.
Concept A: 10 by 12 foot living room with a clear entry side
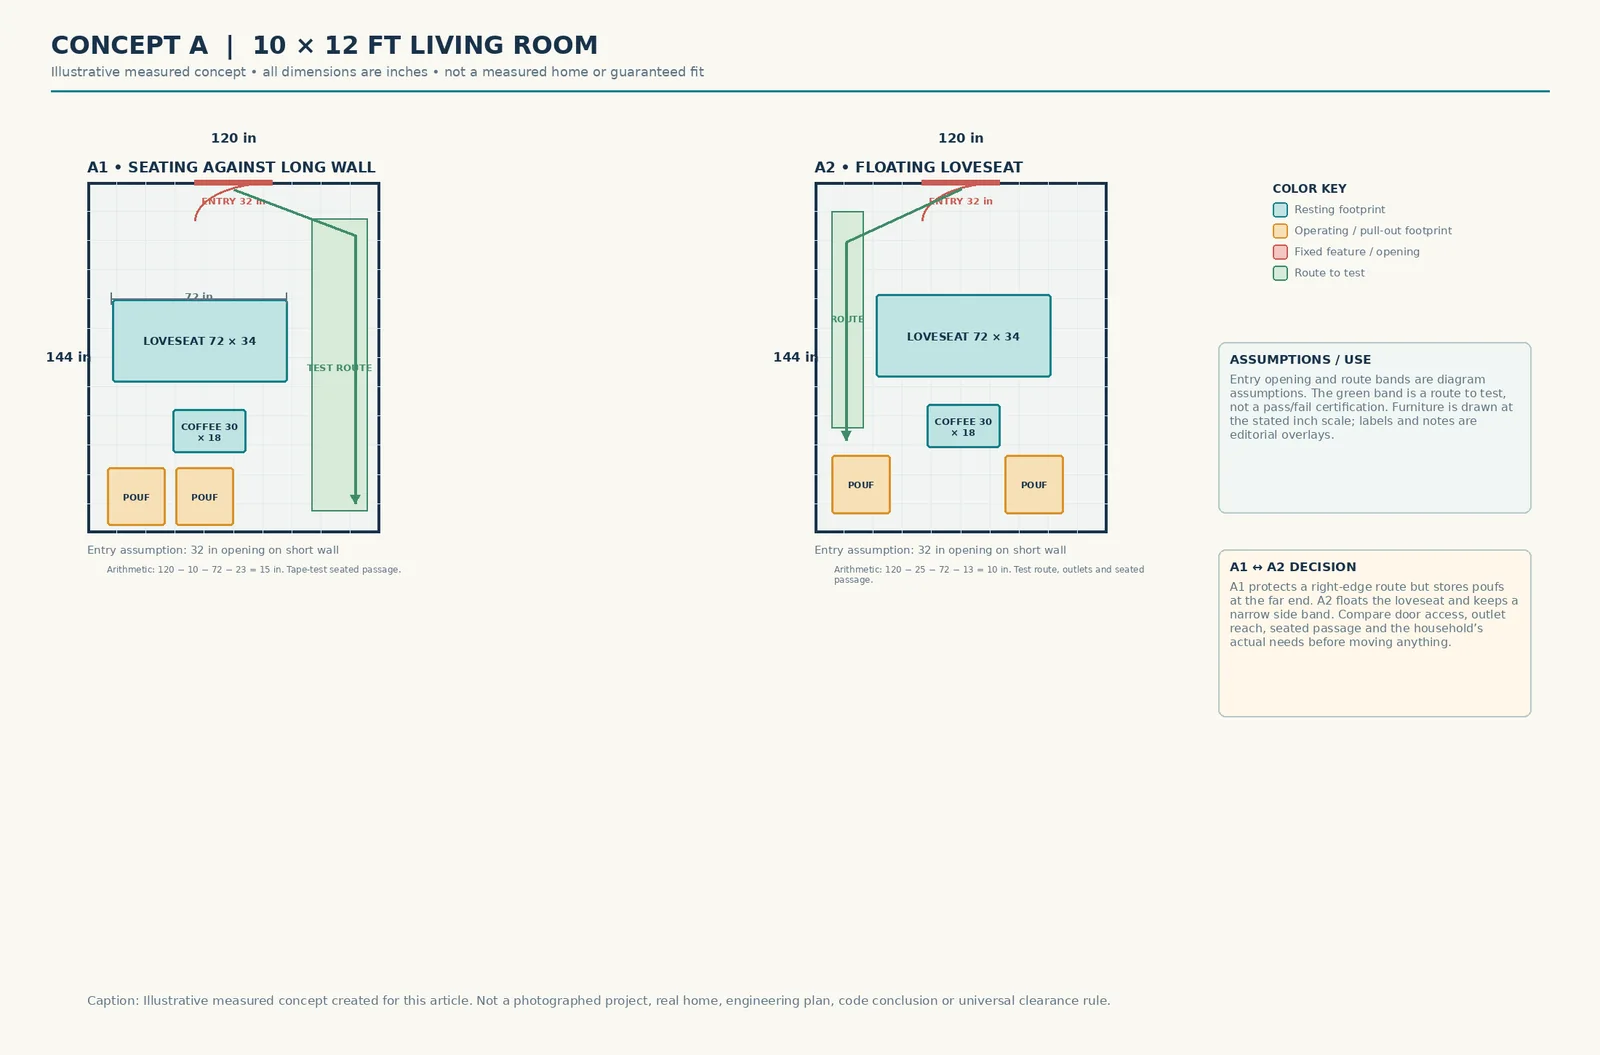
The planning shell is 10 by 12 feet, or 120 by 144 inches. Mark a 32-inch entry opening on the short wall as a diagram assumption. The furniture inventory is a 72-inch loveseat with a 34-inch depth, a 30 by 18-inch coffee table, and two 24 by 24-inch poufs.
For Plan A1, place the loveseat against the long wall, center the coffee table in front, and store the poufs outside the primary path when they are not needed. The shell length minus the loveseat width is 144 – 72 = 72 inches before accounting for the table, entry condition, and any other envelope. Across the room, 120 – 34 = 86 inches remains after the loveseat depth, before the coffee table or route is marked. These subtractions show available room dimensions, not a pass.
For Plan A2, float the same loveseat and reserve the route from entry to the opposite side. Compare the remaining zone behind the sofa with the wall position in A1. Tape the seated passage, check outlet access, and open the entry door. The floating option may create better zoning but can consume more usable floor than its closed footprint suggests.
Concept B: 12 by 14 foot open room with living plus compact dining
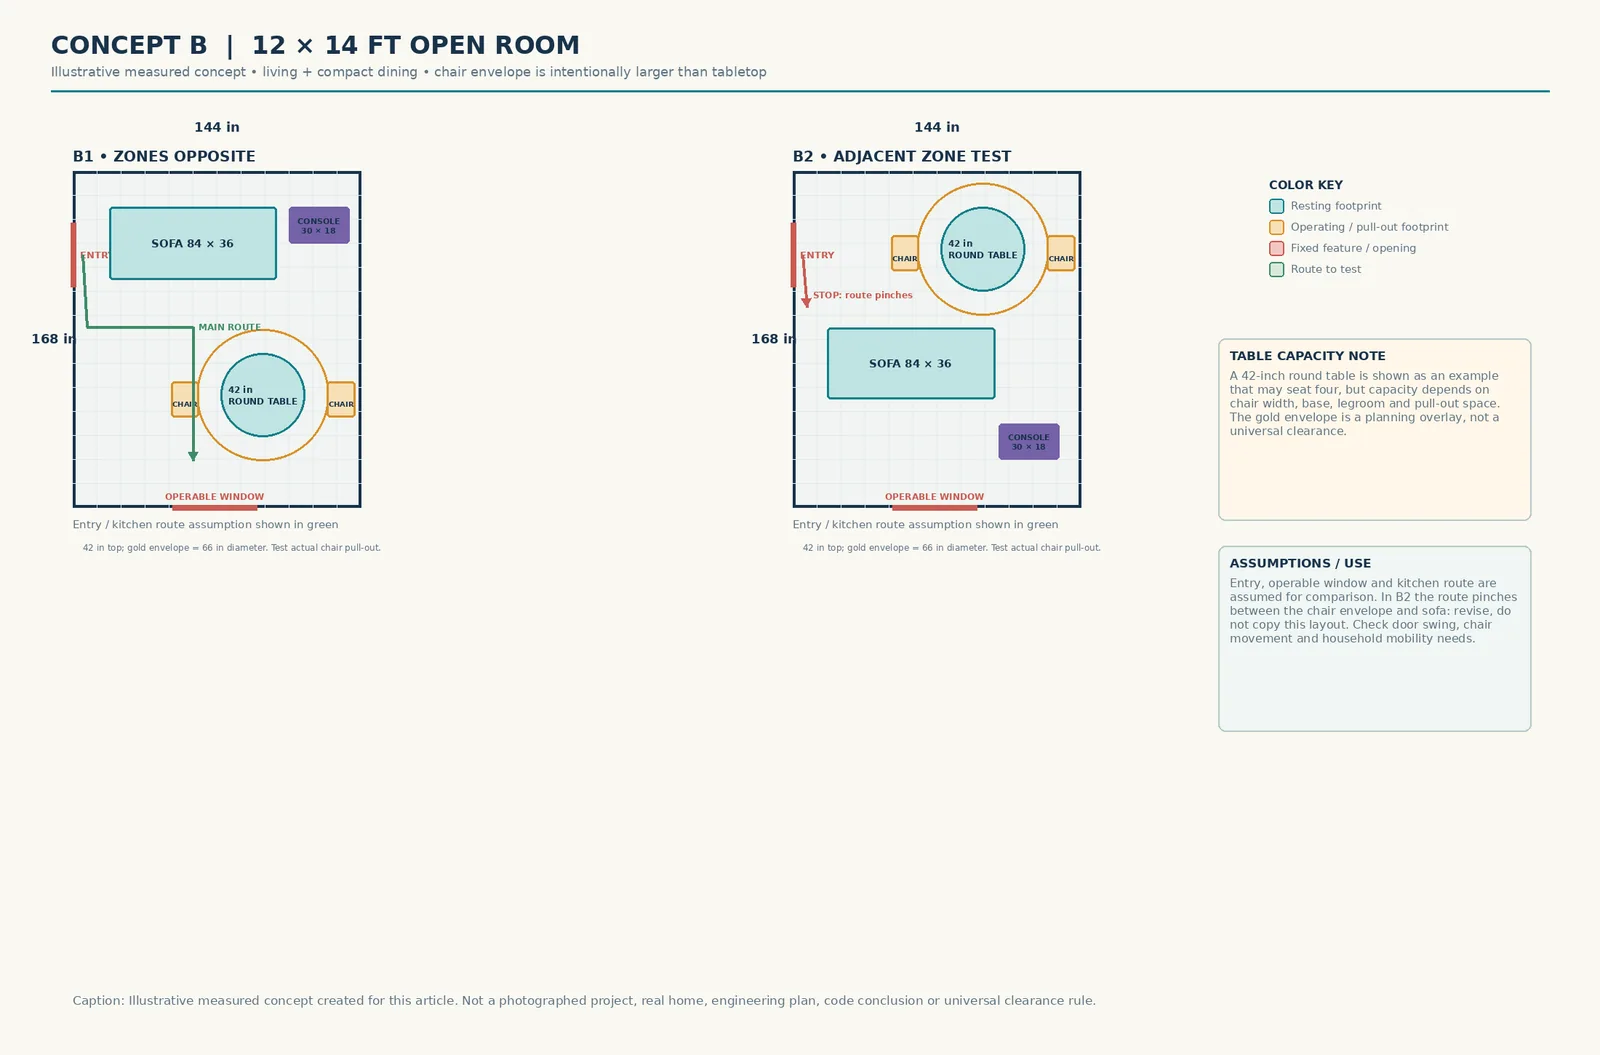
The shell is 12 by 14 feet, or 144 by 168 inches. Use an 84 by 36-inch sofa, a 42-inch round table, two compact chairs, and a 30 by 18-inch console. Compare opposite-side placement with a table behind or beside the sofa.
The 42-inch diameter is tabletop only. The seating envelope is larger because chairs pull out and people sit, stand, and pass. Capacity depends on chair width, table base, legroom, and pull-out space. Judge the full envelope.
Mark a route to the kitchen or entry and test chairs in both occupied and pushed-in positions. In the adjacent-zone sketch, the chair envelope and sofa pinch the illustrated entry route. Treat that option as a failed test, not a recommendation: move the table to the opposite side, reduce the chair count, or choose a different function for that zone. For visual follow-up after the measured test, see living and dining room inspiration.
Concept C: 9 by 16 foot long narrow apartment zone
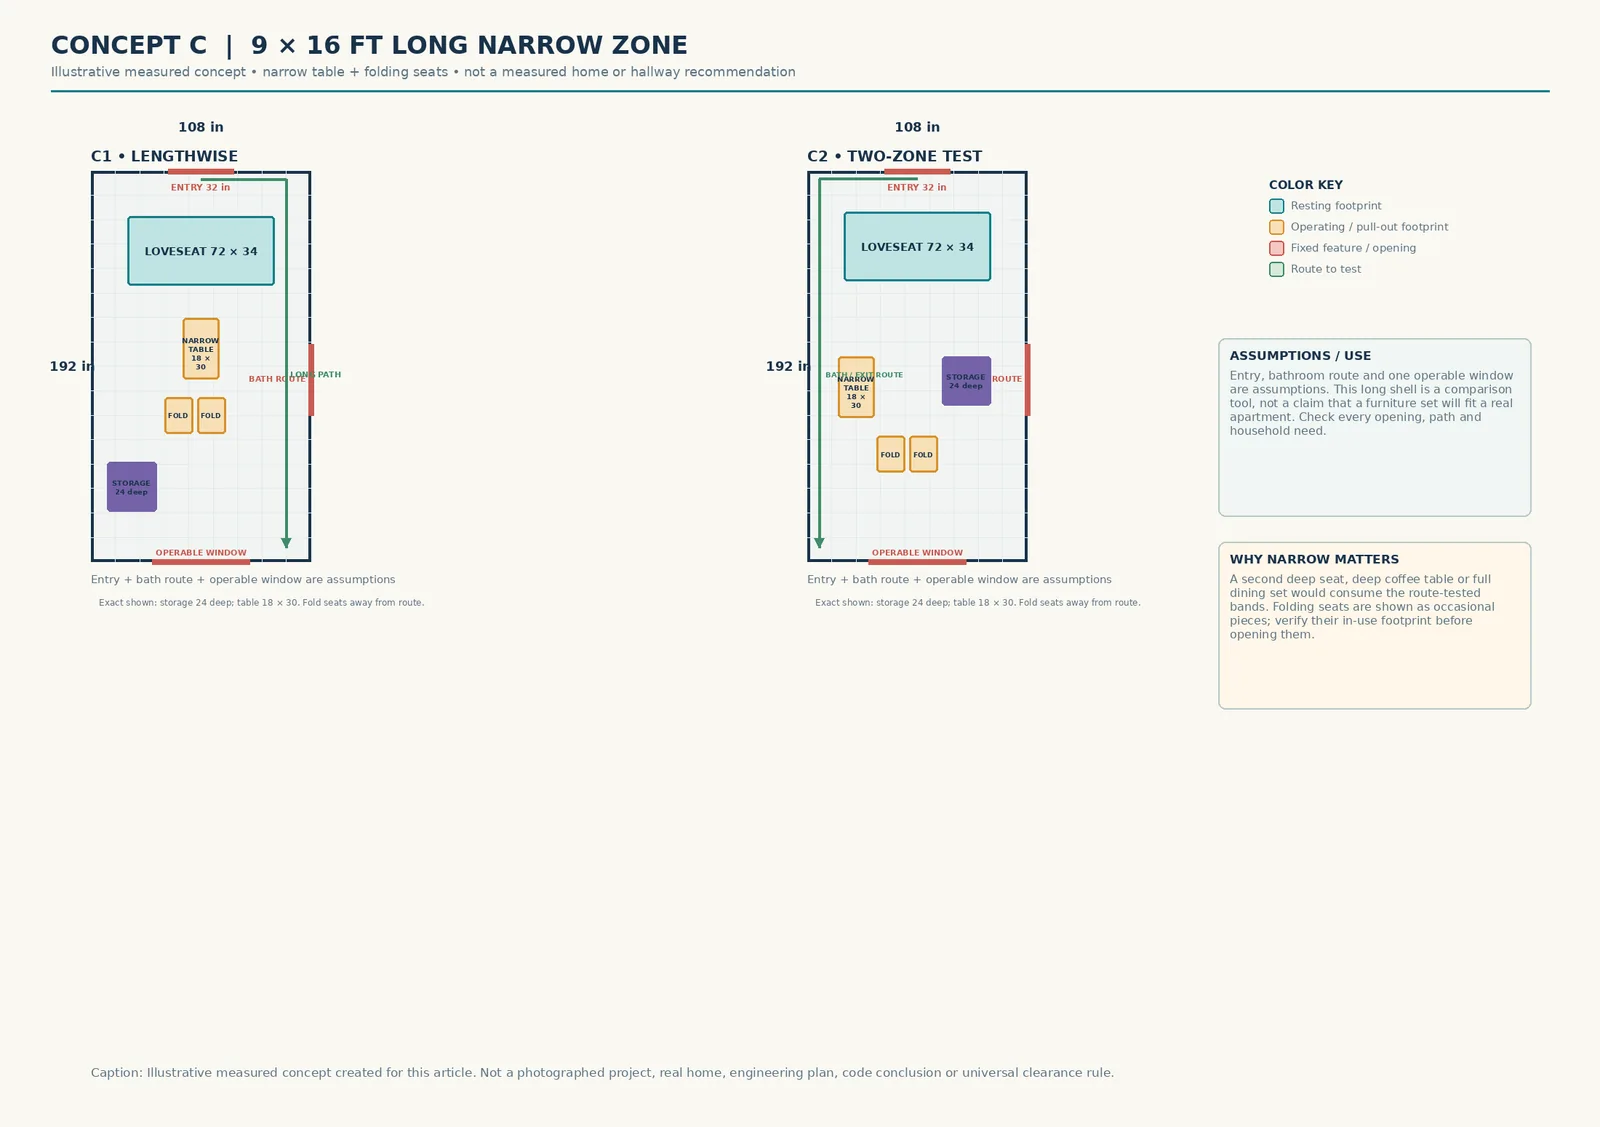
The shell is 9 by 16 feet, or 108 by 192 inches. Use a 72-inch loveseat or apartment sofa, an 18 by 30-inch table, two stackable or folding seats, and a 24-inch-deep storage piece. Compare a lengthwise arrangement with a two-zone arrangement.
The lengthwise plan may read as a hallway if sofa, table, and storage line up in one band. A two-zone plan can create a stronger living or work area, but seating and storage must not narrow the bathroom route or window access. A deep coffee table or full dining set can consume the center. Mark the operable window and tape-test before adding rugs.
Concept D: furniture delivery and turn check
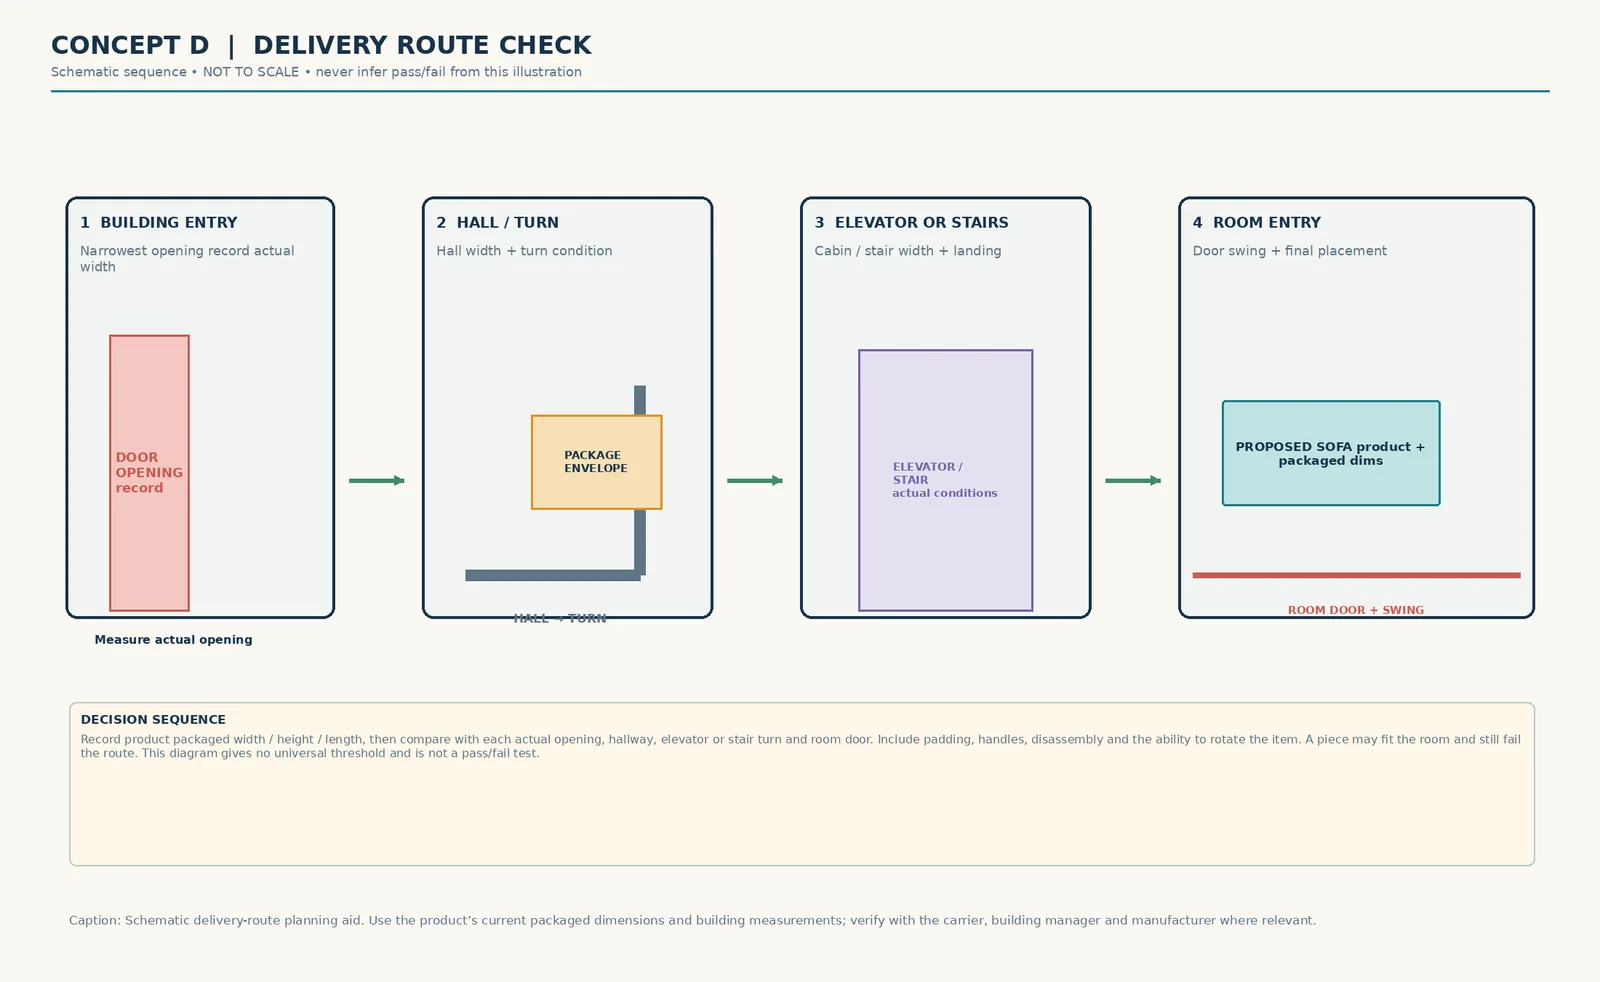
A sofa can fit the room and still fail delivery. Record the narrowest opening, hall, landing, elevator or stair width, and every turn. Compare with packaged dimensions and verified disassembly options.
There is no universal delivery threshold. Door closers, handrails, ceiling height, elevator depth, packaging, and diagonal turns can change the result. Do not order from room measurements alone.
Check power, windows, exits, and installation
Keep exit routes and walkways clear
The U.S. Fire Administration recommends clear doors and windows in escape planning. Its fall-prevention guidance also calls out boxes, electrical cords, phone cords, coffee tables, magazine racks, plant stands, and loose rugs as walkway hazards. Remove or secure those hazards during the tape test. A design that depends on stepping around a coffee table or loose rug should be revised. This is planning guidance, not a substitute for local requirements.
Treat cords and rugs as part of the layout
A power route that requires an extension cord under a rug fails the plan. The CPSC’s extension-cord fire guidance says rugs prevent heat from escaping cords. Move the furniture closer to an appropriate outlet, use an approved installation approach, or consult a qualified professional. Do not hide a cord under a rug to preserve a furniture arrangement.
Handle TVs and top-heavy furniture responsibly
Use furniture intended to hold a television. Follow the manufacturer’s instructions and install supplied anti-tip devices using an approved method. CPSC’s Anchor It guidance recommends securing TVs and top-heavy furniture. Renters should check the lease and ask the property manager before drilling, anchoring, or mounting anything. If permission is not available, choose a stable freestanding arrangement that still follows the product instructions.
Add a conditional window and child-safety note
When young children are present, CPSC says cordless coverings are safest and recommends moving beds, furniture, and toys away from windows and cords. This is conditional guidance. See CPSC window-covering cord guidance.
Decide what to change when a layout fails
| Failure | First adjustment | Second adjustment | Last resort |
|---|---|---|---|
| Main path is blocked | Rotate or shift the largest piece | Replace a deep table with a narrow, nesting, or mobile piece | Remove or relocate a function |
| Chair pull-out fails | Reduce table size or chair count | Use a bench, stool, or folding seat where appropriate | Move dining to another zone |
| Bed and living zones compete | Reduce the living footprint or use a curtain only if light and permission work | Use a daybed, sleeper, or dual-use piece if its operating footprint passes | Prioritize one daily function and make the other occasional |
| Storage blocks access | Move seasonal storage higher or under furniture only if accessible | Choose shallower or freestanding storage | Reduce inventory or use off-site storage carefully |
| TV or desk creates glare | Change orientation or viewing position | Add a reversible shade or reposition the work surface | Remove the media function from the plan |
| Cord route fails | Relocate the piece near a suitable outlet | Use an approved cable-management or electrical solution | Choose a non-powered arrangement |
| Delivery route fails | Check disassembly or packaged dimensions | Choose modular or smaller pieces | Do not order the piece |
| Installation is not permitted | Choose freestanding or reversible options | Request written permission | Exclude the installation from the plan |
A renter-aware permission and reversibility check
A freestanding chair and wall-mounted television do not create the same lease question. Before drilling, anchoring, mounting, installing tracks, changing fixtures, or altering wiring, check the lease and ask the property manager.
Do not call an item renter-friendly merely because it is small or removable. Consider wall or floor damage, weight, delivery, disposal, and move-out timing. Then browse renter-friendly finishing ideas.
Which layout should you keep?
Keep the option with the strongest required path and opening results. Prefer the plan that supports daily activities without repeated conversion. Choose compromises deliberately, such as less seating in exchange for a usable work or dining zone. Style should come after movement, access, power, and safety. Save the shell map, furniture inventory, scores, and delivery notes so the work remains useful when you move or replace one piece.
FAQ: small apartment furniture layouts
What should I measure before planning an apartment furniture layout?
Measure the finished room length and width, ceiling height where relevant, door openings and swings, windows and sill heights, radiators, vents, thermostats, columns, built-ins, outlets, switches, and the routes to the entry, kitchen, bathroom, sleeping area, and operable windows. Also measure the building route for any large delivery.
How can I test a furniture layout before buying anything?
Draw the room at a stated scale and use paper blocks, or tape the closed furniture footprint on the floor. Add a second tape outline for chair pull-out, drawers, sleeper mechanisms, and walking space. Walk the route from the entry, sit in each seat, open the doors, and photograph the option from the main viewpoints.
What is the difference between a furniture footprint and an operating footprint?
The resting footprint is the item’s closed width and depth. The operating footprint includes the surrounding space needed to sit, walk, open, pull out, extend, fold, reach, or access controls. A dining table may have a modest tabletop but a much larger in-use envelope once chairs are occupied.
How do I plan living and dining furniture in one small room?
First mark the entry and kitchen route. Then test the sofa and table as separate activity zones, including chair pull-out and serving movement. Compare at least two options, such as opposite sides and behind-the-sofa placement. Keep the option that preserves required paths and openings, even if it seats fewer people.
What should renters check before mounting or anchoring furniture?
Check the lease, building rules, and property manager requirements before drilling, anchoring, mounting, installing tracks, or changing wiring. Follow the furniture or TV manufacturer’s instructions. If approval is unavailable, choose a freestanding option that does not create a new structural or electrical change.
Are walkway measurements universal rules?
No. Editorial starting points can help begin a tape test, but they are not universal building-code or furniture rules. Household mobility, door swings, trim, heat sources, chair use, storage access, and applicable requirements change the decision. ADA route dimensions apply in scoped covered contexts and do not certify a private apartment plan.
Save the measurement before you save the room
A useful small apartment furniture layout is a decision record. Measure the shell, map exits, separate resting from in-use footprints, test priorities, score options, inspect delivery, and document safety fixes before spending money.
Keep the worksheet for the next move and update it when furniture changes. For a related floor-zone decision, use this guide to measured living-room rug placement, but still verify the rug edge, vent, door, and circulation against your own shell.